![MM-18-5 Bilge Alarm Manu (E) PDF [PDF]](https://pdfs.asia/img/200x200/mm-18-5-bilge-alarm-manu-e-pdf.jpg)
5 0 4 MB
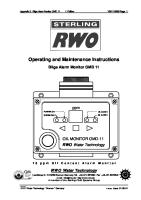
15ppm Bilge Alarm
FOCAS-1800 Oil Concentration Detector
Thank you very much for purchasing this product. Electric products may cause a fire or WARNING accident resulting in bodily injury or death unless safety precautions are observed. This instruction manual describes important precautions and product handling method to prevent such an accident. Read this instruction manual thoroughly to operate the product safely. After reading the manual, be sure to keep it in an easy-to-access place so as to refer to it whenever necessary.
IMO 9478482
MM-18-5
Page. 1
Contents 1. Introduction....................................................................................................................................3 1-1 1-2 1-3 1-4 1-5 1-6
Features of the Product ........................................................................................................................................... 3 Request for Safe Use............................................................................................................................................... 3 Safety Indications and Their Meanings.................................................................................................................... 3 Precautions .............................................................................................................................................................. 4 Other Important Precautions.................................................................................................................................... 5 Oil Concentration of 16 ppm .................................................................................................................................... 5
2. Work Execution and Installation ..................................................................................................6 2-1
2-2
2-3
Product..................................................................................................................................................................... 6 2-1-1 Product classification .............................................................................................................................. 6 2-1-2 Component parts list ............................................................................................................................... 6 2-1-3 System environment required for operation ........................................................................................... 6 2-1-4 Appearance of the main unit and names of parts................................................................................... 7 Piping ....................................................................................................................................................................... 8 2-2-1 Installing method..................................................................................................................................... 8 2-2-2 Connecting pipes .................................................................................................................................... 8 2-2-3 Precautions on executing the piping work .............................................................................................. 8 2-2-4 Precautions on fixtures of the washing unit ............................................................................................ 9 2-2-5 Replacement from the FOCAS-1500C (our existing product) ................................................................ 9 Wiring/Wire Connections ....................................................................................................................................... 10 2-3-1 Opening the cabinet.............................................................................................................................. 10 2-3-2 Connecting the grounding wire ............................................................................................................. 10 2-3-3 Connecting signal lines ......................................................................................................................... 10 3-3A Terminal Base Specification A (P.S. terminal, solenoid valve) ...............................................................11 3-3B Terminal base specification B (VALVE terminal, three-way valve) ....................................................... 12 2-3-4 Replacement from the FOCAS-1500C (our existing product) .............................................................. 13
3. Preparations for Operation .........................................................................................................14 3-1 3-2 3-3 3-4 3-5 3-6
Settings before a Start of Operation ...................................................................................................................... 14 Setting the Clock Battery ....................................................................................................................................... 14 Checking the Memory Card ................................................................................................................................... 14 After Powering on the Equipment .......................................................................................................................... 14 Setting the Clock.................................................................................................................................................... 15 Trial Run................................................................................................................................................................. 16 3-6-1 Performing a trial run ............................................................................................................................ 16 3-6-2 Checking the washing operation........................................................................................................... 16
4. Basic Operating Procedure ........................................................................................................17 4-1
Internal Layout and Part Names ............................................................................................................................ 17 4-1-1 Layout, part names, and details on the panel....................................................................................... 17 4-1-2 Internal layout, names, and details ....................................................................................................... 18 4-1-3 Layout, part names, and details on the operating surface.................................................................... 18 4-2 Turning on the Power Supply and Equipment Operations .................................................................................... 19 4-2-1 Equipment status at occurrence of outage ........................................................................................... 19 4-2-2 Equipment operations when power is supplied (Standby mode).......................................................... 19 4-2-3 When "Auto" is selected by the "Operation mode selecting" switch..................................................... 19 4-2-4 Equipment operations at the stop of operation..................................................................................... 19 4-2-5 Emergency stop method ....................................................................................................................... 19 4-3 Basic Operations (Timing Chart)............................................................................................................................ 20 4-4 Indications and Functions at Operation ................................................................................................................. 21 4-4-1 Oil concentration indication................................................................................................................... 21 4-4-2 Relationship among concentration indication, alarm indication, relay contact, and REC terminal output....................................................................................................................... 21 4-4-3 Switching the alarm point (option) ........................................................................................................ 21 4-5 Causing Fresh Water to Flow ................................................................................................................................ 22 4-5-1 Operating method .................................................................................................................................................. 22 4-6 Using the Washing Unit (Option) ........................................................................................................................... 23 4-6-1 Operating method ................................................................................................................................. 23
Page. 2
Contents 4-7
4-8
4-9
Sample Water Detection Tube Stain Indicating Function ...................................................................................... 24 4-7-1 Stain indicating operation...................................................................................................................... 24 4-7-2 Lamp ON status and meaning of each status ...................................................................................... 24 Looking at the Clock Function and Precautions .................................................................................................... 24 4-8-1 Clock function ....................................................................................................................................... 24 4-8-2 Precautions ........................................................................................................................................... 24 Looking at the Operation Record........................................................................................................................... 25 4-9-1 Record data........................................................................................................................................... 25 4-9-2 Group indication and contents of status ............................................................................................... 26
5. Equipment Inspection, Servicing, and Maintenance ................................................................27 5-1
Inspection and Cleaning Procedures..................................................................................................................... 27 5-1A Type without an Washing Unit (Standard Product) ............................................................................... 27 5-1A-1 Cleaning the sample water detection tube ......................................................................................... 27 5-1A-2 Procedure to be executed after the end of cleaning .......................................................................... 27 5-1A-3 Checking a cleaning effect ................................................................................................................. 27 5-1 Inspection and Cleaning Procedures..................................................................................................................... 28 5-1B Type with a Washing Unit (Option Product).......................................................................................... 28 5-1B-1 Cleaning the sample water detection tube ......................................................................................... 28 5-1B-2 Procedure to be executed after the end of cleaning .......................................................................... 28 5-1B-3 Checking a cleaning effect ................................................................................................................. 28 5-2 Cleaning the Filter.................................................................................................................................................. 29 5-2-1 Preparation............................................................................................................................................ 29 5-2-2 Cleaning procedure............................................................................................................................... 29 5-3 Zero-point Compensation ...................................................................................................................................... 30 5-3-1 Preparation............................................................................................................................................ 30 5-3-2 Operating procedure for zero-point compensation ............................................................................... 30 5-3-3 Stopping zero-point compensation halfway .......................................................................................... 30 5-4 Replacement Time of Desiccating Agent and Procedure for Replacing It............................................................. 31 5-4-1 Inspection.............................................................................................................................................. 31 5-4-2 Preparation for replacement ................................................................................................................. 31 5-4-3 Replacing procedure............................................................................................................................. 31 5-5 Alarm Operation Test ............................................................................................................................................. 32 5-5-1 Preparation for testing........................................................................................................................... 32 5-5-2 Test procedure for each alarm operation.............................................................................................. 32 5-6 Inspection of 4-20 mA (REC Terminal Output) ...................................................................................................... 33 5-6-1 Test procedure ...................................................................................................................................... 33 5-7 Method of Replacing the Backup Battery for Clock ............................................................................................... 34 5-7-1 Preparation............................................................................................................................................ 34 5-7-2 Removing the battery............................................................................................................................ 34 5-7-3 Installing the battery.............................................................................................................................. 34 5-8 Replacement Time of Memory and Procedure for Replacing It............................................................................. 35 5-8-1 Checking the memory consumption ..................................................................................................... 35 5-8-2 Preparation for replacing the memory card .......................................................................................... 35 5-8-3 Removing and mounting the memory................................................................................................... 36 5-8-4 Storing the memory card....................................................................................................................... 36 5-9 Replacing the Fuse ................................................................................................................................................ 37 5-9-1 Replacing procedure............................................................................................................................. 37 5-10 Operating the Reset Switch ................................................................................................................................... 37 5-10-1 Operating the reset switch .................................................................................................................... 37
6. Error Codes of Self-diagnostic Function...................................................................................38 6-1
Indications by Self-diagnostic Function and Taking Measures.............................................................................. 38
7. Routine Maintenance and Preventive Maintenance..................................................................39 8. Quality Assurance .......................................................................................................................39 9. Product Specifications................................................................................................................40 9-1 9-2
Product Standard ................................................................................................................................................... 40 External Dimension Drawing ................................................................................................................................. 42
Page. 3
1. Introduction Thank you very much for selecting 15 ppm BILGE ALARM FOCAS-1800 (oil concentration detector) manufactured by Fellow Kogyo Co., Ltd. The FOCAS-1800 has been developed to meet all the market needs by our original technology and satisfies IMO Resolution MEPC107 (49). Be sure to read this Instruction Manual thoroughly and keep it in an easy-to-access place so that the operator can refer to it any time.
1-1 Features of the Product 1.
The product adopts an automatic operation system by sample water pressure that is matched to oil separator and pump operations.
2.
The automatic washing function of the detector relieves troublesome manual washing. (Option)
3.
When device trouble occurs, an error code is displayed and when the detection unit is contaminated, this contamination is displayed. This facilitates maintenance and inspection. Thus, the product has an easy-to-maintain structure.
4.
The operation record including trouble alarms is stored in a memory card and can be checked as required.
5.
The product measures only the oil concentration and is not affected by SS component (suspended turbid substances except oil content) and a detergent.
6.
For alarms, a double safety system is adopted.
When the oil concentration is 15 ppm or more, an oil alarm is output. When the sample water is faulty or the measuring instrument is faulty, a trouble alarm is output.
1-2 Request for Safe Use In this Instruction Manual and on the product, the following indications and symbols are used for the items to be observed according to each hazard level for the purpose of avoiding accidents resulting in injury or death or damage of property. Use the product with a good understanding of the contents of the description.
1-3 Safety Indications and Their Meanings ●
Symbols indicated in this document and on this product
DANGER
This indicates the existence of imminent hazard which, if not avoided, will result in death or serious injury.
WARNING
This indicates the existence of potential hazard which, if not avoided, may result in death or serious injury.
CAUTION
This indicates the existence of potential hazard which, if not avoided, may result in a slight or less serious injury.
This indicates a prohibited action.
This indicates a warning or caution.
Before using the product, be sure to read the Instruction Manual.
• The contents described in this document are subject to change without prior notice in future. • No part of this document may not be copied, reproduced, or transmitted to any electronic media without the prior written permission of our company.
Copyright c 2005, FELLOW KOGYO CO.,LTD. Printed in Japan
Page. 4
1-4 Precautions ■ ■
Confirm the specifications of the ordered product. (Refer to Page 6, “2-1-1 Product classification”.) Confirm the contents of the package. (Refer to Page 6, “2-1-2 Component parts list”.)
DANGER This machine is not provided with a power switch for the primary power supply. Be sure to install a power switch at the power supply source. ●
Because an outage alarm is output, a power switch for the primary power supply is not equipped.
When executing the work (placement, piping, or wiring operations) or maintenance, be sure to turn off the primary power supply beforehand. ● ●
When the power supply of the supply source is turned on after completion of wire connections to the terminal base, the product is put to operation. A fire, electric shock, or injury may be caused by short circuit.
WARNING Do not rework, disassemble, or modify this product. ●
An accident, fire, electric shock, electronic part damage or burnout may be caused. charge of repair.
If the product has been modified, we cannot take
If any abnormal noise or smell occurs in this machine, stop the operation at once and contact the distributor or us. ●
An electric shock, injury, fire, or electronic device damage or burnout may be caused.
When combustible gas is generated, do not use the product. ●
If the product is operated in a place where combustible gas is generated, explosion may be caused.
Do not touch the terminals, PC boards, etc. inside the product during operation. ●
An electric shock, injury, or failure may be caused.
Do not use the product when it is faulty. ●
An accident such as electric shock and fire may be caused.
Stop the operation at once and repair the product.
Do not use any fuse other than the specified one. ●
Replace the fuse only when it is confirmed that there is no fault after troubleshooting.
●
Using a fuse other than the specified one will result in an accident.
CAUTION Do not store the product in the following place. ●
If the product is stored or left outdoors, in a high-temperature and high-humidity place, or in an environment of combustible gas or corrosive gas, discoloration, deformation, or corrosion may be caused to the cabinet.
Do not install the product in any direction other than the specified direction. ●
A malfunction may be caused.
Tighten bolts, screws, etc. securely with a proper tool. ●
The bolts or screws may be damaged.
●
When making wire connections to the terminal base, tighten the screws securely.
Insufficient tightening will result in a failure.
Do not sprinkle water on the product or do not paint it. ●
In particular, in the type provided with an automatic washing unit, a malfunction will be caused by painting the product. cabinet may not be opened.
Or the
Perform piping or wiring correctly. ●
Execute the work referring to Pages 6 to 13, “3. Work Execution and Installation” in this document.
Do not perform wiring near a noise generating source. ●
Do not bundle each wire together with a noise-superposed wire or put each wire in the same duct as such a wire. be caused.
A malfunction may
When starting work execution or maintenance, remove the static electricity charged on the human body beforehand. ●
Before touching an internal part, remove the static electricity charged on the human body.
Insert a clock battery and adjust the clock accurately. ●
Unless the clock is adjusted, the product cannot be operated.
If liquid leakage occurs from the clock battery, do not touch it directly. ●
A burn or a loss of eyesight may be caused. When liquid is attached to the eyes or skin, flush it with lots of water at once and consult a physician.
Do not short the clock battery. ●
Firing or a burn may be caused.
Energy may remain in the used battery, inviting danger.
Use the specified battery (CR2450) as a clock battery. Insert the battery with its correct polarity. ●
If a battery other than the specified one is used or the polarity is incorrect, the product cannot be operated correctly, resulting in an injury due to breaking or liquid leakage, or a machine failure.
Do not put the battery in a fire. Do not perform heating, disassembly, modification, and charging. ●
Breaking or liquid leakage may occur, resulting in an injury or burn.
Do not dispose of the used battery (CR2450) as waste. ●
The disposal of used batteries is stipulated by each country or local self-governing body. method specified in each region.
Dispose of them in accordance with the
Page. 5
CAUTION Supply fresh water and air at all times. (Air: For the type with an automatic washing unit) ●
After completion of sample water measurement, fresh water (washing water) is always caused to flow automatically. (Common to both standard specification and OP specification) For automatic washing or manual washing based on a pushbutton, the washing wiper cannot be operated unless air is supplied.
Seal the electric wire port securely so that condensation may not caused in the device or waterdrops may not enter the device. ●
If condensation or waterdrop inflow occurs, this will result in a device failure or malfunction.
In an operating environment in which the room temperature suddenly changes, operate the product in several hours after the room temperature is stabilized. ●
Condensation may be caused, resulting in a failure.
Do not put the water containing foreign materials such as seawater and refreshing drink directly into the sample water detection tube of this equipment. ●
Because of the character of the oil concentration detector for oil water of ppm level, a malfunction will be caused.
Do not leave the product in a subzero environment in the status where sample water or fresh water remains in the sample water detection tube. ●
The sample water detection tube will be broken by freezing, resulting in a failure.
Perform inspection and clean the sample water detection tune periodically. When the product is installed in a place exposed to many vibrations including micro vibrations, inspect the terminal base, set screws, connectors, etc. periodically. ●
Check them for looseness.
When removing parts temporarily for inspection or cleaning, store genuine parts carefully without damage or loss. Do not operate this machine with the cabinet open. ●
This is very dangerous.
Be sure to close the cabinet and set the patch before starting the operation.
For disposal of this product ●
The disposal method and regulations depend on the country or region. Contact the local self-governing body or organization in charge of environmental protection in the respective countries or regions.
1-5 Other Important Precautions 1.
All of FOCAS-1800 products undergo inspection and testing in our factory before they are delivered. They are delivered with the oil alarm operating point set to 15 ppm.
2.
The inspection to be performed after delivery must be executed by a qualified person approved by us in accordance with the IMO regulations. When inspection has been executed, its date and time is recorded on the memory card of this equipment. A certificate of accuracy will be issued. Please keep it carefully on the customer side. For details, contact our sales department or distributor.
3.
For prevention of illegality, a stamped seal is pasted on the display board in this equipment. Removing this stamped seal is regarded as an illegal action. Do not remove the stamped seal in any case.
4.
The secular contamination on the sample water detection tube will lead to performance degradation. Periodic maintenance is required. Perform automatic washing for the fixtures of the washing unit. And perform automatic washing by using the stain indicating function. When the sample water detection tube is remarkably contaminated and the stain indicating lamp comes on in red, the operation is disabled.
5.
The operation record is stored on the memory card for 18 months. (Any data operation cannot be performed.) If the memory status lamp comes on in yellow (the consumption of the memory reaches 80% or more) in less than 18 months because of high frequency of system operation or high frequency of alarm occurrence, replace the memory card. When the red lamp comes on, this equipment is stopped, so that the Bilge discharge system cannot be operated. For details, refer to Pages 35 and 36, “5-8 Replacement Time of Memory and Procedure for Replacing it” in this document. Keep the removed memory card carefully in custody. To refer to the past record at inspection, mount the stored memory card on the equipment again. No spare memory card is attached. For purchasing it, contact the distributor or our sales department.
6.
Except the case where the oil concentration is 15 ppm or less, every status is regarded as an trouble alarm as stipulated.
7.
In this document, the term of each function is independently used. For explanation of the term, the mark is used.
8.
For the related item that operationally requires caution, the are used as required.
NOTE
TERM
Symbol
symbol mark is used. Thus, other symbol marks
1-6 Oil Concentration of 15 ppm Oil content of 15 ppm: The oil content in oil water can hardly be visually identified. When the oil content is completely emulsified, nebula or darkness can be a little observed depending on the oil type. Naturally, as the oil concentration lowers, oil particles are harder to distinguish. The rate of oil water is measured with high accuracy by our unique technology. The oil concentration of 15 ppm cannot be visually confirmed.
Page. 6
2. Work Execution and Installation 2-1 Product 2-1-1 Product classification FOCAS-1800 product classification
Confirm that the delivered contents are correct. (Basic combination: 8 variations)
FOCAS-1800 series Specifications of terminal block
Specification B
Specification A
Washing unit
Equipped
Not equipped
Equipped
Not equipped
Please refer to the figures below. With
15/5ppm Oil alarm contact switching
With For 15ppm For 15ppm With For 15ppm With 15/5ppm For 15ppm 15/5ppm 15/5ppm only
switching
only
switching
Standard product
NOTE
only
switching
only
Options
Please refer to the Page 11 and 12.
Standard product
Because this product model is already approved, a request for later modification cannot be accepted.
2-1-2 Component parts list Type without a washing unit
Type with a washing unit
Accessories
Others Memory card
A single memory card is inserted in the main unit. Instruction Manual (this document) 1 copy
Silica gel
One pouch Besides, one pouch is mounted on the main unit.
Maintenance parts ● For the main unit
3A 250V
● Tool set (housing case)
Fuse 3 A (Normal acting type 20 mm x φ5) * Ceramic tube (milk white color)
1 piece
● For external device
2A 250V
Fuse 2 A (Normal acting type 20 mm × φ5) * Glass tube (transparent)
2 pieces
● Screwdriver (for M4)
1 unit
● Tweezers ● Washing brush ● Washing liquid (125 ml)
1 unit 1 piece 1 bottle
2-1-3 System environment required for operation Option type Type without a washing unit Type with a washing unit
Air pressure for washing -----0.3-0.9Mpa
Sample water pressure
Sample water pressure
Supply voltage
0.03-0.3Mpa
Max 0.6Mpa
90-240V AC/50-60Hz
Be sure to use the fresh water equivalent to drinking water or mineral water.
Page. 7
2-1 Product 2-1-4 Appearance of the main unit and names of parts View from obliquely above (Type without an automatic washing unit) Names of parts in the upper part
L
C
Y D B
K A
A ○ B ○ C ○ D ○ K ○ L ○ Y ○
Sample water detector (sensor unit) Desiccating agent (silica gel) indicator window Upper lid retainer Sample water/fresh water outlet Latch Calibration cap Pressure control valve for back flow prevention
View from obliquely above (Type with an automatic washing unit)
J
Names of parts in the upper part
H Y
L
F E D C
K
B A
A ○ B ○ C ○ D ○ E ○ F ○ H ○ J ○ K ○ L ○ Y ○
Sample water detector (sensor unit) Desiccating agent (silica gel) indicator window Upper lid retainer Sample water/fresh water outlet Shaft with a washing wiper Joint Cylinder body for washing Air inlet/outlet Latch Calibration cap
Pressure control valve for back flow prevention
View from obliquely below Names of parts in the lower part
M ○ N ○ P ○ Q ○ R ○ S ○ T ○ U ○ W ○
M
N
P
W Q
S
R
T
U
Sample water inlet Sample water filter insertion cap Drainage port (drainage cap) Fresh water inlet Grounding terminal (M4) Air valve (for the type with a washing unit only) Air inlet (for the type with a washing unit only) Grounding (cable port) * The shapes depend on the specification. Fresh water filter insertion cap
Page. 8
2-2 Piping ● ●
DANGER
● ●
CAUTION
● ● ●
Request
Do not install the equipment in a place around which there is explosive gas. Do not install the equipment outdoors, in a place that is in a high-temperature and high-humidity environment, in a dusty place, or in a place where water may splash directly on the equipment. When transporting and installing the equipment, take care about its weight balance. (This equipment has an asymmetrical structure between its left and right sides, being unbalanced.) Do not drop the equipment or do not apply excessive force to the equipment. (The equipment includes glass materials inside.) Be sure to fix this product with bolts and do not install it in a place to which impulsive mechanical vibrations are directly transmitted or in an unstable place. Check whether the product delivered from the factory is matched to the ordered specifications. Be careful that the parts attached to the equipment will not get lost.
2-2-1 Installing method 375 max 116±1.0
Installing
1
1 ○
4-M8 x 15
Fix the equipment with bolts (M8 x 15 mm) in the 4 mounting holes. Prepare bolts, tool, etc. on the customer side.
260±1.2
Request
Install the equipment vertically.
WARNING
Do not install the equipment directly by electric welding, arc welding, etc. A failure will occur.
4-φ10
Coppe r wire
2
Sc rew type joint
※2
3 Nut
Copper ball ※1
Sc re w side
1
※3
FOCAS-1800 side
2-2-2 Connecting pipes
Procedure 1 ○ 2 ○ 3 ○
Wind a seal tape. (For prevention of water leakage or pressure leakage) Insert a nut and a copper ball into the copper pipe. Use a copper pipe with an external diameter of φ8 and an internal diameter of φ6. While the copper pipe is inserted into the FOCAS-1800 side, tighten the nut including the copper ball with an adjustable angle wrench.
2-2-3 Precautions on executing the piping work ■
When executing the piping work, be sure to observe the following restrictions.
NOTE ● ● ● ●
The connections shown in the figure below are based on the standard installation method. Be sure to observe the restrictions shown in the figure because a fault may be caused by improper disposal of cable. The pipe length for sample water should be 2 m or less from the supply source. The pipe for drainage should be 2 m or less in length and 1.5 m in fall. If this condition is not satisfied, use a hopper halfway. In this Bilge Alarm, the response time is specified within 5 sec. In the whole Bilge discharge system, the response time is specified within 20 sec or less. The response time is affected by pipe length.
Restrictions on piping
* The figure represents an OP product. Wasshing cylinder Screw type joint
Total length 2m or less
Hopper Oil separator Outlet
Oil concentration detector
Sample water inlet (0.03∼0.3MPa)
Fall 1m or less
Fall 1.5 m or less
Outlet head Pressure control valve
Screw type joint
Filter Air valve equipped (Closed) (Open) It is desirable that the valve is near the concentration detector.
Total length 2m or less
Air inlet (0.3 ∼0.9MPa)
Fresh water inlet
(Mineral water level )(0.6 MPa max)
Page. 9
2-2 Piping 2-2-4 Precautions on fixtures of the washing unit 1. 2. 3.
To operate the automatic washing unit, air must be supplied.
○
When air is supplied, raise the valve (cock) in the lower part of this equipment toward Ⅱ . Air supply is started. Use the fresh water for washing, equivalent to drinking water.
Open Ⅱ
2-2-5 Replacement from the FOCAS-1500C (our existing product) ■
There is no compatibility with the FOCAS-1500C in respect of the installation dimension, pipe flow inlet/outlet (arrangement), etc. The conversion fixture that is separately available is recommended. For details, contact the distributor or our sales department. ■ When executing the piping work, change the existing piping so as to observe the installing conditions shown in “2-2-3 Precautions on executing the piping work” on Page 8. ● For installing this equipment, do not perform electric welding or arc welding directly in any case. A failure will occur. If such welding must be performed for a compelling reason, be sure to disconnect this equipment WARNING beforehand. ●
Sample water and fresh water must be connected respectively by independent pipes as stipulated.
FOCAS-1800 (this product) * The figure represents an OP product.
Comparison with the FOCAS-1500C (existing equipment)
170 Fixing hole positions of the FOCAS-1800
Using the fixing bracket, that is seperately available, will facilitate the execution of work. In the vertical direction, the center of 1500C mounting holes is the reference position.
Drainage
Sample water Fresh water
Air
Fresh water
Sample water
Drainage
3 way valve
270
116 ±1.0
260±1.2
81.5
Page. 10
2-3 Wiring/Wire Connections ■
Perform the work with particular attention to safety. Be sure to observe the following items to prevent a failure from occurring.
■
Be sure to refer to Pages 4 and 5, “1-4 Precautions” and Pages 11 and 12, “2-3-3A & 3B Terminal Base Specification” in this document. ● ●
DANGER ●
WARNING
NOTE
The rated power supply of this equipment is 90 V to 240 V AC and its power frequency is 50 to 60 Hz. Operate the equipment within the rating. The P.S. terminal and the VALVE terminal are voltage outputs. The voltage that is supplied to this equipment is output to these terminals. Observe the rated value that permits connecting the terminal base and adjust the supply voltage of the load side to the supply voltage when operating the equipment.
●
Do not make a connection to another device through the terminal base. A failure will occur.
●
Be sure to shut off the supply power before starting the wiring work.
●
When closing the cabinet, take care not to have the hand nipped by the cabinet.
●
Take extreme care not to lose the part removed at wire connection.
●
When installing a cable onto the terminal base, tighten the screw securely with a proper tool.
2-3-1 Opening the cabinet Latch
Operating surface
Ⅱ
Pull the latch toward
Ⅰ
to release the locked status.
Pull the front lid toward Ⅱ to open the cabinet.
Ⅰ MODEL OF TYPE APPROVAL M-
国土交通省型式承認番 号
Structure of the electric wire port
ビ ルジ 用濃度監視装置 BILGE 型 式 MODEL 製 造 番 号 SERIAL NO. 製 造 年 月 DATE
TOKYO
MONITOR
FOCAS-1800
JAPAN
Grou nd body Wash er Rubber pac kin g
Lid
Electric wire port
Not required when an electric wire passes
Nu t
Grounding terminal
2-3-2 Connecting the grounding wire
NOTE
●
This equipment has a cabinet grounding structure. Check whether the cabinet is grounded.
Since this equipment has a cabinet grounding structure, a grounding wire does not need to be connected if the mounting section is grounded. When the mounting section is painted, no grounding effect is provided, so connect a grounding wire to the grounding terminal. The grounding terminal is positioned in the lower left part of the main unit case, and its screw is M4.
2-3-3 Connecting signal lines Specifications of the terminal base
NOTE
●
The terminal screw of the terminal base is M3.5.
●
The indication of NO-COM-NC, etc. of each alarm contact represents that the AC power is connected, and the power per circuit is 250 V AC, 2 A max. Operate the equipment within the rating.
●
An occurrence of outage (power interruption), every alarm contact is put to an alarm status.
Terminal base specification A ● S1 of AC IN terminal and S1 of P.S terminal are connected inside this equipment. COM of each alarm contact is disconnected. ● Each operation of OIL AL.1 and OIL AL.2 or ALL AL.1 and ALL AL.2 is the same but is different in contact configuration. Terminal base specification B ● Each operation of ALL AL. and VALVE terminals is the same but is different as to whether the terminal contact is a no-voltage contact or a voltage contact.
Page .11
3-3A Terminal Base Specification A (P.S. terminal, solenoid valve)
Terminal name
Att e n t io n t o vo lt age S u pply vo lt age o u t pu t
2
3
4
Cut off
OIL AL.1
DEF AL.
■ Voltage terminal To the P.S. terminal, the supply voltage that is supplied to this product (FOCAS-1800) is output. Observe the rated value that permits connecting this equipment and adjust the supply voltage of the load side. A wrong connection may cause damage to the equipment, and also damage or fire to the equipment on the load side. ■ Be sure to confirm that the voltage of the wiring cable is shut off. This product is provided with terminal base specifications A and B, and the wire to be connected varies depending on each specification. Connect each wire correctly taking care about it. 1. Regarding the option with an oil alarm switch, the alarm point can be set to 5 ppm. 2. The contact indication of NO-COM-NC is for the case where AC power is supplied. 3. At occurrence of outage, all the alarm contacts are put in alarm status. (In the NO-COM contact section, a connection is made.) 4. S1 of AC IN and SI terminal of P.S. are connected within the main unit. COM of each terminal is disconnected at each contact. 5. At occurrence of outage, the voltage from the voltage output terminal is not supplied. 6. Tighten the bolts and nuts securely with a proper tool.
DANGER
5
P.S.
NO COM NC NO COM NC NO COM NC S1 PS
WARNING
Upper row Lower row
S1 S2 COM NC AL1 AL2 NO COM NC
Terminal name
AC IN
1 Terminal name
OIL AL.2 ALL AL.2
3a
7a
CAUTION
ALL AL.1
REC
7
6
Contents of terminals
Terminal No.
Terminal name
Between terminals
AC power supply
●
Connects the supply power.
1
AC IN
S1 - S2
External output
● ●
Outputs the oil concentration value in real time. Outputs a current of 4-20 mA.
6
REC
+ −
Terminal name
Contents of terminals
No.
● ●
The power that can be supplied is 90 to 240 V AC, 50 to 60 Hz. When AC is supplied, this product is put to a power ON status (standby mode).
The line resistance is 700 Ω or less.
Number of relay circuits and allowable capacity
Terminal name
Between terminals
At outage
3
1 circuit of contact B 250VAC, 2A max. (No-voltage contact)
OIL AL1
NO – COM COM – NC
Disconnection
3a
1 circuit of contact C 250VAC, 2A max. (No-voltage contact)
OIL AL.2
COM – NC
Disconnection
Outputs an alarm when a device failure or operation fault occurs.
4
1 circuit of contact C 250VAC, 2A max. (No-voltage contact) 1 circuit of contact C 250VAC, 2A max. (No-voltage contact)
DEF AL.
●
Outputs an alarm when AC power is not supplied.
2
1 circuit of contact C 250VAC, 2A max. (No-voltage contact) 1 circuit of contact C 250VAC, 2A max. (No-voltage contact)
Cutoff
●
Outputs an alarm when one of oil alarm and trouble alarm is faulty.
1 circuit of contact B 250VAC, 2A max. (No-voltage contact)
ALL AL.1
Oil concentration alarm
●
Defect alarm
●
Power failure alarm Combined alarm Terminal name
Outputs an alarm when the oil concentration value reaches the alarm point during operation.
Contents of terminals
● Solenoid valve rely
Terminal
Connecting condition and precaution
●
This terminal can also be used as a voltage contact. (The supply voltage is output.) This terminal is operated when the oil concentration is below 15 ppm.
7 7a Terminal No.
5
NO – COM COM – NC NO – COM
Below 15 ppm
15 ppm or more
Equipment trouble
Connection Disconnection Disconnection Disconnection Disconnection Connection Connection Connection Connection Connection Connection Disconnection Disconnection Connection
Connection Connection Connection Disconnection Disconnection
Connection Disconnection Disconnection Disconnection Disconnection Disconnection Disconnection
Connection
Connection
Connection Connection Connection Connection Disconnection
Connection Disconnection Disconnection Disconnection Disconnection Disconnection Disconnection Disconnection
Connection
Connection Connection Connection Connection
Connection
NO – .COM COM – NC AL1 – AL2
Connection
Connection
Connection Connection Disconnection Connection
Connection
Disconnection Disconnection Disconnection Disconnection Connection Disconnection Disconnection
ALL AL.2
Number of relay circuits and allowable capacity
Terminal name and terminal-toterminal
Pressure SW status
P.S. S1-PS
Below the specified pressure Specified pressure or more
DANGER
At operation For Standby warming-up status
COM – NC
Terminal name and terminal-to-terminal
1 circuit of contact A 1.5 VA max. (voltage contact)
At nooperation (standby)
Disconnection Disconnection Disconnection Disconnection Connection Disconnection Disconnection
At operation
At outage
At nooperation (standby)
OFF
OFF
.….
OFF
.….
OFF
For Standby warming-up status
Equipment trouble
Below 15 ppm
15 ppm or more
OFF
.….
.….
OFF
.….
ON
OFF
OFF
Page. 12
3-3B Terminal base specification B (VALVE terminal, three-way valve)
Terminal name
2
3
4
Cut off
OIL AL.1
DEF AL.
DANGER
NO COM NC NO COM NC NO COM NC Upper row
WARNING
Lower row
Terminal name
Terminal name
N
L
ALL AL.
1
7a
VALVE
7
A t t e n t io n t o vo lt age S u pply vo lt age o u t pu t
Contents of terminals
1. Regarding the option with an oil alarm switch, the alarm point can be set to 5 ppm.
6
Terminal No.
CAUTION
Terminal name
Between terminals
●
Connects the supply power.
1
AC IN
N-L
External output
●
Outputs the oil concentration value in real time.
●
Outputs a current of 4-20 mA.
6
REC
+ −
Contents of terminals
Oil concentration alarm
●
Defect alarm
●
Power failure alarm
●
Terminal for three-way valve
● ●
Outputs an alarm when one of oil alarm and trouble alarm is faulty.
Combined alarm
●
Outputs an alarm when one of oil alarm and trouble alarm is faulty.
2. The contact indication of NO-COM-NC is for the case where AC power is supplied. 3. At occurrence of outage, all the alarm contacts are put in alarm status. (In the NO-COM contact section, a connection is made.) 4. COM of each terminal is disconnected at each contact. 5. At occurrence of outage, the voltage from the voltage output terminal is not supplied. 6. Tighten the bolts and nuts securely with a proper tool. 7. The terminal marked “●” on the terminal base cannot be connected. It cannot be used.
REC
AC power supply
Terminal name
This product is provided with terminal base specifications A and B, and the wire to be connected varies depending on each specification. Connect each wire correctly taking care about it.
NO COM NC BLG NA SEA
AC IN
■ Voltage terminal To “VALVE terminal,” the supply voltage that is supplied to this equipment (FOCAS-1800) is output. Observe the rated value that permits connecting this equipment and adjust the supply power voltage to the load side. A wrong connection may cause damage to the equipment, and also damage or fire to the equipment on the load side. ■ Be sure to confirm that the voltage of the wiring cable is shut off.
Terminal No.
Connecting condition and precaution ●
The power that can be supplied is 90 to 240 V AC, 50 to 60 Hz.
●
When AC is supplied, this product is put to a power ON status (standby mode).
The line resistance is 700 Ω or less.
Number of relay circuits and allowable capacity
Terminal name
NO – COM
Outputs an alarm when the oil concentration value reaches the alarm point during operation.
3
1 circuit of contact C 250VAC, 2A max. (No-voltage contact)
OIL AL.
Outputs an alarm when a device failure or operation fault occurs.
4
1 circuit of contact C 250VAC, 2A max. (No-voltage contact)
DEF AL.
Outputs an alarm when AC power is not supplied.
2
1 circuit of contact C 250VAC, 2A max. (No-voltage contact)
Cutoff
7
1 circuit of contact A 1.5 VA max. (voltage contact)
VALVE
This terminal can also be used as a voltage contact. (The supply voltage is output.)
7a
DANGER
1 circuit of contact C 250VAC, 2A max. (No-voltage contact)
Between terminals
COM – NC NO – COM COM – NC NO – COM
At nooperation (standby)
At operation For Standby warming-up status
Below 15 ppm
15 ppm or more
Connection Disconnection Disconnection Disconnection Disconnection Connection Disconnection
Connection
Connection
Connection
Connection Connection Connection Disconnection Disconnection
Connection Disconnection Disconnection Disconnection Disconnection Disconnection Disconnection
Equipment trouble
Connection
Connection Connection Connection Connection Disconnection
Connection Disconnection Disconnection Disconnection Disconnection Disconnection Disconnection
COM – NC
Disconnection
Connection
Connection Connection Connection Connection
Connection
BLG – NA
Connection
Connection
Connection Connection Disconnection Connection
Connection
NA – SEA
ALL AL
At outage
NO – COM COM – NC
Disconnection Disconnection Disconnection Disconnection Connection Disconnection Disconnection
Connection
Connection
Connection Connection
Connection
Connection
Disconnection Disconnection Disconnection Disconnection Connection Disconnection Disconnection
Page. 13
2-3 Wiring/Wire Connections 2-3-4 Replacement from the FOCAS-1500C (our existing product) Terminal block specification A part (solenoid valve, P.S terminal) Terminal block arrangement of the existing device FOCAS-1500C DEF AL. OIL AL.1 OIL AL.2 Terminal name
( Ma x 1.5V A )
A ttenti on Terminal block arrangement to v ol ta g e of FOCAS-1800 Suppl y v ol ta g e output Cut off OIL AL.1 DEF AL. P.S. Terminal name
NO COM NC NO COM NC COM
NO COM NC NO COM NC NO COM NC
Upper row
Upper row
Lower row
Lower row
Terminal name
S1 S2
S1 PS AL1 AL2 NC
AC IN
P.S.
AL
Terminal name
REC
Attention to voltage 100V fixed
S1
S1 PS
S2 COM NC AL1 AL2 NO COM NC
AC IN OIL AL.2 ALL AL.2ALL AL.1 REC FOCAS-1800 auxiliary terminal block J1
J2
Open
J3
Open Connected
Terminal block specification B part (Three-way valve, VALVE terminal) Terminal block arrangement of the existing device FOCAS-1500C Terminal name
DEF AL.
OIL AL.
Terminal block arrangement of FOCAS-1800 Terminal name
NO COM NC NO COM NC Upper row
Upper row
Lower row
Lower row
S1 S2 NA SEA BLG Terminal name
AC IN
VALVE
Attention to voltage Supply voltage output
N
REC
FOCAS-1500C auxiliary terminal block P.C
Cut off
N.P.C.
Connected Connected Open
Terminal name
OIL AL.1 DEF AL.
NO COM NC NO COM NC NO COM NC
L
AC IN
NO COM NC BLG NA SEA
ALL AL.
VALVE
Attention to v oltage Supply volta ge output
FOCAS-1800 auxiliary terminal block J1
J2
J3
Connected Connected Open
REC
Page.
14
3. Preparations for Operation 3-1 Settings before a Start of Operation ■
■
Before operating this equipment for the first time, adjust the clock for operation record. Otherwise, the equipment cannot be operated. In this case, a trouble alarm or oil alarm is output. This output alarm can be cancelled by adjusting the clock. If there is any abnormality, “Exx” is indicated on the 3-digit segment display of the display section. (* xx denotes a 2-digit number.) Refer to Pages 38 to 39, “6-1 Indications by Self-diagnostic Function and Taking Measures” in this document.
NOTE
Be sure to execute the following items. 1. 2. 3. 4.
Before powering on the equipment, check the pipe joints and the terminal base for looseness. Confirm that the memory card and the backup battery are mounted. Power on the equipment. Adjust the internal clock. (Then, the equipment is ready for operation.)
3-2 Setting the Clock Battery
D isc h a rge - pr o o f sh e e t P u ll ou t th e disc harge - proof sh e e t toward Ⅲ . * Th e batte ry is alre ady se t at delive ry from th e fac tory.
Perform battery (CR2450) setting.
Ⅲ 3-3 Checking the Memory Card
For details, refer to Page 36,“5-8 Memory Replacement Intervals and Replacing Method”in this document.
Confirm that the memory card is mounted.
3-4 After Powering on the Equipment DANGER
NOTE
During powering on, do not touch the internal terminal base, parts, boards, etc. An electric shock may occur. In some cases, the clock may have been set. This is not abnormal. Set the clock once again according to the procedure.
When the following is displayed on the panel, it is normal. i If the internal clock is NOT adjusted
The figure represents an option product.
15ppm Bilge Alarm Indication shortly after power distribution
"15" blinks
r te . A f s ec 3
15ppm Bilge Alarm ---- Operation Status Standb --- TES AUTO T y
Oil Alam
Defect Alam
PPM Memory Status
FOCAS-1800
Usually, the green light comes on. The lights come on. Either AUTO or TEST that is selected comes on.
Oil Alam
PPM
Defect Alam
Sta in of Detecter Memory Status MODEL
The display blinks. An "E98" error and an oil/trouble alarm are output. The lights come on.
FOCAS-1800
The equipment cannnot be operated. Adjust the clock.
Sta in of Detecter
MODEL
---- Opera tion Status --TES Standb AUTO T y
A 3 f t er se c.
If the internal clock adjustment is completed 15ppm Bilge Alarm ---- Operation Status --TES Standb AUTO T y
Oil Alam
Defect Alam
PPM Sta in of Detecter Memory Status
MODEL
FOCAS-1800
The equipment can be operated.
The lights come on.
Page. 15
3-5 Setting the Clock Adjust the clock. This is an important setting to record the operation of the Bilge discharge system.
Switch Functions 1.
2.
3.
○
When adjusting the internal clock, press the “Clock Adjust” switch 1 on the operating surface at least for 2 seconds. Press this switch again to determine the adjusted clock value. Turn the “Edit” switch 2 on the operating surface to adjust the time. When the switch is turned clockwise, the value increases. When the switch is turned counterclockwise, the value decreases. * When the value reaches the maximum or minimum limit in the setting range, it does not change. If it is found halfway that the setting value is incorrect, set any optional value to the end and then set the correct value again. While the clock is being set, any switch other than 1 and 2 on the operating surface does not function.
○
○ ○ The clock indicates the time on the basis of a 24-hour system. Setting Procedure ** The clock can be set up to December 31, 2099. I nd i ca ti on s on t h e pa ne l T h e di sp la ys bl in k.
Operation
Status
Standby AUTO TEST
Oil Alarm Defect
Date : Time :
Jan-01-2005 00:00:00
S ta in PPM of Alam D et ec t Memory e rS t a t u s MODEL FOCAS1800
1. It operates after 2secnd
Date : Time :
Jan-01-2005 00:00:00
Date : Time :
Jan-01-2005 00:00:00
Date : Time :
Jan-01-2005 00:00:00
Date : Time :
Jan-01-2005 00:00:00
Date : Time :
Jan-01-2005 00:00:00
Date : Time :
Jan-01-2005 00:00:00
5.
5
3
F
4 1
2
while the clock is being set, the lamp blinks. At completion of the setting, the lamp goes out.
7.
●
● ●
S ta in PPM of D et ec t Memory e rS t a t u s MODEL FOCAS-1800
Turn the "Edit" switch ② on the operating surface to adjust "Day." -The setting range begins with 01 and last day varies depending on each month. Press the "Clock Adjust" switch ① on the surface to determine it. Next, the hour part "00" blinks. Turn the "Edit" switch ② on the operating surface to adjust "Hour." -The setting range is 00 to 23.
Turn the "Edit" Switch ② on the operating surface to adjust "Minute." - The setting range is 00 to 59.
Turn the "Edit" switch ② on the operating surface to adjust "Second." - The setting range is 00 to 59. Press the "Clock Adjust" switch ① on the surface to determine it.
Check whether the lights on the panel turn on as shown below: A: Stanby......................Red light B: Auto or Test..........Green light C: Memory Status.....Green light
----
De fe ct Al am
Turn the "Edit" switch ② on the operating surface to adjust "Month." - The setting range is Jan to Dec. Press the "Clock Adjust" switch ① on the surface to determine it. Next, the day part "01" blinks.
With these procedures, the settings are completed and a setting completion message is displayed for 3 seconds. The "Power" light ⑤ on the surface goes out.
15ppm Bilge Alarm Standby AUTO TEST
Press the "Clock Adjust" switch ① on the operating surface at least for 2 seconds.
Press the "Clock Adjust" switch ① on the surface to determine it. Next, the second part "00" blinks.
T he li gh ts t ur n on .
Request
T
----Zeroin Washing ---Valv Wash g e - es
Press the "Clock Adjust" switch ① on the surface to determine it. Next, the minute part "00" blinks.
The completion of adjustment
NOTE
Auto Operati Cleani on AUT ng ON O TES OF
Edit
Turn the "Edit" switch ② on the operating surface 2. to adjust "Gregorian year."-The setting range is 2005 to 2099. Press the "Clock Adjust" switch ① on the surface to determine it. Next, the month part "Jan" blinks.
6.
O il A la m
POW ER
Men u
The Gregorian year part "2005" will blink.
4.
Status
Clock Adj.
When the primary power supply is turned on for the first time,"Jan-01-2005 00:00:00(January 1, 2005, 00 hour 00 minute 00 second)"is displayed and the equipment at a stop.
3.
Operation
Liquid crystal indicator
Jan-01-2005 00:00:00
----
T he li gh ts tu rn on .
----
Date : Time :
-------- Error Washin Draina Status -------g ge ----Cap -CapOperation Wate Oil Status ---r Valve Valve
I n di ca ti on s on th e li qu id cr ys ta l in di c at or
15ppm Bilge Alarm ----
----------- Test operation ----------20mA Line 4mA OIL - Defect Cut Alarm Alarm off LCD Contrast
Date : Time :
The trouble alarm and oil alarm are all cleared. The equipment is put to a standby status and 運転ができる状態になります。 th is i s re ad y fo r op er at i on .
xxx-xx-20xx xx:xx:xx
If “A32” blinks on the panel display after setting the time, the memory card for operation record is not inserted. Check it. When “---” blinks on the panel, set the Line Test switch 4 on the operating surface to the middle position (Line). If the battery is consumed, the clock is put out of order when the primary power supply is shut off. Replace the battery (CR2450) and set the clock once again. After adjusting the clock, be sure to close the cabinet for safety. For system operation, be sure to set the switch 3 on the operating surface of the equipment to the “Auto” side.
○
○
Page. 16
3-6 Trial Run ■
This section describes the adjusting/checking method to be executed through a trial run so that the installed and fixed equipment can be normally operated.
■
The switches for test run are intended for adjustments and checks. So a part of operations is limited.
■
Check the installation, piping and wiring, the terminal base for looseness and also check the specified pressure of supply water once again.
■
When “Test” of the operation switch is selected, the operation will be stopped in 300 sec (5 min) after pressing the power switch.
CAUTION ●
Be sure to wash the inside of the pipe before performing a trial run.
After the piping work is executed, the inside of each pipe is much contaminated by residue. Before connecting the pipe to this equipment, be sure to wash the inside of the pipe by letting water run through the pipe. If the contaminated pipe is connected to this equipment and then water is passed through the pipe, the solenoid valve (plunger operation) in the detector of this equipment becomes faulty.
3-6-1 Performing a trial run
○
1.
Open the cabinet and select the “TEST” of the “Operation” switch 22 on the operating surface. equipment is not put to auto operation even if the specified pressure is applied to sample water.
2.
Supply the primary power supply. The lamps 11 and 13 on the panel come on. With these lamps ON, the standby mode can be confirmed. If an error appears at this time, refer to Pages 38 and 39, “6 Error Codes of the Self-diagnostic Function” in this document. To start the operation, press the “Power” switch 21 on the operating surface. To stop the operation, press the “Power” switch 21 on the operating surface once again. Cause the sample water to be tested to flow. The concentration of the sample water and the interlocking operation with the separator can be checked. During the operation, check whether any leakage occurs from piping points.
3. 4. 5.
○
○
○
○
●
NOTE
When “Test” is selected, the
● ●
The contacts of P.S terminal (solenoid valve relay), terminal base specification A and VALVE terminal (three-way valve), terminal base specification B are not operated unless oil water of 15 ppm or more flows in. Note that the contacts perform the same changeover operation as the ordinary operation in spite of a test operation. The test operation using the Power switch is performed even when the pressure of sample water is zero.
3-6-2 Checking the washing operation 1. 2. 3.
4.
○
Hold down the “Valve” switch 25 on the operating surface at least for 2 seconds. For the type with a washing unit, hold down the “Valve” switch 25 or “Washes” switch 26 at least for 2 seconds. On the indicator 14 on the panel, “A01” (“A02” when pressing the “Washes” switch for the type with a washing unit) is displayed and fresh water is caused to flow for 1 minute. After that, the operation is stopped for 1 minute and the stain in the sample water detection tube is displayed. After the stop of inflow, confirm that the green lamp a on the panel 15 comes on as a sample water detection tube stain indicator.
○
○
○
○
●
Important ●
WARNING
○
○
○
- When the yellow lamp b or red lamp c comes on as a sample water detection tube stain indicator, the fresh water is dirty. When industrial water or circulating recycled water is used, the water may often be cloudy or contains various foreign substances. In this case, replace the water with the water equivalent to drinking water or mineral water or install a filter. When the red lamp comes on, the equipment cannot be operated. A “zero-point correcting” function is mounted in this equipment. When the red or yellow lamp comes on as a sample water detection tube stain indicator, do not perform compensation in any case. Otherwise, trouble may occur. -----------Test operation -----------
15ppm Bilge Alarm
11 12 13
14
---- OperationStatus ---Standby AUTO TEST
Oil Alam
PPM
--------Error Status -------Washing Drainage -Cap -Cap -----OperationStatus ----Water Oil -Valve -Valve
20mA Line 4mA OIL- Defect - Cut off Alarm Alarm LCDContrast
Stain of Detecter
Defect Alam
MemoryStatus MODEL
FOCAS-1800 Clock Adj.
17 18 Stain of Detecter
15
Auto POWER Operation Cleaning AUTO ON TEST
a
b
c
Menu
Zeroing
Edit
-----Washing ----Valve Washes
OFF
21 22 23
25 26
Page. 17
4. Basic Operating Procedure NOTE
Precaution on Operations
Do not remove the stamped seal in any case. It is against the IMO regulations. If the stamped seal is removed, this is put on record.
Stamped seal ● ●
Standby mode: Operation mode: Auto operation: Test operation:
TERM
●
Warming up:
●
Fresh water mode:
The primary power supply is ON and the Bilge discharge system is ready for operation. The equipment is in “Auto operation” or “Test operation” (during oil concentration measurement). The pressure switch is turned on or off by the pressure of sample water and the equipment is in operation in the ON status. The equipment is turned on or off by the “Power” switch 21 on the operating surface. The ON status is automatically is turned off in 300 sec (5 min). This function returns the remaining high-concentration oil water in the pipe to the ship without causing it flow out of the ship at the start of operation. As the self-maintenance function, this function causes fresh water to flow for a certain time so that oil water may not remain in the sample water detection tube at the end of operation. This function can also be performed manually with the “Valve” switch 25 on the operating surface. This function is provided for the type with a washing unit. This is a higher function than the fresh water mode. As the self-maintenance function, the inside of the sample water detection tube is automatically washed by wiper at the end of operation. This function can be performed manually with the “Washes” switch 26 on the operating surface. This term means a return to the status preceding the occurrence of trouble.
○
○
●
Washing mode:
●
Status return:
○
4-1 Internal Layout and Part Names 4-1-1 Layout, part names, and details on the panel Name
11 ○ 12 ○ 13 ○ 14 ○
15ppm Bilge Alarm
11 12 13
14
----OperationStatus ---Standby AUTO TEST
Oil Alam
PPM Stain of Detecter
Defect Alam
MemoryStatus MODEL
Standby lamp Auto operation lamp
Indicates the currently set operation mode.
Test operation lamp 7-segment indicator
15 ○
Sample water detection tube stain indicating lamp
16 ○
Memory consumption indicating lamp
17 ○ 18 ○
Oil concentration alarm lamp
15 16
Contents Comes on when the primary power supply is ON and yet the oil content of sample water is not measured.
FOCAS-1800
17 18
Trouble alarm lamp
Indicates the oil concentration or error number as a 3-digit and 7-segment. Indicates the stain level after sample water is measured and the fresh water/washing mode is completed. Green The detection tube is clean. LED ON Yellow The detection tube is contaminated and manual LED ON washing is required. The detection tube is much contaminated and the oil Red concentration cannot be measured. LED ON A trouble alarm is output and the equipment operation is stopped. Indicates the memory consumption level. Green The memory has a sufficient capacity. LED ON This LED comes on when the memory has been used Yellow 80% or more. LED ON Replace the memory card. The memory is full. No free capacity is available. Red A trouble alarm is output and the equipment operation LED ON is stopped. An alarm is output and the lamp blinks when the concentration exceeds the specified value of 15 ppm. (Option: 5 ppm) An alarm is output and the lamp blinks when a device abnormality represented by error indication occurs.
Page. 18
4-1 Internal Layout and Part Names 4-1-2 Internal layout, names, and details Name
10 9 8 7 ⅱ 6
ⅰ 1
5 4 2 3 ⅲ
Contents
1 ○ 2 ○ 3 ○ 4 ○ 5 ○ 6 ○ 7 ○ 8 ○
Oil alarm contact switching
9 ○ 10 ○
Display board connector
Protective fuse Protective fuse for external device Auxiliary terminal base Terminal base Recorder memory Clock backup battery Reset switch
“5/15 ppm” selecting switch (option function) One 3 A fuse (5φ 20 mm ceramic tube fuse, normal acting type) Two 2 A fuses (5φ 20 mm glass tube fuse, normal acting type) Any relay connection other than the connection specified by us cannot be made. Two terminal specifications are available depending on the Bilge discharge system. The memory card is our original part and cannot be operated. This battery backs up the clock when the primary power supply is interrupted. This is a system reset switch. The data of the memory is not lost.
Name
Name
ⅰ ○ ⅱ ○ ⅲ ○
Sensor unit connector
Display board Control board Base board
4-1-3 Layout, part names, and details on the operating surface Name
31 32 33 34 35
36 37 38 39
-----------Test operation ----------20mA Line 4mA OILDefect - Cut off Alarm Alarm
--------Error Status -------Washing Drainage -Cap -Cap -----OperationStatus ----Water Oil -Valve -Valve
LCDContrast
30 Clock Adj.
Auto POWER Operation Cleaning AUTO ON TEST
Menu
Zeroing
Edit
-----Washing ----Valve Washes
29 28 27
OFF
21 22 23
24 25 26
NOTE ●
The parts ○ 23 and ○ 26 on the operating surface are mounted for the type with a washing unit.
Contents
21 ○ 22 ○ 23 ○ 24 ○
POWER switch
Used for test operation, operation, stop, etc.
Operation mode selecting switch
Used to select either auto operation or manual operation. Used to perform auto washing after completion of sample water measurement. Used for zero-point compensation.
25 ○
Fresh water valve switch
26 ○ 27 ○ 28 ○ 29 ○ 30 ○ 31 ○ 32 ○ 33 ○
Washing switch
34 ○
Outage alarm test switch
35 ○
4-20 mA test switch
36 ○ 37 ○ 38 ○ 39 ○
Washing cap lamp
Auto washing switch Zero-pint correcting switch
Clock adjustment switch
Used to manually wash the sample water detection tube or manually cause fresh water to flow to indicate the stain level intentionally. Used to perform washing intentionally. Used to set the time or update the record data indication.
Time setting switch
Press this switch to set the time.
Menu switch
Press this switch to see the record data.
Liquid crystal display
Displays the time and record data.
LCD contrast adjuster Oil alarm test switch Trouble alarm test switch
Drainage cap lamp Fresh water valve opening lamp Sample water valve opening valve
LCD contrast (light and shade) when the liquid crystal display is hard to see. The switch functions only when the concentration is 15 ppm or less during oil measurement. When the switch is held down at least for 2 seconds, an alarm status is provided. When the switch is continuously pressed during a test and then released, the status is returned to the initial status. The switch functions in the standby status. After a test, reset the switch to the middle position (Line). When the cap is removed, the lamp comes on and a trouble alarm is output.
The lamp lights up when the valve is open.
Page. 19
4-2 Turning on the Power Supply and Equipment Operations ■
This equipment is not provided with a power switch for the primary power supply. Be sure to install a power switch for the power supply source. ●
CAUTION ●
NOTE
●
This equipment is not provided with a power switch for the primary power supply because of outage detection and alarm output. Before turning on the primary power supply, be sure to confirm that the wiring to the terminal base is correctly performed. For auto operation, be sure to set the “Operation mode selecting” switch 22 on the operating surface to “Auto.” If the switch is set to the “Test” side, auto operation cannot be performed even if the oil separator is operated. For the explanation of test operation, refer to Page 16, “3-6 Trial Run” in this document. Check whether the “memory card” 6 of the control board is inserted and the Line test switch 35 on the operating surface is set to the Line position (middle position). If this condition is not satisfied, the equipment cannot be operated.
○
○
○
4-2-1 Equipment status at occurrence of outage When the primary power is not supplied, all the lamps on the panel are OFF and the outage, trouble, oil, and compound alarms are in an alarm status. At this time, the “P.S.” terminal (for the solenoid valve) of terminal base specification A is turned off and the “VALVE” terminal (for the three-way valve) of terminal base specification B is put to an alarm status.
4-2-2 Equipment operations when power is supplied (Standby mode) 1.
2.
When the primary power is supplied, this equipment is put to a power-on status and the setting value of oil alarm point blinks on the indicator 14 on the panel for 3 seconds. For the equipment dedicated for 15 ppm, “15” is displayed. (In the case of the product with an alarm point selecting function (option), “15” or “5.0” is displayed.) After the setting value of alarm point is displayed, the equipment is put to the standby mode (the outage, trouble, and oil alarms are cleared and the compound alarm remains in the alarm status.) The “Standby” lamp 11 on the panel comes on. At this time, the “P.S.” terminal (for the solenoid valve) of terminal base specification A is turned off and the “VALVE” terminal (for the three-way valve) of terminal base specification B is put to an alarm status. The mode selected by the “Operation mode selecting” switch 22 on the operating surface is displayed on the “Auto” lamp 12 or “Test” lamp 13 on the panel that comes on. Only when “Auto” is selected by the “Operation mode selecting” switch 22 on the operating surface, the Bilge discharge system can be put to auto operation. (When “Test” is selected, the Bilge discharge system cannot be put to auto operation.)
○
○
3. 4.
○
○
○
○
4-2-3 When “Auto” is selected by the “Operation mode selecting” switch 1. 2.
When the pressure of sample water exceeds the specified value, the equipment is put to the operation mode. When the pressure is below the specified value, the equipment is put to the standby mode after completion of the fresh water or washing mode. As soon as the operation mode is started, warming-up is performed for 30 seconds and “UP” blinks on the indicator 14 on the panel to indicate the worming-up status in progress. At this time, a compound alarm is output and the “P.S” terminal (for the solenoid valve) of terminal base specification A is turned off and the “VALVE” terminal (for the three-way valve) of terminal base specification B is put to an alarm status. After the lapse of 30 seconds, a concentration measurement is started and then the measured value is displayed on the indicator 14 on the panel. If the measured value is 15 ppm or less, all the alarms are cleared.
○
○
3.
When the measured value exceeds 15 ppm, the oil alarm lamp
17 on the panel blinks and an alarm is output. ○
4-2-4 Equipment operations at the stop of operation 1.
When the pressure continues below the specified value for a certain time, the fresh water mode or the washing mode is started. In this period, the compound alarm is put to an alarm status and the “P.S” terminal (for the solenoid valve) of terminal base specification A is turned off and the “VALVE” terminal (for the three-way valve) of terminal base specification B is put to an alarm status. “A01” (“A02” when auto washing is selected) lights on the indicator 14 on the panel. After completion of the fresh water mode or washing mode, “A01” or A02” goes out and the stain level of the sample water detection tube is displayed on “Stain of Detector” 15 on the panel. For details, refer to Page 24, “4-7 Sample Water Detection Tube Stain Indicating Function” in this document. This completes all the operations. The compound alarm is put to an alarm status and the “P.S” terminal (for the solenoid vale) is kept OFF or the “VALVE” terminal (for the three-way valve) is kept in the alarm status, and the current status is returned to the standby mode.
○
2.
3.
○
4-2-5 Emergency stop method ※
If this equipment must be stopped halfway at occurrence of an emergency during oil concentration measurement, press the “Power” switch 21 on the operating surface. The operation is forcibly stopped and “E04” is displayed on the indicator 14 on the panel. The oil and trouble alarm lamps 17 and 18 on the panel blink and an alarm is output. To exit from the emergency status and clear the alarm, press the “Power” switch 21 on the operating panel again. Clearing an When the pressure of sample water is zero, the equipment is put to the standby mode and will be restarted when the alarm pressure of sample water comes to the specified level next time. Restarting the When the specified pressure is continuously given to sample water, the lamp of the “Power” switch 21 blinks. At this operation time, press the “Power” switch 21 on the operating surface once again. After warming-up, the operation is restarted.
○
○
○
○
○
○
○
For the type with a washing unit, make the following checks.
Open
1. 2.
Ⅱ
To operate the auto washing function, air must be supplied. A valve (cock) is installed in the lower part of this equipment. Air supply will be started.
Raise it toward
Ⅱ. ○
Oil alarm
Fresh water valve
Sample water valve
Warming-up
Specification B
Specification A
A and B
Alarm
Alarm
For 30 sec A detection of Sample water 15 to 30 ppm inflow in progress
In opera tion
Alarm
OFF
Alarm
Blinking
UP
Normal
Alarm
OFF
Alarm
Normal
Relay contacts At the normal status, the contact between COM and NC is open. At the alarm status, the contact between NO and COM is connected. Alarm lamp The alarm lamp blinks when an alarm is output.
While the fresh water valve is open, the stain display is updated in one minute after a compound alarm is output and the inflow is stopped.
※1“A01”:At operation in the fresh water mode “A02”:At operation in the washing mode - The washing mode can be selected for the type with a washing unit.
Indicator OFF
OFF
Alarm
Stop of inflow
A01
Inflow
Stop of inflow
After the no-pressure status is kept for approx.90 seconds, the stanby mode is started after washing.
Stanby mode
ON
Normal
※1
No pressure
Normal
Linear indication for the range of 0 to 30 ppm
Normal
ON
Normal Alarm
Normal
Alarm
Approx. 120 sec
After the pressure is kept for several seconds, the stanby mode is started.
The specified pressure is provided.
Normal
Auto operation mode
In the power-on status
Stop of fresh water inflow
Stop of inflow
No pressure
Alarm
Stanby mode
Segment indicator Indicator OFF
Valve terminal
valve relay
Solenoid
Compound alarm
Common to Specifications Trouble alarm
Status of equipment
Sample water pressure
Outage alarm
At occurrence of outage
Page. 20
4-3 Basic Operations (Timing Chart)
Page. 21
4-4 Indications and Functions at Operation
NOTE
●
This basic operation makes no difference between terminal base specification A and terminal base specification B.
4-4-1 Oil concentration indication ●
15ppm Bilge Alarm
11 12 13
14
----OperationStatus ---StandbyAUTO TEST
Oil Alam
PPM Stain of Detecter
Defect Alam
MemoryStatus MODEL
●
15 16
FOCAS-1800
17 18
Regardless of auto operation or test operation, the concentration value is indicated on the indicator 14 of the panel in real time after completion of warming-up. When the concentration value on the indicator exceeds the oil alarm point, the red lamp 17 (Oil Alarm) on the panel blinks and an oil alarm is output. When the indicator value goes down under the oil alarm point, the lamp goes out and the alarm is cleared. At this time, the time of outputting the oil alarm and the time of clearing the alarm are recorded on the memory card.
○
○
4-4-2 Relationship among concentration indication, alarm indication, relay contact, and REC terminal output In the option product of this equipment, the internal switch of alarm points should be changed over for operation in a river under strict regulations. At selection of an alarm point of 15 ppm (fixed in the standard product)
At selection of an alarm point of 5 ppm (only for the option product)
Oil concentration alarm contact
15 ppm
5 ppm
Full scale point
30 ppm (“30” blinks in the range of 30 to 40 ppm.)
15 ppm (“15.0” blinks in the range of 15 to 40 ppm.)
Concentration indication Measurement limit point
Indicated in an integer
Indication of up to the first decimal place
40 ppm
40 ppm
Linear indication
“30”blinks Lamp OFF Oil alarm lamp Lamp OFF Troublealarm lamp Linear indication Oil concentration indicator 20
1
2
Blinking “E02”error indication
Oil concentration alarm contact Full scale point Measurement limit point
REC output terminal[mA] 12 4 0
Blinking
Lamp OFF
Oil alarm lamp Troublealarm lamp Oil concentration indicator 20.00 REC output terminal[mA] 9.33 4.00 0
40 15 30 Oil concentration value [ppm]
Blinking Lamp OFF “15.0”blinks
Blinking “E02”error indication
Oil concentration alarm contact Full scale point Measurement limit point
5
40 15 Oil concentration value [ppm]
○
A 4-20 mA direct current is output from the REC terminal interlocking with the value indicated on the indicator 14 of the panel. When the value exceeds 30 ppm, the current output is fixed to 20 mA. In the standby mode or at occurrence of outage, no current is output. The allowable line resistance is 700 Ω/F.S or less. When the oil or trouble alarm lamp blinks, the relay contact is put into an alarm status.
4-4-3 Switching the alarm points (option) ■ ■
This is an option function. The equipment dedicated for 15 ppm is not provided with a selecting switch. The selecting switch adopts a lock system.
NOTE
●
If the alarm point is switched during operation (during oil concentration measurement), the function does not become effective at once. Set the standby mode and then start the operation.
Ⅱ 5ppm
15ppm
5ppm
Switching method
15ppm
Ⅰ
-1.
-2.
The alarm point of oil concentration can be switched to 15 ppm or 5 ppm according to the use. The switch is a lock-type toggle switch. While pulling the switch toward Ⅰ , bring down the lever Ⅱ .
○
○
Page. 22
4-5 Causing Fresh Water to Flow ■ ■ ■
This function causes fresh water to flow. When washing the sample water detection tube manually, this function is convenient for washing away the cleaner or washing solution. After causing fresh water to flow, the stain level of the sample water detection tube is indicated. Refer to Page 24, “4-7 Sample Water Detection Tube Stain Indicating Function” in this document. Use the fresh water equivalent to drinking water. If industrial water or circulating recycled water is used, the stain indicator may not function normally. ● ● ● ●
NOTE
●
○
When this function is actuated, “A01” lights on the indicator 14 of the panel and the system operation is recorded on the memory card. When the function is stopped, it is recorded that the trouble alarm has been cleared. When “E21” appears on the indicator 14 of the panel, fresh water is not supplied. Check the fresh water supply source. Apply pressure to supply fresh water at all times. At operation (during oil concentration measurement), this function is not actuated. Only the standby mode can function. When “auto operation” is selected and manual washing operations are performed by using this function in the standby mode, “auto operation” is not performed until the end of this function even if the specified pressure is applied to sample water.
○
4-5-1 Operating method Starting the function 1
2
○
Hold down the “Valve” switch 25 on the operating surface for 2 sec or more. When the function is started, release the switch. When the function is actuated, the lamp incorporated in the switch comes on. After fresh water flows for about 1 min, the function is automatically stopped. After that, measure the stain level of the detection tube. In about 1 min, the stain level is indicated. While this function is in operation, the “Washes-Valve” lamp 38 on the operating surface lights to indicate that the valve is in the “Open” status.
○
Stopping the function halfway 1
○
○
Press the “Valve” switch 25 on the operating surface. The lamp incorporated in the switch and the “Washes-Valve” lamp 38 on the operating surface go out and the function is stopped. When the function is stopped halfway, the stain level is not detected.
31 32 33 34 35 -----------Test operation ----------20mA Line 4mA OILDefect - Cut off Alarm Alarm
15ppm Bilge Alarm
11 12 13
14
----OperationStatus ---Standby AUTO TEST
Oil Alam
PPM Stain of Detecter
Defect Alam
MemoryStatus MODEL
17 18
36 37 38 39 --------Error Status -------Washing Drainage -Cap -Cap -----OperationStatus ----Water Oil -Valve -Valve
LCDContrast
30
15 16
Clock Adj.
Menu
Edit
FOCAS-1800 Auto POWER Operation Cleaning AUTO ON TEST
Zeroing
-----Washing ----Valve Washes
OFF
21 22 23
24 25 26
29 28 27
Page. 23
4-6 Using the Washing Unit (Option) DANGER ■
■ ■ ■
●
Do not touch the movable portion with a hand.
This is an option function and is not mounted for the standard specification. To perform washing in the standard specification, refer to Page 27, “5-1A Type without a Washing Unit (Standard Product)” in this document. This function is convenient for washing out stain in the sample water detection tube in the standby mode. After washing, the stain level of the sample water detection tube is automatically indicated. Refer to Page 24, “4-7 Sample water Detection Tube Stain Indicating Function” in this document. Use the water equivalent to drinking water as fresh water. If industrial water or circulating recycled water is used, the stain indicator may not function normally. ●
●
NOTE
● ●
○
When a washing operation is started, “A02” comes on the indicator 14 of the panel and the system operation is recorded on the memory card. When the operation is stopped, it is recorded that the trouble alarm has been cleared. When “E21” appears on the indicator 14 of the panel, fresh water is not supplied. Check the fresh water supply source. For an auto washing operation, air and fresh water must be supplied. Supply air and fresh water at all times. When “auto operation” is selected and manual washing operations are performed by using this function in the standby mode, “auto operation” is not performed until the end of this function even if the specified pressure is applied to sample water.
○
4-6-1 Operating method Starting the function 1
2
○
Hold down the “Washes” switch 26 on the operating surface for 2 sec or more. When the function is started, release the switch. When the function is actuated, the lamp incorporated in the switch comes on. After washing operation is performed for about 1 min, the function is automatically stopped. After that, measure the stain level of the detection tube. In about 1 min, the stain level is indicated. While this function is in operation, the “Washes-Valve” lamp 38 on the operating surface lights to indicate that the valve is in the “Open” status.
○
Stopping the function halfway 1
○
Press the “Washes” switch 26 on the operating surface. The lamp incorporated in the switch and the “Washes-Valve” lamp 38 on the operating surface go out and the function is stopped. When the function is stopped halfway, the stain level is not detected.
○
31 32 33 34 35 -----------Test operation ----------20mA Line 4mA Defect - Cut off OILAlarm Alarm
15ppm Bilge Alarm
11 12 13
14
----OperationStatus ---Standby AUTO TEST
Oil Alam
PPM Stain of Detecter
Defect Alam
MemoryStatus MODEL
17 18
36 37 38 39 --------Error Status -------Washing Drainage -Cap -Cap -----OperationStatus ----Water Oil -Valve -Valve
LCDContrast
30
15 16
Clock Adj.
Menu
Edit
FOCAS-1800 Auto POWER Operation Cleaning AUTO ON TEST
Zeroing
-----Washing ----Valve Washes
OFF
21 22 23
24 25 26
29 28 27
Page. 24
4-7 Sample Water Detection Tube Stain Indicating Function ■
This function indicates the current stain level of the sample water detection tube. This is a convenient function to know whether cleaning is necessary. Use the water equivalent to drinking water as fresh water. If industrial water or circulating recycled water is used, the stain indicator may not function normally.
■
●
NOTE ●
○
When the red lamp of “Stain of Detector” 15 on the panel comes on, the equipment cannot be operated. “E14” blinks on the indicator 14 on the panel and the oil alarm lamp 17 and trouble alarm lamp 18 also blink and an alarm is output. In this case, the sample water detection tube must be manually washed. The indication of sample water detection tube has no relation with the indication of oil concentration.
○
○
○
4-7-1 Stain indicating operation 1.
After the fresh water mode or washing mode is completed at “auto operation”, the stain level is automatically measured and indicated until a restart of operation. To manually indicate the stain level: For the type without a washing unit (standard product), press the “Valve” switch 25 on the operating surface. For the type with a washing unit (option product), press the “Valve” switch 25 or “Washes” switch 26 on the operating surface. In about 1 min after completion of the fresh water mode or washing mode, the stain level of the detection tube is indicated.
2.
○
○
○
4-7-2 Lamp ON status and meaning of each status 15ppm Bilge Alarm
Checking for necessity/non-necessity for cleaning
○
Make a judgment by the lamp ON color in “Stain of Detector” 15 on the panel.
a ○ b ○ c ○
Green LED ON ... The detection tube is clean.
11 12 13
14
---- Operation Status---Standby AUTO TEST
Oil Alam
PPM Stain of Detecter
Defect Alam
MemoryStatus
FOCAS1800
Yellow LED ON ... The detection tube is contaminated. Clean the detection tube. Red LED ON ... The detection tube is so contaminated that the oil concentration cannot be detected. A trouble alarm is output and the operation is stopped. Wash the detection tube manually.
MODEL
18
17
Stain of Detecter
a
b
15
c
4-8 Looking at the Clock Function and Precautions ■
For setting the clock, refer to Page 15, “3-5 Setting the Clock” in this document.
4-8-1 Clock function 1
○
Clock data is indicated on the liquid crystal display 30 on the operating surface as shown below.
Date Time 2
: :
Jan-01-2005 00:00:00
31 ----------- Test operation ------------------ Error Status -------Washing Drainage -Cap -Cap ----- Operation Status ----Water Oil -Valve -Valve
20mA Line 4mA
Notation: Upper row: Month-day-Gregorian year Lower row: Hour-minute-second If the liquid crystal display is hard to see, turn the knob 31 on the operating surface to adjust the contrast. Turning the knob counterclockwise increases the contrast of the liquid crystal display.
OIL Defect Alarm Alarm Cut off LCD Contrast
○
30 Clock Adj.
Auto POWER Operation Cleaning AUTO ON TEST
Menu
Zeroing
Edit
----- Washing ----Valve Washes
29 28 27
OFF
4-8-2 Precautions ● ● ● ●
Clock data is displayed in either standby mode or operation mode when any error or alarm is not output and any function is not operated. The clock incorporates a backup battery (CR2450) for outage. Its service life is about 2 years. For replacing the battery, refer to Page 34, “5-7 Method of Replacing the Backup Battery for Clock” in this document. When the clock is not set, “E98” blinks on the indicator 14 on the panel and a trouble alarm is output. Refer to Page 14, “3-2 Setting the Clock Battery” in this document. The maximum monthly difference of this clock is ±30 sec. Determine the inspection/re-setting intervals according to the in-ship specifications. Unless otherwise specified, we recommend performing inspection once a month.
○
Page. 25
4-9 Looking at the Operation Record ■
■
This function automatically records and refers to the start time and end time (including each alarm output/clearing time) of each operation status during equipment operation. Recorded data is displayed on the liquid crystal display 30 on the operating surface. For reading the data on operation record, the data for each status can be displayed and can be seen by switching the menu.
○
●
The record data of the Bilge discharge system must be stored for past 18 months as specified. At periodical inspection, an inquiry of data may be required. During operation (during oil concentration measurement), record data cannot be read. Loot at the record data in the standby mode. Conversely, while record data is being read (during access to record data), the operation mode cannot be started even if pressure is applied to sample water. After completion of the access, the operation mode is automatically started. The data that was recorded cannot be operated in any case. The record capacity of the memory card can cope with the data for about 110 months on the supposition that the Bilge discharge system is operated once a day and an oil/trouble alarm is output 4 or 5 times. That is, the capacity has a sufficient margin. (It depends on the frequency of alarm output.) If there is a large number of written data, data retrieval may take more time. The time to be recorded is the time of the equipment clock. The maximum monthly difference of this clock is ± 30 sec.
●
NOTE
●
● ●
4-9-1 Record data
○
TERM
■
●
Group
●
Status
When the “Menu” switch 29 on the operating surface is pressed, nine groups are displayed in sequence in the following order: 1. All Data Status → 2. AC Power → 3. Operation → 4. Oil Alarm → 5. Defect Alarm → 6. System → 7. Calibration → 8. Test → 9. Memory Capacity → Clock indication → 1. All Data Status → The above groups include various items. Each item is called status. For details, refer to the table on Page 26, “4-9-2 Group indication and contents of status.”
For reading the data of the operation record, the data for each group is displayed in a lump and can be confirmed according to the following procedure. 1. When the clock is indicated, press the “Menu” switch 29 on the operating surface. Then, the incorporated yellow lamp comes on. The total number of data recorded in the memory is indicated for 3 seconds and switched to Note 2.
○
Note. 1
ALL DATA Status XXXXX 2.
31 -------- Error Status -------Washing Drainage -Cap -Cap ----- Operation Status ----Water Oil -Valve -Valve
20mA Line 4mA
3.
30 Clock Adj.
Auto POWER Operation Cleaning AUTO ON TEST
Menu
Zeroing
Edit
----- Washing ----Valve Washes
Regarding the status and record time, the data is displayed beginning from the latest data.
Note. 2
AC Power OFF Jan-01-2005 00:00:00
----------- Test operation -----------
Defect OILAlarm Alarm Cut off LCD Contrast
Upper row: Group Lower row: Number of data
29
Upper row: Status Lower row: Record time
○
Turn the “Edit” knob 28 on the operating surface. When this knob is turned counterclockwise, the data is displayed in sequence beginning from the oldest record data. When the knob is turned clockwise, the data is displayed in sequence beginning from the latest data. If there is no data, the contents shown at Note 3 appear and are not changed by “Edit” dial 28 on the operating surface.
○
28 27
Note. 3
AC Power
Upper row: Group Lower row: Message
Not Find
OFF
4
○
To change the group, press the “Menu” switch 29 on the operating surface once again. When this switch is pressed 10 times, the lamp of the “Menu” switch 29 on the operating surface goes out and the clock indication reappears.
○
5.
At the last group 9, the memory consumption can be checked. In this menu, the display is not changed by the “Edit” switch 28 on the operating surface.
○
Note. 4
Memory Capacity xx[%]
Upper row: Group Lower row: Memory consumption
Page. 26
4-9 Looking at the Operation Record 4-9-2 Group indication and contents of status (The contents shown in Note 2 in the example are displayed.) ON, alarm output, or OFF or clear status function operation start status
Group indication (Menu display item) (The contents shown in Note 1 in the example are displayed.) The group indication continues for 3 sec and then switched to the status indication.
No.
Indication in the upper row of the liquid crystal display
No.
Indication in the upper row of the liquid crystal display
Menu. 1 ALL Data Status All record data is indicated.
All trouble alarm clearing Function error (other)
All status from 2 to 8 is indicated. ----FFH 37H Functional error_2 ---
Defect Alarm Release ---
Menu. 2 AC Power 01H
AC_Power ON
02H
AC_Power OFF
11H 13H
Test Operation ON Auto Power ON
12H 14H
Test Operation OFF Auto Power OFF
21H
Oil Alarm
22H
Oil Alarm_Release
Memory dismounted Full-scale over Artificial error Sensor system functional error Emergency stop Maintenance mode Sensor failure due to stain Memory capacity error Zero-point shift error Illegal operation error
--31H 33H 35H 39H 41H 43H 45H 47H 49H
--Full-scale Over Artificial error Functional error_1 Scram Maintenance mode Stain Error Memory Capacity Err. Zero point sift Err Injustice use error
30H -------------------
Memory Error -------------------
Warming up System operation System error
61H 63H 65H
Warming Up System Operation System Error
-------
-------
Calibration operation Calibration error Calibration test Zero-point compensation
71H 73H 81H 83H
Calibration Operation Calibration Error Calibration Test Zero Offset
---------
---------
4-20 mA test Oil alarm test Trouble alarm test Outage alarm test
51H 53H 55H 57H
Test 4-20mA Test Oil Test Defect Test Cutoff
---------
---------
The primary power ON/OFF time is indicated.
Menu. 3 Operation The time of operation status (start or stop) is indicated.
Test operation Auto operation
Menu. 4 Oil Alarm The time of oil alarm output or clearing is indicated.
Menu. 5 Defect Alarm
The time of trouble alarm output is indicated.
Menu. 6 System The time of system operation or error related to externally supplied running water is indicated.
Menu. 7 Calibration The time of calibration or calibration error is indicated.
Menu. 8 TEST The time of alarm operation test or 4-20 mA test is indicated.
Menu. 9 Memory Capacity The whole memory consumption is indicated.
Reference
●
When writing data, the information shown at right is indicated for 3 sec.
Memory Capacity xx [%]
Writ 00H
: :
Jan-01-2005 00:00:00
The status number is indicated in left side of the lower row.
Page. 27
5. Equipment Inspection, Servicing, and Maintenance 5-1 Inspection and Cleaning Procedures ■
For inspection of the sample water detection tube, refer to Page 22, “4-5 Causing Fresh Water to Flow or Page 23, “4-6 Using the Washing Unit (Option)” in this document. Use the water equivalent to drinking water as fresh water. If industrial water or circulating recycled water is used, the stain indicator may not function normally.
■
DANGER
●
When cleaning the sample water detection tube of this equipment, be sure to turn off the primary power supply beforehand.
●
Do not apply excessive force to the sample water detection tube during cleaning. The sample water detection tube may be damaged, resulting in an operation failure. For cleaning, use the dedicated cleaning liquid or fresh water (equivalent to drinking water). If an organic solvent or alcohol-base solvent is used for cleaning, the oil concentration may not be measured correctly, thereby causing trouble to the operation. When mounting the washing cap again, check whether the O-ring is out of position. If the washing cap is mounted with the O-ring being out of position, water leakage or failure will be caused. During the inspection or cleaning work, do not supply sample water or fresh water. Be careful that the parts attached to the equipment will not get lost. After using the cleaning brush, wash it carefully and keep it clean. When the brush becomes dry, it becomes hard. When the brush gets wet, it becomes soft. As screws for the upper lid, one of 3 screws is a long screw for a structural reason. Do not remove the screws from the upper lid. Take care not to drop the removed washing unit because it is heavy.
● ●
CAUTION
● ● ● ●
●
5-1A Type without an Washing Unit (Standard Product) 5-1A-1 Cleaning the sample water detection tube
c
b Upper lid (Washing cap)
Drainage port Drainage cap
p 1. 2. 3. 4. 5.
e Washing brush Washing liquid
f
6. 7.
Sample water detection tube
8.
Prepare the attached screwdriver, washing brush, and washing liquid. Shut off the primary power supply. Remove the 3 screws b . Pull up the upper lid toward c to remove it. Loosen the 2 drainage screws p and bleed the detection tube of water. Return the drainage to its initial position and tighten the screws securely. Put the dedicated washing liquid into the container cap. (Approx. 6 cc) For washing, put 12 cc (equivalent to 2 caps) of this liquid into the sample water detection tube. Move the washing brush in the directions of e and f for washing.
○
○ ○
○
○
5-1A-2 Procedure to be executed after the end of cleaning 1. 2.
○
Tighten the 3 screws b to set the upper lid again. (Tighten the screws securely.) Turn on the primary power supply. At this time, if “E23” or “E24” blinks on the indicator 14 on the panel and a trouble alarm or oil alarm is output, the washing cap or drainage cap is not set properly. Check them again.
○
5-1A-3 Checking a cleaning effect 1. 2.
Supply fresh water. Hold down the “Valve” switch 25 on the operating panel at least for 3 seconds. After the fresh water mode is completed, check the stain level on the “Stain of Detector” 15 on the panel. Refer to Page 22, “4-5 Causing Fresh Water to Flow” and Page 24, “4-7 Sample Water Detection Tube Stain Indicating Function” in this document.
○
○
Page. 28
5-1 Inspection and Cleaning Procedures 5-1B Type with a Washing Unit (Option Product) 5-1B-1 Cleaning the sample water detection tube
Ⅰ
Drainage port
Close
Drainage cap
p c
1.
a
2. 3.
d 4. 5. 6.
Cylinder
b
Prepare the attached screwdriver, washing brush, and washing liquid. Shut off the primary power supply. Set down the air valve in the lower part of this equipment in the direction of Ⅰ . Then, air supply is stopped. Remove the 2 hexagon nuts a . Remove the 3 screws b . Holding the cylinder with both hands, raise it slowly in the direction of c by shaking it lightly in the direction of d to remove it. Loosen the 2 drainage screws p to bleed the sample water detection tube of water. Return the drainage to the initial status and tighten the screws securely.
○
○
○
7. 8.
9.
e 10.
Washing brush Washing liquid
○
○
○
Put the dedicated washing liquid into the container cap. (Approx. 6 cc) For washing, put 12 cc (equivalent to 2 caps) into the sample water detection tube. Move the washing brush in the directions of e and f for washing.
○
○
f
Sample water detection tube
5-1B-2 Procedure to be executed after the end of cleaning 1.
c ○
Holding the washing unit in the direction of with both hands, insert it into the sample water detection tube by shaking it lightly in the direction of d . Tighten the 3 screws b again. (Tighten the screws securely.)
○
○
○
2.
Tighten the 2 hexagon nuts a .
3.
Operate the air valve to supply air. Raise the valve in the direction of Ⅱ to start to supply air. Turn on the primary power supply. At this time, if “E23” or “E24” blinks on the indicator 14 on the panel and a trouble alarm or oil alarm is output, the washing cap or drainage cap is not set properly. Check them again.
4.
○
Open
○
Ⅱ
5-1B-3 Checking a cleaning effect 1. 2.
Supply fresh water. Hold down the “Valve” switch 25 on the operating panel at least for 2 seconds. After the fresh water mode is completed, check the stain level on the “Stain of Detector” 15 on the panel Refer to Page 22, “4-5 Causing Fresh Water to Flow” and Page 24, “4-7 Sample Water Detection Tube Stain Indicating Function” in this document.
○
○
Page. 29
5-2 Cleaning the Filter ■ ■
This filter is intended to prevent large impurities from entering the sample water detection tube. The filter section will cause clogging. It should be periodically cleaned.
CAUTION
● ● ● ● ●
Note that when removing the filter, the internal remaining water may flow out. Do not clean the filter during operation. Be sure to stop water in each line of sample water and fresh water during the cleaning work. The seal washer gets out of position easily. Take care not to lose the removed parts. A seal washer is inserted between the filter unit and the sensor unit. When installing the filter again, be sure to insert the seal washer.
5-2-1 Preparation 1. 2.
Shut off the primary power supply. Prepare a tool equivalent to M16 and a resin brush.
5-2-2 Cleaning procedure 1. 2. 3. ●
Remove the filter by turning the filter unit in the direction of g with the tool equivalent to M16. Clean the filter section with the resin brush. Install the filter securely by turning the filter unit in the direction of i . Clean the fresh water (for washing) filter in the same way.
○ ○
g Filter section
Open
i Close
Seal washer Filter unit 31 32 33 34 35
36 37 38 39
-----------Test operation ------------------Error Status -------Washing Drainage -Cap -Cap -----OperationStatus ----Water Oil -Valve -Valve
20mA Line 4mA
15ppm Bilge Alarm
11 12 13
14
----OperationStatus ---Standby AUTO TEST
Oil Alam
PPM Stain of Detecter
Defect Alam
MemoryStatus MODEL
17 18
Defect OILAlarm Alarm Cut off LCDContrast
30
15 16
Clock Adj.
Menu
Edit
FOCAS-1800
Auto POWER Operation Cleaning AUTO ON TEST
Zeroing
-----Washing ----Valve Washes
OFF
21 22 23
24 25 26
29 28 27
Page. 30
5-3 Zero-point Compensation ■
It is important to clean the sample water detection tube periodically. In some cases, however, a correct value may not be displayed as a result of arithmetic operations for oil concentration because invisible oil films or foreign substances are attached to the wall surface of the detection tube after the elapse of years. This function is intended to perform compensation to avoid this trouble. ●
Important ● ●
CAUTION
●
●
NOTE
●
This is a very sensitive measuring equipment to detect a concentration value of ppm order. Accordingly, be sure to use the water equivalent to drinking water or mineral water as fresh water that is used as a basis for zero-point compensation. (A single PET bottle of 500 ml is enough.) If seemingly clean water, industrial water, or seawater is used, zero-point compensation cannot be performed. Do not use these types of water. Industrial water or circulating recycled water contains lots of particles that cannot be visually recognized. Using these types of water will cause a compensation error and result in an error value about the stain level of the sample water detection tube. If zero-point compensation is performed with any water other than the specified fresh water, the operation of this function cannot be guaranteed. Before starting zero-point compensation, clean the inside of the sample water detection tube. Do not perform zero-point compensation without this cleaning. Refer to Pages 27 and 28, “5-1 Inspection and Cleaning Procedures” in this document. This function has not effect to clean the sample water detection tube. For indication of the stain level of the sample water detection tube, the physical stain amount is measured and then this zero-point correcting function cancels the stain amount. However, this function never improves the stain level of the sample water detection tube. Before performing a washing operation and injecting mineral water, shut off the primary power supply and close the cabinet of this equipment. This function does not operate during oil concentration measurement.
5-3-1 Preparation 1. 2. 3. 4.
5. 6. 7. 8. 9. 10. 11.
12.
It is necessary to inject mineral water into the sample water detection tube. Close the nearest valve in the fresh water line section in which fresh water is caused to flow into this equipment. The valve of this equipment cannot be stopped independently. Shut off the primary power supply. Remove the upper lid. For the type with a washing unit, stop air by cock and remove the cylinder. Refer to Pages 27 and 28, “5-1 Inspection and Cleaning Procedures” in this document. Remove the drainage cap and then bleed the sample water detection tube of residual water. After bleeding, set the drainage cap in the initial status. Clean the inside of the sample water detection tube with the dedicated washing liquid. Remove the drainage cap, bleed the sample water detection tube of washing water, flush this washing liquid with mineral water. Set the drainage cap in the initial status. Inject mineral water into the sample water detection tube up to its full level. Set the upper lid or cylinder again and tighten screws securely. For the type with a washing unit, operate the clock to pass air. Turn on the primary power supply. Hold down the “Valve” switch 25 on the operating surface at least for 2 seconds. The fresh water mode is started. * Unless the valve of the fresh water line is closed, the valve of this equipment is opened to admit washing water, so that the injected mineral water will be discharged. In 120 seconds, confirm the detection tube stain indicator 15 on the panel. Refer to Page 24, “4-7 Sample Water Detection Tube Stain Indicating Function” in this document. Green lamp ON: Compensation can be performed. We recommend cleaning the side of the sample water detection tube with the dedicated washing liquid attached to this equipment before starting zero-point compensation. Yellow lamp or red lamp ON: Be sure to perform washing manually with the dedicated washing liquid attached to this equipment before starting compensation referring to Pages 27 and 28 , “5-1 Inspection and Cleaning Procedures” in this document.
○
○
5-3-2 Operating procedure for zero-point compensation 1. 2. 3.
○
○
4.
5.
○
Confirm that the equipment is in the standby mode and that the green lamp lights in the detection tube stain indicator 15 on the panel. Press the “Zeroing” switch 24 on the operating panel continuously for 3 seconds or more. Zero-point compensation is automatically performed. After completion of the compensation, the equipment is put to the standby mode again. A trouble alarm or oil alarm is output. “000” comes on on the indicator 14 on the panel. The oil alarm lamp 17 or trouble alarm lamps 18 blinks and the lamps of the “Power” switch 21 and “Zeroing” switch 24 on the operating panel come on. “000” blinks on the indicator 14 on the panel and compensation is performed. After completion of the compensation, “End” appears on the indicator 14 on the panel and the equipment is put to the standby mode. The time required for compensation is about 2 minutes. After completing the above operations, be sure to open the valve of the fresh water line. With the valve closed, auto operation cannot be performed.
○
○
○
○
○
○
5-3-3 Stopping zero-point compensation halfway 1.
○
Press the “Zeroing” switch 24 on the operating panel. “End” appears on the indicator 14 on the panel and the oil alarm lamp 17 or trouble alarm lamp 18 goes out and the alarm is cleared. After that, the equipment is put to the standby mode. When the compensation is stopped halfway, zero-point compensation is not executed and the previous status is kept.
○
○
○
Page. 31
5-4 Replacement Time of Desiccating Agent and Procedure for Replacing It ■
The desiccating agent can remove moisture in the sample water detection tube and protect the detection tube against a blur due to condensation.
CAUTION
● ● ● ●
●
Be sure to replace silica gel with tweezers. After replacing with new silica gel, restart the operation in 10 minutes or more. Take care not to get the new silica gel wet. At replacement, an O-ring is installed on the counter side of the silica gel indicator cap. When the O-ring is damaged or not installed, the silica gel has no effect. For a reserve of silica gel, contact the distributor or our sales department in advance.
5-4-1 Inspection 1.
Look in at the silica gel indicator. ■ When the color in the indicator is blue, replacement is not required. ■ When this color has changed into pink, replacement is required because the silica gel has absorbed moisture.
Silica gel indicator window
5-4-2 Preparation for replacement 1.
Prepare new silica gel for replacement.
2.
Prepare an adjustable angle wrench, tweezers, and other tools required for replacement
5-4-3 Replacing procedure 1. 2. 3. 4.
Turn the hexagon cap of the silica gel indicator in the direction of a with a proper tool such as adjustable angle wrench. Take out silica gel from the silica gel indicator with tweezers. (Note that silica gel may be attached to the cap side.) Take out a new set from the sealed bag with tweezers and insert it into the silica gel indicator with its light blue portion upward. Tighten the hexagon cap of the silica gel indicator in the direction of b securely with a proper tool such as adjustable angle wrench.
○
Open When unpacked: Silicagel Light blue
○
O ring
a
b
Close
Page. 32
5-5 Alarm Operation Test 5-5-1 Preparation for testing 1.
2.
○
○
Operate the “Operation” switch 22 on the operating panel to start “test operation” and then the “Power” switch 21 on the operating panel to switch the current mode into the operation mode for inspection. However, while an oil alarm or trouble alarm is output, each test switch cannot be operated. Confirm that the lamps 11 , 17 and 18 on the panel are OFF and that one of the lamps 12 and 13 is ON.
○○
●
NOTE
○
○
○
This function is used for inspection or operation check of each alarm contact of oil, trouble, and outage. The function is operated when the concentration is below 15 ppm during oil content measurement at “auto operation” or “test operation.” It cannot be operated in the standby mode.
5-5-2 Test procedure for each alarm operation For checking the oil alarm operation 1. 2.
3.
○
Hold down the “Oil Alarm” switch 32 on the operating surface. An oil alarm is output in 2 sec. After the alarm is output, the “Oil Alarm” lamp 17 on the panel blinks and “15” blinks on the indicator 14 on the panel. At the same time, the relay contact is operated to switch the current status over to the alarm status. During checking, hold down the “Oil Alarm” switch 32 on the operating panel. To end the test, release the “Oil Alarm” switch 32 on the operating panel.
○
○
○
○
For checking the trouble alarm operation 1 2
3
○
Hold down the “Defect Alarm” switch 33 on the operating surface. A trouble alarm is output in 2 sec. After the alarm is output, the “Defect Alarm” lamp 18 and “Oil Alarm” lamp 17 on the panel blink and “dEF” blinks on the indicator 14 on the panel. At the same time, the relay contact is operated to switch the current status over to the alarm status. During checking, hold down the “Defect Alarm” switch 33 on the operating panel. To end the test, release the “Defect Alarm” switch 33 on the operating panel.
○
○
○
○
○
For checking the outage alarm operation 1 2
3
○
Hold down the “Cut off” switch 34 on the operating surface. A trouble alarm is output in 2 sec. After the alarm is output, “oFF” blinks on the indicator 14 on the panel. At the same time, the relay contact is operated to switch the current status over to the alarm status. During checking, hold down the “Cut off” switch 34 on the operating panel. To end the test, release the “Cut off” switch 34 on the operating panel.
○
○
○
31 32 33 34 35
36 37 38 39
-----------Test operation ------------------Error Status -------Washing Drainage -Cap -Cap -----OperationStatus ----Water Oil -Valve -Valve
20mA Line 4mA
15ppm Bilge Alarm
11 12 13
14
----OperationStatus ---Standby AUTO TEST
Oil Alam
PPM Stain of Detecter
Defect Alam
MemoryStatus MODEL
OILDefect Alarm Alarm Cut off LCD Contrast
30
15 16
Clock Adj.
FOCAS-1800
Menu
Edit
17 18 Auto POWER Operation Cleaning AUTO ON TEST
Zeroing
-----Washing ----Valve Washes
OFF
21 22 23
24 25 26
29 28 27
Page. 33
5-6 Inspection of 4-20 mA (REC Terminal Output) ■
The REC terminal outputs an oil concentration value linearly by 4-20 mA current. This value can be recorded externally. This equipment is provided with a line test switch. The external contactor can be inspected and checked from the REC terminal by operating this switch. ● ●
●
NOTE ● ●
While this function is operated, an alarm is output and recorded onto the memory. Perform this inspection in the standby mode. It cannot function during operation (oil content measurement). When the switch position is set to “4 mA” or 20 mA” and kept in this status during operation (oil content measurement), a fixed current of “4 mA” or “20 mA” is output after completion of the oil content measurement. Be sure to reset the switch to “Line.” At “auto operation”, when the standby mode is switched to the operation mode during testing, “E05” appears on the indicator 14 on the panel. At this time, the operation is regarded as an error and operation (oil content measurement) is disabled. When pressure is applied to sample water, reset the line test switch 35 on the operating surface to “Line” (middle position) to start the operation (oil content measurement). During inspection of 4-20 mA, an a trouble alarm is output. “---” appears on the indicator 14 on the operating panel and the oil or trouble lamp 17 or 18 blinks. After completion of the inspection, be sure to reset the line test switch 35 on the operating surface to “Line” (middle position).
○
○
○
○ ○
○
5-6-1 Test procedure Inspection of “4 mA” (equivalent to oil concentration “0 ppm”) 1. 2.
3.
○
Set the switch 35 on the operating surface to “4 mA” (lower side). To the REC terminal, 4 mA is forcibly output in fixed form. “4 mA Fixed” appears on the liquid crystal display 30 on the operating surface.
○
4-20mAoutput 4mA
Fixed
4-20mAoutput 20mA
Fixed
○
After completion of the inspection, reset the switch 35 on the operating surface to “Line” (middle position).
Inspection of “20 mA” (equivalent to oil concentration “30 ppm”) 1. 2.
3.
○
Set the switch 35 on the operating surface to “20 mA” (upper side). To the REC terminal, 20 mA is forcibly output in fixed form. “20 mA Fixed” appears on the liquid crystal display 30 on the operating surface.
○
○
After completion of the inspection, reset the switch 35 on the operating surface to “Line” (middle position).
35 15ppm Bilge Alarm
11 12 13
14
----OperationStatus ---Standby AUTO TEST
Oil Alam
PPM Stain of Detecter
Defect Alam
MemoryStatus MODEL
20mA Line 4mA
----------- Test operation ----------20mA Line 4mA OILDefect - Cut off Alarm Alarm
-------- Error Status -------Washing Drainage -Cap -Cap ----- Operation Status ----Water Oil -Valve -Valve
LCD Contrast
15 16
30
FOCAS-1800 Clock Adj.
17 18 Auto POWER Operation Cleaning AUTO ON TEST
OFF
Menu
Zeroing
Edit
----- Washing ----Valve Washes
Page. 34
5-7 Method of Replacing the Backup Battery for Clock ■ ■
This is a backup battery for the internal clock against outage. The battery life is about 2 years. If the ambient temperature is above 20°C, the battery life will be shorter. ● ●
During operation (standby mode or operation mode), do not perform this replacement. When starting replacement, be sure to shut off the primary power supply beforehand. Do not use any battery other than the specified one.
The applicable battery is the coin-shaped manganese dioxide lithium battery, model “CR2450.” ●
CAUTION
● ● ●
When the battery is removed, the clock is reset. After replacing the battery, be sure to adjust the time. Refer to Page 15, “3-5 “Setting the Clock” in this document. If the battery is dropped into this equipment, be sure to remove it. When the battery has been removed, do not turn on the primary power supply. Be sure to replace the battery before it is used up. If the equipment is operated with a consumed battery (defective battery), the clock is reset at occurrence of outage. In this case, “E98” blinks on the indicator 14 on the panel and a trouble alarm and an oil alarm are output, disabling equipment operation. The battery is covered with metal. Remove the battery without touching peripheral mounted electronic parts. The regulations on the disposal of used batteries varies depending on the nation and region. Observe the regulations specified in the disposal place. For replacement, use a new battery. Insert the battery securely until its battery holder is locked.
○
● ● ● ●
5-7-1 Preparation 1. 2. 3.
Shut off the primary power supply source of this equipment. For removal, prepare the attached tweezers. For replacement of the battery, prepare a coin-shaped manganese dioxide lithium battery, model “CR2450.”
Battery holder Button battery CR2450
k m u
5-7-2 Removing the battery 1.
○
○
Insert the tweezers from the space of the battery holder k and push it in the direction of u . Then, push it out in the direction of m .
○
5-7-3 Installing the battery 1.
Prepare a new battery.
2.
Insert the new battery from the battery holder guide and push it in the direction of n to lock the battery. Turn on the primary battery. “E98” blinks on the indicator 14 on the panel and a trouble alarm and an oil alarm are output.
3.
4.
○
○
Adjust the clock accurately. After this adjustment, the alarms are cleared. Refer to Page 15, “3-5 Setting the Clock” in this document.
Take care about the polarity.
Front side: Positive electrode
n Rear side: Negative electrode
Page. 35
5-8 Replacement Time of Memory and Procedure for Replacing It ■
■
■
■
The operation record function can store the operation record of the Bilge discharge system for past 18 months. To use the memory effectively, the frequency of memory card replacement can be reduced by overwriting older data over past 18 months or in other ways. The record capacity of the memory card can cope with the data for about 110 months on the supposition that the Bilge discharge system is operated once a day and an oil/trouble alarm is output 4 or 5 times. That is, the capacity has a sufficient margin. (It depends on the frequency of alarm output.) When reaching the write enable limit of the memory capacity, the equipment operation is stopped, disabling the operation of the Bilge discharge system. For the user to operate the system without anxiety, the equipment is provided with an indicator that permits monitoring the amount of data written on the memory at a glance. The operation record about the Bilge discharge system for the period of 18 months beginning from the present time must be stored as specified.
Important
●
If the memory is out of place or no record capacity is available, the operation is stopped.
●
The memory card mounted in this equipment is designed to provide a high efficiency that permits overwriting older data over past 18 months. If the memory consumption of the data within the period of 18 months exceeds 80% because the frequency of operation or the frequency of alarm is high, the yellow lamp of “Memory Status” 16 on the panel comes on. At this time, replace the memory card with a new one. The memory card is separately available. Please contact your nearest distributor or our sales department.
NOTE
○
5-8-1 Checking the memory consumption 1. 2.
15ppm Bilge Alarm
The memory consumption can be checked on the “Memory Status” indicator on the panel of this equipment. This function always indicates the memory consumption in the power ON status (standby mode or operation mode).
14
---- Operation Status ---Standby AUTO TEST
Oil Alam
Defect Alam
PPM Stain of Detecter
MemoryStatus
FOCAS1800
MODEL
18
17
MemoryStatus
a
b
16
c
○
Contents of each indicating LED (“Memory Status” 16 on the panel)
○ ○
Green LED a ON Yellow LED b ON
The memory has a free capacity. Continue to use it. The memory consumption exceeds 80%. The memory card must be replaced. No free capacity is available and data cannot be recorded. “E03” appears on the indicator 14 on the panel and the oil alarm and trouble alarm lamps 17 and 18 blink. In this case, an alarm is output and the equipment operation is stopped. ■ With the red LED ON, replace the memory card. The Bilge discharge system cannot be operated. The memory card is not mounted. “E32” appears on the indicator 14 on the panel and the oil alarm and trouble alarm lamps 17 and 18 blink. In this case, an alarm is output and the equipment operation is stopped. ■ Insert the memory card completely until it is locked.
○
○
Red LED c ON
○○ ○
LEDs a , b , and c blinking
○
○
○
○
○
5-8-2 Preparation for replacing the memory card 1. 2.
Shut off the primary power supply source. Confirm that all the lamps on the panel are OFF. At this time, each alarm of outage, trouble, and oil is output. Prepare a new memory card for replacement. (The spare memory card for replacement is separately available.)
●
WARNING
CAUTION
● ● ●
Before starting the replacement work, shut off the supply power. If the memory is removed and mounted with the primary power supply ON, memory elements may be damaged or get out of order. In this case, data cannot be read out permanently. Do not touch the edge of the memory card. The memory card is easily affected by static electricity and damaged permanently. Discharge static electricity before starting the work. Use the memory card only for this equipment. Do not insert any other card. A failure will be caused.
Page. 36
5-8 Replacement Time of Memory and Procedure for Replacing It 5-8-3 Removing and mounting the memory Removing the memory card 1. Push the memory card in the direction of ○ Ⅰ . The memory card is pushed out slightly in the direction of Ⅲ . 2. Holding the portion of Ⅱ with a hand, pull out the memory card in the direction of Ⅲ .
○ ○
○
Notch
Ⅱ Ⅰ Ⅲ
Mounting the memory 1. Insert the memory card in the direction of ○ Ⅰ with its notch inward and the edge (gold-plated portion) downward. 2. 3.
When the memory card is inserted to the innermost part, it rebounds a little. At this time, it is locked. Holding the portion of Ⅱ , try to pull it out in the direction of Ⅲ to confirm that it cannot be pulled out.
Ⅱ
○
○
5-8-4 Storing the memory card 1.
Put the memory card in the uncharged bag (bag in which the memory card for replacement was packed) and then store it carefully for 18 months or more after the date of replacement. In 18 months after the date of replacement, all the memory area can be used again.
Important
●
Confirmation of operation record may be required as specified. At this time, if the memory card is within 18 months after the replacement, replace the memory card with the previous memory card for this confirmation.
Page. 37
5-9 Replacing the Fuse ■
The fuse is provided with a protective function for this equipment and external connected equipment against an overcurrent. ●
DANGER ●
WARNING
CAUTION
There are two types of fuse for this equipment and external equipment, of which rated values are different. Replace these fuses correctly. Inserting a fuse of incorrect rated value may cause deposition to relay contacts or cause a failure of connected equipment, resulting in trouble in the operation of the Bilge discharge system. Do not perform operations in the power ON status. Be sure to shut off the primary power supply before starting the operations.
●
Do not use any other fuse than the specified one.
●
At normal use, the fuse will not blow out. If the fuse has blown out, trouble may have occurred in this equipment or external connected equipment. Clear up the cause and then replace the fuse. Do not turn the cap of the fuse holder with a bladed screwdriver. Damage will occur. Be sure to remove or install the fuse with a hand.
●
5-9-1 Replacing procedure 1. 2.
20mm
Shut off the primary power source. Prepare the fuse for replacement. 5φ 20 mm ceramic tube type for this equipment, 250 V, 3 A ○ 2 5φ 20 mm glass tube type for external equipment, 250 A, 2 3 A○
Indication of rated value 3A 250V 2A 250V
Φ5 Fine wire
3A for this equipment
Removing the fuse 1. 2. 3.
2A for external equipment
While pushing the fuse holder from above with the thumb, turn it in the direction of Ⅰ . Remove it in the direction of Ⅱ .
○
○
Pull out the fuse from the cap of the fuse holder.
2 3 Fuse
Installing the fuse 1. 2. 3.
Insert the fuse into the cap of the fuse holder. Put the cap in which the fuse was inserted into the fuse holder body. While pushing the cap with thumb, turn it in the direction of Ⅲ until it is stopped.
4.
Confirm that the cap of the fuse holder does not get out of place.
○
Ⅱ
Ⅲ Close
Ⅰ Open
Indication of rated value 1.
The rating is carved on the metal portion of each fuse.
Checking for blow-out 1. 2.
The internal fuse wire of the glass tube can be visually checked. However, make a continuity test across both ends with a tester to make sure of it. The ceramic tube does not permit a visual check. Be sure to make a continuity test across both ends with a tester.
5-10 Operating the Reset Switch ■
If normal operation cannot be performed because of an equipment fault, this function resets the system forcibly for a recovery.
Important
NOTE
●
When the reset switch is pressed, the data on operation record is not lost. The data can be held.
●
Pressing the reset switch cannot recover an error. Remove the cause of the error. For a measure to be taken for each error, refer to Pages 38 and 39, “6-1 Indications by Self-diagnostic Function and Taking Measures” in this document.
5-10-1 Operating the reset switch 1.
2.
There is a small button (orange or yellow) in the right oblique part (see the figure at right) of the control board. Pressing this button resets the system. When the reset switch is pressed, each alarm of outage, trouble, and oil is put to an alarm status. When the reset switch is released, the equipment is put to the standby mode. When the auto operation mode is selected and pressure is applied to sample water, the equipment is put to the operation mode after warming up.
Page. 38
6. Error Codes of Self-diagnostic Function ■
■
This equipment is provided with a self-diagnostic function. At occurrence of equipment trouble, the equipment indicates an error and outputs a trouble alarm, and also is capable of locating the faulty portion. As error indication, “Exx” (xx: numeral) blinks on the indicator 14 on the panel. At occurrence of equipment trouble, the “Oil Alarm” lamp 17 and the “Defect Alarm” lamp 18 on the panel blink.
○
○
15ppm Bilge Alarm
11 12 13
○
14
---- Operation Status ---Standby AUTO TEST
Oil Alam
PPM Stain of Detecter
Defect Alam
MemoryStatus
15 16
FOCAS1800
MODEL
17
18
6-1 Indications by Self-diagnostic Function and Taking Measures Group 1
E01 E02 E03 E04 E05
Errors related to normal operation ■ Cause of alarm ● Reason for regulation ● Clearing measure ■ Cause of alarm ● Reason for regulation ● Clearing measure ■ Cause of alarm
Mixed foreign substances equivalent to 120 ppm of oxidized iron was detected in the sample water, so the operation was stopped. The sample water is water of very high concentration. The concentration value exceeds the measurement range. So, return the sample water to the Bilge tank. Make it clean by re-treatment. A flow-in over 40 ppm of oil concentration was detected, so the operation was stopped. When the oil concentration is over 40 ppm, it is over the measurement limit of this equipment, so that measurement cannot be performed. Since the concentration value exceeds the measurement range, return the water to the Bilge tank. Make it clean by re-treatment. The memory of the recorder is full and data cannot be recorded any more. stopped.
So the operation was
● Reason for regulation
It is put under an obligation to keep the operation record data for past 18 months as specified.
● Clearing measure
Replace the memory card.
■ Cause of alarm
The operation was stopped in an emergency by the “Power” switch in the auto operation mode.
Keep the replaced card carefully for 18 months after the date of replacement.
○
1.
Press the “Power” switch 21 on the operating surface once again. When no pressure is applied to sample water, the operation mode is returned to the standby mode.
● Clearing measure
2.
When the specified pressure is applied to sample water, the lamp of the “Power” switch 21 blinks. At this time, press the “Power” switch 21 on the operating surface once again. The operation will be restarted after warming up.
■ Cause of alarm ● Reason for regulation
As the operating conditions were satisfied in the status where 4 mA or 20 mA was forcibly output by the “Line” test switch, a trouble alarm was output. To prevent the equipment from proceeding to another operation while 4 mA or 20 mA is output. When auto operation is selected:
● Clearing measure
When test operation is selected:
○
○
Return the “Line” test switch to Line (middle position) to clear the alarm. Return the “Line” test switch to Line (middle position) to clear the alarm. After clearing the alarm, the standby mode is held until the “Power” switch is pressed again.
Group 2
E12
Sensor unit errors ■ Cause of alarm
The sensor board in the sensor unit becomes faulty.
● Clearing measure
Press the “Power” switch 21 on the operating surface to temporarily clear the trouble alarm. if trouble alarm “E12” reoccurs, it is judged that this equipment is faulty.
■ Cause of alarm
E13 E14
● Clearing measure
○
However,
A faulty operation was caused by condensation in the sensor unit. ● Replace the desiccating agent (silica gel) of the detector. Condensation will disappear after a while. For the replacing procedure, refer to Page 31, “5-4 Replacement Time of Desiccating Agent and Procedure for Replacing It” in this document. ● Shut off the primary power supply and bleed the remaining water in this product and make it dry completely. For the drainage method, refer to Pages 27 and 28, “5-1 Inspection and Cleaning Procedures” in this document.
■ Cause of alarm ● Reason for regulation
The equipment cannot be operated correctly because the sample water detection tube is contaminated. The regulation is intended to keep the performance.
● Clearing measure
Wash the sample water detection tube manually with a reserve of dedicated washing liquid. Close the washing cap and the drainage cap firmly and press the “Valve” switch 25 on the operating surface or the “Washes” switch 26 on the operating surface for the type with a washing unit. If the stain level is improved, the equipment will be returned to the standby mode. If the stain level is not improved, “E14” is continuously indicated. At this time, wash the sample water detection tube manually again.
○
○
If the fresh water injected in the sample water detection tube is seawater or recycled water, this error may occur. Use the water equivalent to mineral water or drinking water.
Page. 39
6-1 Indications by Self-diagnostic Function and Taking Measures Group 3
Errors due to operation errors
E21 E22 E23 E24 Group 4
● Clearing measure
Fresh water does not flow in for auto washing or the function that uses fresh water. Because this may cause trouble to equipment operation, it was stopped. Cause fresh water to the sample water detection tube. (Apply the specified pressure.)
■ Cause of alarm
The performance maintenance setting portion was released.
● Reason for regulation
When the seal is cancelled, this is an illegal action. Do not cancel the seal. This is recorded onto the memory. be maintained.
■ Cause of alarm
● Warning ■ Cause of alarm
The washing cap is not installed correctly.
● Clearing measure
Close the washing cap securely.
■ Cause of alarm
The drainage cap is not installed correctly.
● Clearing measure
Close the drainage cap securely.
(The seal was cancelled.) The performance of this equipment cannot
For this reason, the operation was stopped. For this reason, the operation was stopped.
Operating condition errors
E31 E32 Group 5
● Clearing measure ■ Cause of alarm
The ambient temperature of the installation place or the temperature of the water that flows into the sample water detection tube exceeds the specified temperature. For this reason, the operation was stopped. Use the equipment within the operating temperature range. The memory card of the recorder is not mounted. The operation was stopped.
● Clearing measure
Insert the memory card completely and confirm that it is locked.
■ Cause of alarm
Internal hardware errors
E91 E98 E99
■ Cause of alarm
■ Cause of alarm
A sensor unit fault was detected, so the operation was stopped. The connecting cable between the base unit and the sensor unit is disconnected. securely. The clock is not set. The operation was stopped
● Clearing measure
Set the clock.
■ Cause of alarm
Error due to other fault
● Clearing measure
Turn off the primary power supply and then turn it on again.
● Clearing measure
Connect the cable
7. Routine Maintenance and Preventive Maintenance ■
The routine maintenance and status are shown in the following table. Routine maintenance method External stain Stain in the sensor Looseness of screws
■
Wipe out stain with a noncombustible cloth dipped in an alcohol-base agent. (Any organic agent is not applicable.) Wipe out stain with the available dedicated washing liquid or tool. Tighten screws with the available tool.
Avoid storing the equipment in the following places. (1) Outdoors or place in the high-temperature, high-humidity, and dusty environment (2) Place that is exposed to active gas or place in which the equipment may be corroded.
8. Quality Assurance This product is warranted for one year after the date of delivery. Any failure due to a product defect that may occur in this period shall be repaired free of cost. The above, however, does not apply to failures due to any other causes.
Note ●
This equipment is not intended for use for facilities and equipment related to human life. If the equipment is used for them, we shall disclaim all the responsibility.
Request for repair of a failure ● When the user recognizes a failure, make a request to us for repair clarifying the details of operating status at occurrence of a failure, contents of the failure, etc.
Page. 40
9. Product Specifications 9-1 Product Standard Detecting method and conditions for target material for measurement Use Target material for measurement Measurement method
Bilge concentration monitor Bilge waste water Full optical continuous measurement method
Operating function Operating method
Auto operation (by sample water pressure) and test operation using the Operation switch, selectable Operating pressure Power ON → 0.03 MPa or more Power OFF → 0.02 MPa or less (Maximum pressure resistance: 0.6 MPa)
Auto operation Test operation Time limit at the start of operation
Warming-up
Measurement interval
Continuous sampling
Sample water conditions
Pressure: 0.03 to 0.3 MPa
Measurement range and alarm operating point
Standard product Option
Measurement limit point Measurement accuracy Stain indicating function Auto washing Option function Zero-point compensating function
Operating limitation of 300 sec (trouble alarm output at operation) 30 sec fixed (compound alarm output)
Full scale: 30 ppm
1 sec or less Flow rate: 0.2 to 3 L/min
Water temperature: +2°C to +45°C
Oil alarm operating point: 15 ppm (fixed)
Full scale: 15/30 ppm (auto selection according the operation of the oil alarm operating point selecting switch) Oil alarm operating point: 5/15 ppm selectable Oil concentration: 40 ppm ±5 ppm (at 15 ppm at the full scale of 30 ppm) Provided as the standard. Use of air
Specified pressure: 0.3 to 0.9 MPa
Provided as the standard.
Primary power supply ON/OFF, each alarm output/clearing time, etc. Operation time storage function Mounted memory capacity Internal clock accuracy Clock battery and its life Maximum measurement oblique angle
Data kept for 18 months, write endless function, memory consumption monitor indicating function, and forgery preventive function provided 2M bytes (non-volatile electric erase type memory) Average monthly difference ±30 sec or less Manganese dioxide lithium battery (CR2450) Approx 2 years 22.5° or less in each direction
Display/output system (common to both terminal base specifications A and B) Oil concentration indication Stain indication Trouble alarm Outage alarm Analog output (for monitor)
3-digit and 7-segment indicator (red)
Oil alarm operating point: Integer indication at 15 ppm Unit: ppm
3-point LED (red, yellow, and green) Output at occurrence of Red LED equipment trouble blinking Output at interruption of the No indicating primary power supply function 4-20 mA line resistance 700Ω or less
Oil alarm operating point: First decimal place indication at 5 ppm Contact output No voltage Contact output No voltage
1 circuit
C contact (250 V AC max, 2 A)
1 circuit
C contact (250 V AC max, 2 A)
Contact output No voltage Contact output No voltage
1 circuit
C contact (250 V AC max, 2 A)
1 circuit
B contact (250 V AC max, 2 A)
1 circuit
C contact (250 V AC max, 2 A)
1 circuit
C contact (250 V AC max, 2 A)
No indicating function
Contact output No voltage Contact output No voltage Contact output Voltage
1 circuit
A contact (load of 1.5 VA or less)
Output at an oil concentration of 15 ppm or more
Red LED blinking
Contact output No voltage
1 circuit
C contact (250 V AC max, 2 A)
Output in all conditions except operation at an oil concentration of less than 15 ppm
No indicating function No indicating function
Contact output No voltage Contact output Voltage
1 circuit
C contact (250 V AC max, 2 A)
1 circuit
C contact (load of 1.5 VA or less)
Terminal base specification A Oil alarm
Compound alarm
P.S (solenoid valve relay)
Output at an oil concentration of 15 ppm or more
Red LED blinking
Output in all conditions except operation at an oil concentration of less than 15 ppm
No indicating function
Terminal base specification B Oil alarm Compound alarm VALVE (for three-way valve)
Page. 41
9-1 Product Standard Equipment test function Alarm contact test switch Self-diagnostic function
Switch for checking the operation of each alarm contact of oil, trouble, and outage Error indication due to equipment trouble
Mechanism and structure Sample water inlet: Nipple and ring nut for a copper pipe with an external diameter of φ8 and an internal diameter of φ6 Fresh water inlet: Nipple and ring nut for a copper pipe with an external diameter of φ8 and an internal diameter of φ6
Pipe diameter
Drainage outlet: Nipple and ring nut for a copper pipe with an external diameter of φ8 and an internal diameter of φ6 Air inlet: Nipple and ring nut for a copper pipe with an external diameter of φ8 and an internal diameter of φ6 (Option for auto washing) 4 pieces (for 15C ship)
Cable ground Prevention against condensation Structure
Silica gel in the sensor unit
Material and paint color
External dimension, weight, and water-proof class
Fresh water pressure for washing Operating (working) temperature Leaving (storage) temperature Supply power consumption
Sensor separation type Sensor section Material: AL5056, C3604 Paint color: Black Main unit Material: ADC-12 Paint color: Munsell 7.5BG7/2 290 mm (W) x 295 mm (H) x 120 mm (D) (including projections) Model without a washing Refer to the external dimension drawing on Page 42. unit Total weight = Approx. 5.3 kg (except accessories) IP = 58 290 mm (W) x 375 mm (H) x 120 mm (D) (including projections) Model with a washing unit Refer to the external dimension drawing on Page 42. Total weight = Approx. 5.6 kg (except accessories) IP = 55 0.02 to 0.60 MPa (common to both type without a washing unit and type with a washing unit)) * Use the fresh water equivalent to mineral water or drinking water. 0°C to 50°C, 5 to 90%RH no condensing -20°C to 70°C, 5 to 90%RH, no condensing 90 to 240 V AC, 50 to 60 Hz, 20 VA or less
* A part of product specifications and design is subject to change without previous notice for improvement of product performance and functions.
Page. 42
9-2 External Dimension Drawing Type without a washing unit (standard product) 290 ±4.0
120 ±3.0
116 ±1.0
15ppm Bilge Alarm
CAUTION 注 意
−− Operation Status−−
これらの注意を怠 ると、機器の損傷や漏電事故等 を生 じる恐れがあり、また 機能上支障 となりますので 十分 に注意して下さい。
TEST
ppm Stain Of Detector
Defect.Alarm
これらの注意を怠 ると、機器の損傷や漏電事故等 を生 じる恐れがあり、また 機能上支障 となりますので 十分 に注意して下さい。
Memory Status
MODEL
208 ±4.0
Oil.Alarm
If these attention are neglected ,there is a fear to cause damage,electric leakage,etc,of apparatus besides an obstacle in terms of functions may be found,so pay full attention.
If these attention are neglected ,there is a fear to cause damage,electric leakage,etc,of apparatus besides an obstacle in terms of functions may be found,so pay full attention.
FOCAS-1800
MODEL OF TYPE APPROVAL
295 ±4.0
Auto
260 ±1.2
Standby
国土交通省型式承認番号 M-248
CANADA NO,CBA-015 USCG No.162.050/9039/0 EC MED−B− 3039 製 造 年 月 20 −
15ppm Bilge Alarm
型
式
FOCAS-1800
M O D E L
DATE 製 造 番 号 SERIAL NO. TOKYO
JAPAN
372 ±4.0
165 ±4.0
Unit: mm
Type with a washing unit (option product) 116 ±1.0
15ppm Bilge Alarm
CAUTION
−−Operation Status−− TEST
ppm Oil.Alarm
Defect.Alarm
注意
これらの注意を怠ると、機器の損傷や漏電事故等を生 じる恐れがあり、また機能上支障となりますので十分 に注意して下さい。
If these attention are neglected,there is a fear to cause damage,electric leakage,etc,of apparatus besides an obstacle in terms of functions may be found,so pay full attention.
Stain Of Detector
Memory Status
FOCAS-1800
これらの注意を怠ると、機器の損傷や漏電事故等を生 じる恐れがあり、また機能上支障となりますので十分 に注意して下さい。 If these attention are neglected,there is a fear to cause damage,electric leakage,etc,of apparatus besides an obstacle in terms of functions may be found,so pay full attention.
MODEL OF TYPE APPROVAL 国土交通省型式承認番号 M -248
製 造 年 月
375 ±4.0
Auto
260 ±1.2
Standby
120 ±3.0
208 ±4.0
290 ±4.0
372 ±4.0
CANADA NO,CBA-015 USCG No.162.050/9039/0
20 −
EC MED−B− 3039
15ppm Bilge Alarm DATE
型
式
M O D E L
FOCAS-1800
製 造 番 号 TOKYO
SERIAL JAPAN NO.
165 ±4.0
Unit: mm
BILGE ALARM FOCAS-1800 OIL CONCENTRATION DETECTOR
Where to make contact
■
Head Office:
6-13-6, Nishinippori, Arakawa-ku, Tokyo 〒116-0013
■ ■
Tokyo Factory: Fellow Keisoku Co., Ltd.:
6-13-9, Nishinippori, Arakawa-ku, Tokyo 〒116-0013 1-16-3, Azuma, Hirohata-ku, Himeji-shi, Hyogo 〒671-1154
TEL 03-3800-9777 FAX 03-3800-9770 HP http://www.fellow-co.com TEL 0792-38-2261 Third edition revised on May 2006