![Fb10 30p Dc70 Series Trs [PDF]](https://pdfs.asia/img/200x200/fb10-30p-dc70-series-trs.jpg)
9 0 5 MB
02W-2201
FB-DC70 SERIES
FB
10P/15P/18P 20P/25P/30P
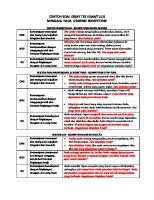
Contents 1. How to adjust SICOS 60 (Major point only)
.........................1
1-1 The name and function of mode select switch
.......................1
q Slow speed mode button . . . . . . . . . . . . . . . . . . . . . . . . . . . . . . . . . . . . . . . . . . . . . . . . . 1 w Mode select button . . . . . . . . . . . . . . . . . . . . . . . . . . . . . . . . . . . . . . . . . . . . . . . . . . . . . . 1 e Up button . . . . . . . . . . . . . . . . . . . . . . . . . . . . . . . . . . . . . . . . . . . . . . . . . . . . . . . . . . . . . 1 r Down button (2 functions) .. . . . . . . . . . . . . . . . . . . . . . . . . . . . . . . . . . . . . . . . . . . . . . . . 2
1-2 How to set the each mode . . . . . . . . . . . . . . . . . . . . . . . . . . . . . . . . . . . . . . . . . . . 2 q Speed setting mode . . . . . . . . . . . . . . . . . . . . . . . . . . . . . . . . . . . . . . . . . . . . . . . . . . . . . 3 w Power setting mode . . . . . . . . . . . . . . . . . . . . . . . . . . . . . . . . . . . . . . . . . . . . . . . . . . . . . 3 e Acceleration feeling mode . . . . . . . . . . . . . . . . . . . . . . . . . . . . . . . . . . . . . . . . . . . . . . . . 3 r Option setting . . . . . . . . . . . . . . . . . . . . . . . . . . . . . . . . . . . . . . . . . . . . . . . . . . . . . . . . . . 4 t Language selection on LCD display . . . . . . . . . . . . . . . . . . . . . . . . . . . . . . . . . . . . . . . . . 5 y Safety monitor symbol . . . . . . . . . . . . . . . . . . . . . . . . . . . . . . . . . . . . . . . . . . . . . . . . . . . 5
1-3 Adjustment of starting current and current limitation . . . . . . . . . . . . . . . . . . 6 q Zero(0) adjusting for installed . . . . . . . . . . . . . . . . . . . . . . . . . . . . . . . . . . . . . . . . . . . . . . 6 w Adjustment of starting current and current limitation . . . . . . . . . . . . . . . . . . . . . . . . . . . . 7
2. Adjustment for other functions
. . . . . . . . . . . . . . . . . . . . . . . . . . . . . . . . . 11
q Auto-torque up . . . . . . . . . . . . . . . . . . . . . . . . . . . . . . . . . . . . . . . . . . . . . . . . . . . . . . . . 11 w Safety circuit for out of control (contactor tripping) . . . . . . . . . . . . . . . . . . . . . . . . . . . . . 11 e Power setting . . . . . . . . . . . . . . . . . . . . . . . . . . . . . . . . . . . . . . . . . . . . . . . . . . . . . . . . . 11 r Hydraulic setting . . . . . . . . . . . . . . . . . . . . . . . . . . . . . . . . . . . . . . . . . . . . . . . . . . . . . . . 12 t Switch back braking distance (Plugging/Regenerative braking) . . . . . . . . . . . . . . . . . . . . 12 y Regenerative braking force . . . . . . . . . . . . . . . . . . . . . . . . . . . . . . . . . . . . . . . . . . . . . . 13 u Adjustment of brightness of the back light on monitor . . . . . . . . . . . . . . . . . . . . . . . . . . 14 i Checking of speed sensor output . . . . . . . . . . . . . . . . . . . . . . . . . . . . . . . . . . . . . . . . . . 14 o Hour meter working . . . . . . . . . . . . . . . . . . . . . . . . . . . . . . . . . . . . . . . . . . . . . . . . . . . . 15 !0 Confirming the working of auto-power cut off function . . . . . . . . . . . . . . . . . . . . . . . . . . . . 15 !1 Adjusting of battery voltage . . . . . . . . . . . . . . . . . . . . . . . . . . . . . . . . . . . . . . . . . . . . . . 15
3. Option . . . . . . . . . . . . . . . . . . . . . . . . . . . . . . . . . . . . . . . . . . . . . . . . . . . . . . . . . . . . . . . . 16 q Confirming Over loading. . . . . . . . . . . . . . . . . . . . . . . . . . . . . . . . . . . . . . . . . . . . . . . . . 16 w Confirming the travel inhibit . . . . . . . . . . . . . . . . . . . . . . . . . . . . . . . . . . . . . . . . . . . . . . 16 e Confirming the lift locking working at over discharge . . . . . . . . . . . . . . . . . . . . . . . . . . . 16 r Confirming the seat switch working . . . . . . . . . . . . . . . . . . . . . . . . . . . . . . . . . . . . . . . . 17
4. Outline of New EPS system for FB–DC70
. . . . . . . . . . . . . . . . . . . . . 18
4-1 Outline of New EPS system . . . . . . . . . . . . . . . . . . . . . . . . . . . . . . . . . . . . . . . . 18 4-2 Operation . . . . . . . . . . . . . . . . . . . . . . . . . . . . . . . . . . . . . . . . . . . . . . . . . . . . . . . . . . . 19 4-3 Feature . . . . . . . . . . . . . . . . . . . . . . . . . . . . . . . . . . . . . . . . . . . . . . . . . . . . . . . . . . . . 19 q Protection of overheat for motor . . . . . . . . . . . . . . . . . . . . . . . . . . . . . . . . . . . . . . . . . . . 19 w Self diagnosis function . . . . . . . . . . . . . . . . . . . . . . . . . . . . . . . . . . . . . . . . . . . . . . . . . . 19
4-4 Checking and Adjustment . . . . . . . . . . . . . . . . . . . . . . . . . . . . . . . . . . . . . . . . . . . 20 q Neutral adjustment of torque sensor . . . . . . . . . . . . . . . . . . . . . . . . . . . . . . . . . . . . . . . 20 w Checking by voltage . . . . . . . . . . . . . . . . . . . . . . . . . . . . . . . . . . . . . . . . . . . . . . . . . . . 21
5. Self diagnosis history memory and I/O check
. . . . . . . . . . . . . . . . 22
5-1 Self diagnosis history memory . . . . . . . . . . . . . . . . . . . . . . . . . . . . . . . . . . . . . . 22 5-2 I/O check . . . . . . . . . . . . . . . . . . . . . . . . . . . . . . . . . . . . . . . . . . . . . . . . . . . . . . . . . . 27
6. Practical trouble shooting (How to find the cause of problem) . . . . . . . . 31 6-1 Before starting
. . . . . . . . . . . . . . . . . . . . . . . . . . . . . . . . . . . . . . . . . . . . . . . . . . . . . 31
q Location of negative circuit . . . . . . . . . . . . . . . . . . . . . . . . . . . . . . . . . . . . . . . . . . . . . . . 31 w Layout of the connectors on MPU board and others . . . . . . . . . . . . . . . . . . . . . . . . . . . . . 32
6-2 Attention for troubleshooting . . . . . . . . . . . . . . . . . . . . . . . . . . . . . . . . . . . . . . . . 33 q Visual checking . . . . . . . . . . . . . . . . . . . . . . . . . . . . . . . . . . . . . . . . . . . . . . . . . . . . . . . 33 w Fault finding . . . . . . . . . . . . . . . . . . . . . . . . . . . . . . . . . . . . . . . . . . . . . . . . . . . . . . . . . . 34 e Error message and possible defective parts . . . . . . . . . . . . . . . . . . . . . . . . . . . . . . . . . 35
6-3 Troubleshooting Procedure . . . . . . . . . . . . . . . . . . . . . . . . . . . . . . . . . . . . . . . . . 36 6-4 Analysis of malfunction causes . . . . . . . . . . . . . . . . . . . . . . . . . . . . . . . . . . . . . 36 q No indications are made on the LCD display . . . . . . . . . . . . . . . . . . . . . . . . . . . . . . . . 37 w Indication of the LCD display is normal, but the truck abnormally travels . . . . . . . . . . . 38 e On the LCD display, error meassages appear . . . . . . . . . . . . . . . . . . . . . . . . . . . . . . . . 38
6-5 Flowchart for troubleshooting
. . . . . . . . . . . . . . . . . . . . . . . . . . . . . . . . . . . . . . . 39
7. Wiring and layout of control unit Reference
. . . . . . . . . . . . . . . . . . . . . . . . . . . . . . . . 68
. . . . . . . . . . . . . . . . . . . . . . . . . . . . . . . . . . . . . . . . . . . . . . . . . . . . . . . . . . . . . . 79
1. How to adjust SICOS60 (Major point only) 1-1 The name and function of mode select switch q Slow speed mode button. Change to traveling mode. When the slow speed mode button is turned on, the speed is regulated to the preset speed. (5km/h–12km/h).
Slow speed mode button
œWhen the slow speed mode button is turned on, the turtle mark is displayed on the monitor. Off
On
w Mode select button. Change the select mode. Speed setting mode (SPEED) Power setting mode (POWER) Acceleration feeling mode (ACCEL)
Mode select button
M
e Up button (2 functions) Increase the parameter of each selected mode.
M
UP button
Showing the travel hour meter. TRAVEL
HYD
STEER
BATT
LOAD
OIL
BRAKE
DISCHARGE
CAUTION
Be sure to check that the decimal point flashes when the hour meter counts by traveling or hydraulic operation.
F 8 6 4 2 E
5
0
km/m
10
15
20
SPEED
POWER
50
75
ACCEL
100
SOFT
STD
FULL
TRAVEL
km
Travel hour meter TRAVEL
HYD
STEER
BATT
OIL
LOAD
BRAKE
DISCHARGE
F 8 6 4 2 E
5
0
km/m
10
15
POWER
50
75
100
ACCEL
SOFT
TRAVEL
When hour meter counts, the decimal point flashes. –1–
20
SPEED
STD
FULL
km
r Down button (2 functions). Decrease the parameter of each selected mode.
M Down button
Showing the hydraulic hour meter.
CAUTION
TRAVEL
Be sure to check that the decimal point flashes when the hour meter counts by operating traveling or the hydraulic lever.
HYD
STEER
BATT
OIL
LOAD
BRAKE
DISCHARGE
F 8 6 4 2 E
0
km/m
5
10
15
20
SPEED
POWER
50
75
ACCEL
100
SOFT
STD
FULL
TRAVEL
km
Hydraulic hour meter
TRAVEL
HYD
STEER
BATT
OIL
LOAD
BRAKE
DISCHARGE
F 8 6 4 2 E
5
0
km/m
10
15
20
SPEED
POWER
50
75
100
ACCEL
SOFT
TRAVEL
STD
FULL
km
When hour meter counts, the decimal point flashes.
1-2 How to set the each mode Mode select button
Press the mode select button M to adjust the each mode.
M
œThe each mode can be changed by pressing the mode select button M as follows.
M
M
: Normal
M
: Speed setting mode
M
: Power setting mode
: Acceleration feeling mode
–2–
q Speed setting mode The travel speed can be set at 5km/h through 12km/h by every 1km/h. Up button for increasing, Down ton for decreasing. NOTE
but-
M
When the slow speed mode button is off, the travel speed can not be regulated even if it is set. Also no display of preset speed and the “turtle” mark.
M
Down button
Up button
5
km/m
10
15
20
SPEED
POWER
50
75
100
ACCEL
SOFT
STD
FULL
w Power setting mode The power can be set at 3 steps, 100%, 75%, and 50% by pressing the Up button or Down button .
M
M
Down button
Up button
(50%–75%–100%)
The preset power is displayed “POWER” column on the display.
at
the
5
km/m
10
15
20
SPEED
POWER
50
75
100
ACCEL
SOFT
STD
FULL
} Preset power
e Acceleration feeling mode The acceleration feeling mode can be set at 3 modes, Soft, Std (standard) and Full.
M
M
: Easy inching Down button : Normal
Up button
(SOFT–STD–FULL)
: Quick accelerator response 5
km/m
10
15
20
SPEED
NOTE
Better inching operation can be achieved by selecting the "soft" mode.
POWER
50
75
100
ACCEL
SOFT
STD
FULL
} The preset accelerator feeling is displayed at the “ACCEL” column on the display. –3–
Preset accelerator feeling
r Option setting
AB
789
2) Press the mode select button M to shift the setting position.
456
CDE
F01
23
1) Set the rotary switch RS1 to “7”, and turn the key switch on.
Set RS1 to “7”
œThe setting position which flashes can be moved to the right by pressing the mode select button M.
3) Press, the Up button to set : display “1”. the Down button to reset : display “0”. for each optional specification.
[
M Mode select button
NOTE
After finishing to set or reset, be sure to turn off the key switch and to return the rotary switch RS1 to “0”.
M NOTE
When replacing the MPU board, be sure to set the each function same as original setting.
Option Set
0
Not used – Over Drive without (Option) Hydrauric bywithout pass (Option) Regenerative with contactor Monitoring displayed Seat switch without Lift lock at off over discharge Not used –
M
Up button
Down button
1 –
TRAVEL
HYD
STEER
BATT
OIL
LOAD
BRAKE
DISCHARGE
with F 8 6 4 2 E
with without
5
0
km/m
10
15
20
SPEED
POWER
off with
50
75
100
ACCEL
SOFT
TRAVEL
STD
FULL
km
on –
If the bit of “Seat switch” is changed “0” to “1” on a standard truch, hydraulic system and indicator are normal, but the truck cannot travel. If all bits is changed “0” to “1” on the standard truck, 4 error messages appear on the indicator. A10 : FET7-OVER DRIVE B20 : FET4-HYD. BY pass D24 : PC. BOARD-AOS * TURN OFF KEY SWITCH *
Not used Over drive (Opt.) Hydraulic by-pass (Opt.) Regenerative contactor
Monitoring Seat switch Lift lock at over discharge Not used
NOTE
When replacing the MPU board, it is set “1” to each option setting for safety. Confirm the specification of the truck and set it properly.
NOTE
The option setting which is standard specification is set to “0”. For example, Regenerative braking system is equipped as standard. Therefore, setting “0” means “with regenerative brake” “1” means “without regenerative brake”. –4–
t Language selection on LCD display
AB
789
1) Set the rotary switch RS1 to “6” and turn the key switch on.
456
CDE
F01
23
œEach language can be selected by this operation.
Set RS1 to “6”
2) Choose the each language shown below by pressing Up button or Down button .
M
M
Down button
F01
456
AB
23
After finishing to set or reset, be sure to turn the key switch off and to return the rotary switch RS1 to “0”.
CDE
Displayed language when turning key switch on.
789
NOTE
Up button
Set RS 1 to “5”
y Safety monitor symbol. œEach monitor symbol can be set by this operation
1) Set the rotary switch RS1 to “5”.
M
2) Use the mode select button M to shift the setting position.
Mode select button
œThe setting position which flashes can be
moved to the right by pressing the mode button M.
M DOWN button –5–
M UP button
3) Press, the Up button to set : displayed “1”. the Down button to reset : displayed “0”. for each safety monitor symbol.
[
TRAVEL
HYD
STEER
BATT
OIL
LOAD
BRAKE
DISCHARGE
F 8 6 4 2 E
5
0
km/m
10
15
20
SPEED
POWER
50
75
100
ACCEL
SOFT
STD
TRAVEL
FULL
km
TRAVEL
: Travel BRAKE
HYD
: Hydraulic
Parking brake : LOAD
STEER
: Steering
Over load : OIL
BATT
: Battery
Oil level :
* For having GS battery and GS electrolyte level sensor only. NOTE
The symbol for Travel, Hyd, Steer and Brake are preset as a standard at the factory.(displayed “1”)
NOTE
After finishing to set or reset, be sure to turn the key switch off and to return the rotary switch RS1 to “0”.
1-3 Adjustment of starting current and current limitation
F01
Battery electrolyte over 1.25 (at 20°C)
456
AB
23
Zero(0) adjusting is required for the installed current detector to adjust the starting current and current limitation correctly.
CDE
q Zero(0) adjusting for installed
789
Set RS1 to “1”
1) Set the rotary switch RS1 to “1”, and turn the key switch on. 2) The each mode can be changed by pressing the mode select button M as follows.
M M
M
Mode select button
M M
–6–
3) Adjust If LEVEL, and Ia LEVEL to be “000A” at no motor current condition by pressing Up button or Down button CAUTION
As MPU board has an auto-zero level adjustment function, no need to re-adjust these mode normally. However, be sure to confirm it. 4) Press, the Up button when the indication shows minus(–) value. the Down button when the indication shows plus (+) value.
M
M
Up button
Down button
Press Up button when indication on monitor shows minus(–) value.
Press Down button when indication on monitor shows Plus (+) value.
5) After adjusting If GAIN and Ia GAIN, be sure to turn the key switch off and to set back the rotary switch RS1 to “0”.
Initializing should be done by pressing the Up button and Down button simultaneously for approx. three (3) seconds. Then, each setting (SPEED, POWER, ACCEL) will be initial setting mode with showing “INITIALIZED” and a beep sound. This "initialize" operation is also accepted by each manual setting of, SPEED : to 7km/h POWER : to 100% ACCEL : to STD
]
= “INITIALIZED”
Press Up and Down button simultaneously for approx. 3 seconds. 5
km/m
10
POWER
50
75
ACCEL
100
Initial setting mode
F01
2) Set the rotary switch RS1 to “2”, and turn the key switch on.
456
AB
23
CDE
w Adjustment of starting current and current limitation 1) Be sure to check that the specific gravity of the battery electrolyte. It should be more than 1.25 at 20°C and the operation of “initialize” should be done, and initializing also finished.
Set RS1 to “2”
œThe each mode can be changed by pressing the mode select button M as follows.
M M
M Mode select button
–7–
15
20
SPEED
789
NOTE
M
SOFT
STD
FULL
3) Adjusting staring current The “CURR START” will be shown after key switch on.
CAUTION
Wall
4) Operate the directional switch to forward, depress the foot brake. Then depress the accelerator pedal until the regenerative contactor just goes on, and hold at that position. When adjusting the starting current and current limitation, lock the traveling motor by operating as follows. Park the truck against a wall, and touch the tip of forks to the wall. Then apply the parking brake lever. Depress the foot brake pedal.
5) Adjust the starting current on the monitor within specified range by pressing Up button or Down button . Model
Starting Current (A)
FB10P
35 ± 5
FB15P, 18P
45 ± 5
FB20P, 25P
50 ± 5
FB30P
45 ± 5
M
–8–
M
Down button
Up button
Press Down button when monitor indication shows higher than the specified value.
Press Up button when monitor indication shows lower than the specified value.
6) Adjusting current limitation Set the “CURR LIMIT” mode by pressing mode select button M.
NOTE
CAUTION
Wall
7) Operate the directional switch to forward, depress the foot brake. Then depress the accelerator pedal all the way down and hold it. The current limitation should be read and adjusted within two (2) seconds, otherwise it will be increased by 130% for the automatic torque increase function. Then the forcible bypass contactor will be turned on.
When adjusting the starting current and current limitation, lock the traveling motor by operating as follows. Park the truck against a wall, and touch the tip of forks to the wall. Then apply the parking brake lever. Depress the foot brake pedal. 8) Adjust the current limitation on the monitor within specified range by pressing Up button or Down button . Model
Current limitation (A)
FB10P
280 ± 5
FB15P, 18P
330 ± 5
FB20P, 25P
380 ± 5
FB30P
330 ± 5
M
NOTE
Use the clamp on meter as a reference when checking and adjusting. There may be some difference between the current value on monitor and the reading by the clamp on meter.
NOTE
After finishing the adjustment, be sure to return the rotary switch RS1 to “0”. –9–
M
Down button
Up button
Press Down button when monitor indication shows higher than the specified value.
Press Up button when monitor indication shows lower than the specified value.
– 10 –
D
E
Not used
Not used
C
9
Not used
5.0 - 6.0
6
4
B
330 ± 10
5.0 - 6.0
5.0 - 6.0
Not used
45 ± 5
FB30P
380 ± 10
330 ± 10
0
A
50 ± 5
FB20P, 25P
5.0 - 6.0
Plugging brake distance (m)
Not used
45 ± 5
FB15P, 18P
280 ± 10
Current limitation (A) 32
Not used
Option setting should be set “0” for standard specification. Set to “1” in case of some option being installed.
regenerative contactor
046
020
OIL
LOAD
BRAKE
\
\
\
OIL
\
LOAD BRAKE
0
Language
6
5 : DUTCH
4 : SPANISH
DUTCH
SPANISH
GERMAN
MONITORING OK
MONITOR OK
UEBERWACHUNG OK
FRENCH 3 : GERMAN
MONITORING OK CONTROLEUR OK
ENGLISH 2 : FRENCH
Indication of key switch on
1 : ENGLISH
Language JAPANESE
0 : JAPANESE
RS1-6
* In case of no indication display language JAPANESE Domestic : 0 : JAPANESE ENGLISH : 1 : ENGLISH Except for Japan
15.0/13.0
15.0/13.0
(km/h)
Unladen /Laden
14.5/12.5
\
5 STEER BATT
15.0/12.5
060
TRAVEL HYD
* For having GS battery and GS electrolyte level sensor only.
0 0 1 0
* For having GS battery and GS electrolyte level sensor only.
BATT
STEER
HYD
Seat switch
Over discharge lift lock
Over drive (Opt.)
1 1 1 1
RS1-5 (monitoring setting)
Switch back brake distance • Flat, Unladen, Full speed • Specific gravity of electrolyte more than 1.25 at 20°C • Full acceleration
TRAVEL
Hydraulic by-pass (Opt.)
060
064
Monitoring
0 0 0 0
48
32
56
64
50
64
32
Tilt
Lift 2
Lift 1 32
Over drive
Speed Speed Speed L lift M lift H lift
Attach- Attach- Attach- Switch back brake force Braking ment 1 ment 2 ment 3 Plugging Regeneration force
PLUGG- REGENE ING RATE
OVER DRIVE
HYD ATT.3
BRAKE TRQ
HYD ATT.2
HYD ATT.1
HYD TILT
4
SPD-L SPD-M SPD-H HYD HYD LIFT LIFT LIFT LIFT-1 LIFT-2
Not used
0 0 0 0
RS1-7 (Option setting)
Starting current /Current limitation • Motor current • Power 100% • Specific gravity of electrolyte more than 1.25 at 20°C
48V
35 ± 5
FB10P
Starting current (A)
/
/
/
/ / /
/ / /
/ / /
/ / /
/ / /
/ / /
/ / /
/ / /
/ /
/
/
/
(V)
3
/
Model
/ / /
/
/
Voltage
/ /
/
/
Traveling speed
/ /
/
/
RS1
/ /
/
/
Setting of rotary switch
/ /
/
/
RS0
/ /
(Confirmation)
The specification of each adjustment for FB-DC70
2. Adjustment for other functions qAuto-torque up
A: Specific gravity of the battery electrolyte: more than 1.25 at 20°C B: Make an initializing (Initialize mode setting)
1) Check the current limitation. 2) Confirm that the current limitation should be increased by 130% of the value of current limCurrent 130% itation after 3 seconds. limitation
Forcible by-pass contactor on
100%
3sec 2sec
wSafety circuit for out of control (contactor tripping)
1) Be sure to check that the forward and backward contactor has not gone in. 2) Make a jumper wire between a main terminal of bypass contactor. (Wire size about 0.5mm2) 3) Be sure to check the warning beap sound and the error massage on the display. 4) Confirm that even though operate the accelerator, after that the forward (backward) contactor will not go in.
ePower setting
Specific gravity of the battery electrolyte: more than 1.25 at 20°C Set the power setting to 50%
1) Check the current limitation. 2) Be sure to check that the motor current becomes to about 70% of the current limitation.
– 11 –
rHydraulic setting
AB
456
CDE
F01
23
Be sure to check that the each setting is set as listed on “The specification of each adjustment for FB-DC70” (p.10).
789
Set the rotary switch RS1 to “3”
1) Set the rotary switch RS1 to “3”.
2) The each mode can be changed by pressing the mode select button M and adjust the setting by up button or down button .
M
Mode select button
After finishing the adjustment, be sure to return the rotary switch RS1 to “0”.
M M M M M
M M M M
tSwitch back braking distance (Plugging/Regenerative braking)
AB
456
CDE
F01
23
A: Specific gravity of the battery electrolyte: more than 1.25 at 20°C B: Flat ground, Unladen, Full speed
789
NOTE
Set the rotary switch RS1 to “4”
1) Set the rotary switch RS1 to “4”, and adjust the braking force by pressing up button or . down button The each mode can be changed by pressing the mode select button M. (either plugging or Regenerative brake) 2) Be sure to check the regenerative contactor goes off when switch back braking operation is done, and goes on just before starting on reverse.
M
Mode select button
M M M
– 12 –
3) Adjust the plugging braking distance by press. ing up button or down button The braking distance will be, . shorten by pressing up button . longer by pressing down button NOTE
After finishing the adjustment, be sure to return the rotary switch RS1 to “0”.
M
M
Up button
Down button
For shorter distance.
For longer distance.
yRegenerative braking force
A: Specific gravity of the battery electrolyte: more than 1.25 at 20°C B: Flat ground, Unladen, Full speed
AB
456
CDE
F01
23
1) Traveling forward with middle speed and release the foot from the accelerator pedal. 2) Depress the foot brake pedal lightly. 3) Be sure to check the forward contactor is off and reverse contactor is on, Then regenerative braking is worked.
789
Set the rotary switch RS1 to “4”
1) Set the rotary switch RS1 to “4”, and change the mode of “BRAKE TRQ” by pressing mode select button M.
M
Mode select button
M M M 2) Adjust the regenerative braking force by . pressing up button or down button The braking force will be, . Strong by pressing up button . Poor by pressing down button NOTE
After finishing the adjustment, be sure to return the rotary switch RS1 to “0”.
– 13 –
M
M
Down button
Up button
For poor braking effect.
For strong braking effect.
uAdjustment of brightness of the back light on monitor Adjust the brightness of the back light on monitor by the volume VR0. Turning it clockwise for bright contrast.
Turning it clockwise for bright contrast.
CFL VR0
F01
456
AB
23
789
1) Set the rotary switch RS1 to “C” and turn the key switch on. The each mode can be changed by pressing the mode select button M as follows.
CDE
iChecking of speed sensor output
Set the rotary switch RS1 to “C”
M M
M Mode select button
Sensor output 1 : left side
Traveling direction F : Forward, R : Reverse
Sensor output 2 : right side
Sensor output total (value of output 1+2)
2) Set the “SPD” (Speed sensor checking) mode. 3) Check the indication of sensor output by traveling. œNormally, the value of sensor output 1 and 2 should be the same when traveling.
In case that the value of sensor output 1 or 2 is not varied when traveling. (=always shown “0”) Check the sensor or its wire harness connected to MPU board. In case that the value of sensor output 1 and 2 are the same with no changing. Check and adjust the potentiometor for sensor 1 or 2 by the shims. In case that the value of sensor output 1 plus 2 does not make a sensor output total. (=output 1+2≠total) It may be influenced by the noise. Please check some wire near the wire of sensor 1 and 2. In case that the indication of traveling direction is opposite from the actual moving direction. Check the connection of sensor 1 and 2, They may be opposite. NOTE
After confirming the working, be sure to turn the key switch off and return the rotary switch RS1 to “0”.
– 14 –
oHour meter working
1) Connect the wireharness of [Blue/Red 1] and [Black] located inside the front cover. 2) Be sure to check that the decimal point flashes when the hour meter counts by traveling or hydraulic operation.
!0Confirming the working of auto-power cut off function
1) Turn the key switch on. 2) Be sure to check that the main power will be cut off after approx.15minutes automatically if there is no operation either traveling or hydraulic operation.
!1Adjusting of battery voltage Item (function)
Condition for checking
Check and adjustment procedure 1) Check the battery voltage at, + : Hyd. fuse, - : Minus (–) terminal in the control unit. 2) Set the rotary switch RS1 to “A”, and turn the key switch on. 3) Set to “VB LEVEL” mode by pressing mode select button M.
Battery voltage (for battery capacity indicator)
MSpecific gravity : more than 1.25 at 20°C
M
M
4) Adjust the “VB LEVEL” to be the same value checked at 1) by pressing Up or Down button.
CAUTION
– 15 –
The VOLTAGE figure will not be changed even if adjusting the VB LEVEL.
3. Option qConfirming Over loading
1) Lift up to the end and make a relief condition. 2) Confirm the display *REDUCE THE LOAD*.
wConfirming the travel inhibit
1) Connect the - line (black) to the connector [CN4-4pin] on the MPU board. 2) Confirm that the tuck does not travel when operating the traveling.
After confirming the working, be sure to turn the key switch off and return the rotary switch RS1 to “0”.
– 16 –
AB
789
NOTE
Lifting speed will be half. Then after ten minutes operation, Battery capacity indicator : [Red] lamp flashes. Indication on display : ✳CHARGE THE BATTERY✳ and lifting will be suspended.
456
CAUTION
F01
23
1) Set the rotary switch RS1 to “7” and turn the key switch on. 2) Set 2nd bit of the lift lock at over discharge to “1”. 3) Supply the voltage of 30–36V to the battery plug. 4) Confirm Battery capacity indicator : [Red] lamp turning on. Indication on display :*CHAGE THE BATTERY*
CDE
eConfirming the lift locking working at over discharge
Set the rotary switch RS1 to “7” TRAVEL
HYD
STEER
BATT
OIL
LOAD
BRAKE
DISCHARGE
F 8 6 4 2 E
5
0
km/m
10
15
20
SPEED
POWER
50
75
100
ACCEL
SOFT
STD
TRAVEL
FULL
km
The lift locking at over discharge (2nd bit)
rConfirming the seat switch working
After confirming the working, be sure to turn the key switch off and return the rotary switch RS1 to “0”.
CDE
AB
789
NOTE
456
1) Operate the traveling without sitting on the seat. 2) Confirm the truck does not travel.
F01
23
1) Set the rotary switch RS1 to “7” and turn the key switch on. 2) Set 1st bit of the seat switch to “1”.
Set the rotary switch RS1 to “7” TRAVEL
HYD
STEER
BATT
OIL
LOAD
BRAKE
DISCHARGE
F 8 6 4 2 E
5
0
km/m
10
15
20
SPEED
POWER
50
75
100
ACCEL
SOFT
TRAVEL
STD
FULL
km
Seat switch (1st bit)
– 17 –
4. Outline of New EPS system for FB–DC70 4-1 Outline of New EPS system
steering gear box
controller
motor
actuator
rear axle
The EPS system is constructed with steering gear box, new design potentiometer actuator, and controller (new design) above. The torque sensor in the steering gear box detects the opposite force from the steering tire when the steering wheel is operated, and send the signal which is proportioned with the force and direction to the controller. The controller controlls the magnitude and direction of the steering motor current. The steering motor creates the force by this current to assist the steering operation. When the shock is applied to the tire, the torque sensor detects it and the actuator creates the equivalent force against it. So, no kick back force is applied to the steering wheel.
– 18 –
4-2 Operation Actuator Ass’y Torque sensor
Steering Operation
+ –
Controller
Actuator
w
e
r
t
Torque sensor output
Motor current control
Output of motor torque
Assist force
Wheel steering
y
1) When the key switch is turned on, the contactor is activated and the power is supplied. 2) When the steering wheel is operated, the steering force is detected by the torque sensor and output the voltage corresponded for it. 3) The output voltage from the torque sensor is applied to the controller and converted to the current for the motor on the actuator. 4) The motor creates the output torque which is proportioned with the input current. 5) The output force of the actuator assists to steer the wheels. 6) The steering force is reduced by this assist force.
4-3 Feature qProtection of overheat for motor When the motor current for about 5 seconds, the turned off automatically. input of torque sensor to normal control condition.
continues over 25A motor output will be When put back the neutral, it returns at
wSelf diagnosis function
TRAVEL
HYD
STEER
BATT
OIL
LOAD
BRAKE
DISCHARGE
1) If the problem is occurred at the torque sensor, scrolls the message of [C29:SENSOREPS TORQUE] on the display (Torque sensor error).
F 8 6 4 2 E
5
0
km/m
10
15
20
SPEED
POWER
50
75
ACCEL
100
SOFT
STD
FULL
TRAVEL
2) If the problem is occurred at a main FET circuit in the EPS controller, scrolls the message of [C30: TR-EPS MAIN] on the display (chopper error).
TRAVEL
HYD
STEER
BATT
OIL
LOAD
BRAKE
DISCHARGE
F 8 6 4 2 E
5
0
km/m
10
15
20
SPEED
POWER
50
75
100
ACCEL
SOFT
TRAVEL
– 19 –
km
STD
FULL
km
4-4 Checking and Adjustment qNeutral adjustment of torque sensor
yellow
1) Turn the key switch off. 2) Jack up the rear wheels from the ground. 3) Open the side cover at right side. 4) Put the clamp meter to the wire [yellow] or [green] between EPS controller and EPS motor [DC range] 5) Turn the key switch on and measure the indication at the clamp meter without steering operation. (= at neutral steer) If the indication shows 0A, it is normal. 6) If any current is flown, adjust the potentiometer by the following procedure.
green
EPS controller
A
black
red
clamp meter
EPS motor
1) Turn the key switch off and disconnect the battery plug. 2) Disconnect the 3P water proof type connector of EPS sensor. 3P water proof type connector (tab side)
1.5
k
potentiometer
EPS sensor ass’y
+ –
3) Check the resistance at sensor side (tab side) between,
• q pin (Orange) and e pin (Black/Red) = Approx. 5k ............... A • q pin (Orange) and w pin (Green/Red) = Approx. 2.5k ........... B • w pin (Green/Red) and e pin (Black/Red) = Approx. 2.5k ...... C
From EPS sensor (potentiometer)
q Orange w Green/Red e Black/Red
These should be even value.
q Blue 3
Tab
Rece
w Green /Blue 1 e White
To EPS controller
3P water proof type connector
4) Adjust it by removing or inserting a shim to be the even value between B and C above. NOTE
The resistance value may depend on the type of tester and each unit. – 20 –
5) Connect the battery plug and turn the key switch on. Check and confirm that there is no EPS motor current at the neutral steer by the above procedure, .
wChecking by voltage When it is difficult to adjust the torque sensor very precisely. Use this method. Neutral adjustment of the potentiometer can be checked by its output voltage.
1) Turn the key switch off. 2) Disconnect the connector of the torque sensor and put the adaptor for measuring voltage. NOTE
As the connector of the torque sensor is waterproof type, it is impossible to put the tester probe. Make an adapter by using the same type adapter.
3) Check the voltage at w pin [Green/Red or Green/Blue 1] of the adaptor. 4) Turn the key switch on and operate the steering wheel from right side end to left side end, then check the voltage. The following values are the standard.
right side end
0.8 V ± 0.3
neutral
2.5 V ± 0.3
left side end
4.2 V ± 0.3
From EPS sensor (potentiometer)
q Orange
q Blue 3
w Green / Red e Black / Red
Tab
w Green/Blue 1
Rece
e White
3P water proof type connector q pin w pin
Rece
e pin
Tab
Adaptor
Tab + probe to w pin (output)
– probe to e pin (negative)
V
+ –
– 21 –
To EPS controller
5. Self diagnosis history memory and I/O check. 5-1 Self diagnosis history memory The total 34 error histories which have occurred at least once can be memorized. There are two (2) kind of information for this function. The one is to memorized the operated condition when the trouble has occurred (called “Format 1”), the other one is to memorize the each malfunction (called “Format 2”). œThe basic system of “Format 2” is same as the one adopted on SICOS 50/60 and A-SICOS for FBR-60 series.
S
CO -SI
W
NE
TRAVEL
HYD
STEER
BATT
OIL
LOAD
BRAKE
TRAVEL
DISCHARGE
F 8 6 4 2 E
HYD
STEER
BATT
OIL
LOAD
BRAKE
DISCHARGE
0
km/m
5
10
15
20
F 8 6 4 2 E
SPEED
POWER
50
75
100
ACCEL
SOFT
TRAVEL
STD
FULL
0
km/m
5
10
15
20
SPEED
POWER
50
75
100
ACCEL
km
SOFT
TRAVEL
STD
FULL
km
Memory and display for the operated condition when the trouble has occurred.
Memory and display for the each malfunction. *same as SICOS 50/60 and A-SICOS or FBR-60 series.
– 22 –
AB
456
CDE
F01
23
1) Set the rotary switch RS1 to “B”, and turn the key switch on. 2) Press the mode select button M to call the each mode.
789
Set RS 1 to “B” NOTE
Do not turn the key switch on/off when the rotary switch RS0 is set to “F” as the history memory is cleared.
M CAUTION
The truck can be moved even though the history memory is called. Mode select button
A: Format 1 of history memory 3) Press Up or Down the each history No..
button to change
M
M
DOWN button
UP button
History memory No. can be changed (called) by pressing Up/Down button.
TRAVEL
HYD
STEER
BATT
OIL
LOAD
BRAKE
DISCHARGE
F 8 6 4 2 E
0
km/m
5
10
15
POWER
50
75
100
ACCEL
SOFT
TRAVEL
STD
FULL
km
[5] : Traveling mileage Traveling mileage will be displayed when some trouble happen.
[1] : History No. (0-9) Each error is displayed in order. 0 : Latest error 9 : Oldest error * It is naturally cleared for the errors over 11th. The history No. can be changed by pressing UP/Down button.
20
SPEED
[4] : Hydraulic motion mode No. Hydraulic motion (condition) is displayed when the trouble has occured. (see the page24 “[2] Hydraulic motion (condition) mode No.” in details) [3] : Traveling motion mode No. Traveling motion (condition) is displayed when the trouble has occured. (see the page24 “[1] Traveling motion (condition) mode No.” in details) [2] : Error No. (If “00” is displayed, there is no error memory) Error No. of error message is displayed (see the page35 table)
– 23 –
[1] Traveling motion mode No. Mode No.
Content
00
Neutral
01
Forward mode: Regenerative contactor OFF
02
Forward mode: Traveling contactor ON
03
Forward mode: Regenerative contactor ON
04
Forward mode: Traveling speed control
05
Forward mode: Bypass contactor ON
06
Forward mode: Bypass contactor OFF
07
Forward mode: Bypass control
08
Forward mode: Over driving contactor ON
09
Forward mode: Over driving contactor OFF
0A
Forward mode: Over driving control
0B
Forward mode: Pre-energizing
0C
Forward mode: Regenerative control
11
Reverse mode: Regenerative contactor OFF
12
Reverse mode: Traveling contactor ON
13
Reverse mode: Regenerative contactor ON
14
Reverse mode: Traveling speed control
15
Reverse mode: Bypass contactor ON
16
Reverse mode: Bypass contactor OFF
17
Reverse mode: Bypass control
18
Reverse mode: Over driving contactor ON
19
Reverse mode: Over driving contactor OFF
1A
Reverse mode: Over driving control
1B
Reverse mode: Pre-energizing
1C
Reverse mode: Regenerative control
[2] Hydraulic motion mode No. Mode No.
Content
0
Hydraulic neutral
1
Hydraulic control
2
Hydraulic bypass contactor ON
3
Hydraulic bypass contactor OFF
4
Hydraulic bypass control
– 24 –
B: Format 2 of history memory 3) Press Up or Down button to change (call) the each Error memory No..
M
If there has been a problem at least once, the bit shows “1”. If not, it shows “0” on the monitor.
M
DOWN button
“0” . . .No trouble [ “1” . . .Troubled (at least once)
UP button
History memory No. can be changed (called) by pressing Up/Down button.
TRAVEL
HYD
BATT
OIL
LOAD
30 40
60
80
STEER
BRAKE
DISCHARGE
F 8 6 4 2 E
Error memory No.
7th bit
6th bit
0
SPEED LIMIT
POWER
5th bit
50
75
100
4th bit
ACCEL
SOFT
%
STD
3rd bit
2nd bit A1 : FUSETRAVEL
ERR0
A5 : A6 : FET9CONTACTORREVERSE FORWARD
A4 : FET10FORWARD
A3 : A2 : FET6CONTACTORREGEN REGEN
ERR1
A14 : SENSOR- A13 : ACCELCURRENT ACCELERATOR (ARMATURE)
A12 : TR-REGEN MAIN
A11 : TR-TRAVEL MAIN
ERR2
B21 : B22 : TR-HYD SWITCH-LIFT MAIN
B20 : FET4HYD. BYPASS
B19 : B18 : FET5CONTACTOR- HYD HYD
ERR3
*REDUCE THE LOAD*
*REFILL HYDRAULIC OIL*
Not used
Not used
C31 : FUSE EPS
ERR4
Not used
Not used
Not used
Not used
Not used
– 25 –
FULL
1st bit
*FAIL HYD*
0 bit
*FAIL TRAVEL*
A10 : FET7- A9 : A8 : FET8OVER DRIVE CONTACTOR BYPASS BYPASS
A7 : CONTACTORREVERSE
B17 : FUSE HYD
A16 : SENSORSPEED
A15 : SENSORCURRENT (FIELD)
C30 : TR-EPS MAIN
C29 : SENSOREPS TORQUE
Not used
Not used
*REPLENISH *REFILL REFINED WATER FOR BRAKE OIL* BATTERY*
1) Turn the key switch OFF.
OFF
ON START
F01
456
AB
23
CDE
2) Set the rotary switch RS0 to “F”.
789
Set the rotary switch RS0 to “F”
3) Turn the key switch ON. (To START) OFF
ON START
4) Turn the key switch OFF.
OFF
5) Set the rotary switch RS0 at the original position.
6) Make sure to be clear it.
– 26 –
ON
5-2 I/O check I/O (Input/Output) check is the function that the input and output signal for the microcomputer can be displayed on the LCD by the binary code of [1] or [0] to check if each part is normal. Approx. 90 points of input/output signals can be checked.
Set RS 1 to “E”
AB
789
2) Select the port by pressing Up or Down button. Refer to the I/O table for the detail of each port.
Select the port No.
M NOTE
After confirming the I/O check, be sure to turn the key switch off and return the rotary switch RS1 to “0”.
M
DOWN button
For example, in case of the port No.10 (=IOM10), the following screen is displayed.
TRAVEL
HYD
STEER
BATT
OIL
LOAD
BRAKE
DISCHARGE
F 8 6 4 2 E
0
km/m
5
10
15
20
SPEED
POWER
50
75
100
ACCEL
SOFT
TRAVEL
Directional switch for reverse 1 : ON 0 : OFF
STD
FULL
km
Not used Not used
Directional switch for forward 1 : ON 0 : OFF Directional switch for neutral 1 : Neutral 0 : Not Neutral
– 27 –
456
CDE
F01
23
1) Set the rotary switch RS1 to “E”, and turn the key switch on.
Not used Not used Not used
UP button
I/O TABLE (1) PORT NO.
RS1-E NO.OD
RS1-E NO.OE
RS1-E NO.OF
RS1-E NO.OC
BIT
IN/OUT
0
IN
Button
[UP]
0: Up [brake closed]
1
IN
Button
[Mode select]
0 : select
2
IN
Button
[Down]
0 : Down
3
IN
Button
[Slow speed]
1 : Slow speed
4
IN
Hydraulic oil level
0 : Detection
5
IN
Brake oil level
0 : Detection
6
IN
Overload
0 : Detection
7
IN
Not used
0
IN
Switch
[Brake]
0 : ON [brake closed]
1
IN
Switch
[Lift 1]
1 : ON
2
IN
Switch
[Lift 2]
1 : ON
3
IN
Switch
[Tilt]
1 : ON
4
IN
Switch
[Attachment 1]
1 : ON
5
IN
Switch
[Attachment 2]
1 : ON
6
IN
Switch
[Attachment 3]
1 : ON
7
IN
Switch
[Parking brake]
1 : ON
0
IN
Contact
[Regenerative]
1 : ON
1
IN
Contact
[Hydraulic]
1 : ON
2
IN
Contact
[Forward]
0 : ON
3
IN
Contact
[Reverse]
0 : ON
4
CONTENTS
REMARKS
Not used
5
IN
Fuse
[Travel]
0 : Fault
6
IN
Fuse
[Hydraulic]
0 : Fault
7
IN
Fuse
[EPS]
0 : Fault
0
IN
Rotary switch RS-0
EX) 0000 : "0"
1
IN
Rotary switch RS-0
0000 : "1"
2
IN
Rotary switch RS-0
0000 : "3"
3
IN
Rotary switch RS-0
0000 : "8"
4
IN
Rotary switch RS-1
EX) 0000 : "0"
5
IN
Rotary switch RS-1
0001 : "1"
6
IN
Rotary switch RS-1
0011 : "3"
7
IN
Rotary switch RS-1
1000 : "8"
– 28 –
I/O TABLE (2) PORT NO.
RS1-E NO.10
RS1-E NO.11
BIT
IN/OUT
CONTENTS
1
IN
Not used
2
IN
Not used
3
IN
Not used
4
IN
Not used
5
IN
Directional
[Neutral]
1 : Neutral
6
IN
Directional
[Forward]
1 : Forward
7
IN
Directional
[Reverse]
1 : Reverse
0
Not used
1
Not used
2
Not used
3
Not used
REMARKS
4
IN
Hour mete clear
1 : Clear
5
IN
Hour meter count stop
1 : Stop
6
IN
Hour meter option
1 : Counting
7
OUT
[Hydraulic]
Not used
Current [Armature] Use 10 bits by binary system. "1 and 0 bits of NO.01 and 7 to 0 bits of NO.00" RS1-E NO.00 NO.01
\\ \\\\\\\\
bit
1 0 7 6 5 4 3 2 1 0 NO.01
NO.00
Analog / Digital conversion
0 - 500A / 1.2 - 4.0V
Current [Field] Use 10 bits by binary system. "1 and 0 bits of NO.03 and 7 to 0 bits of NO.020" RS1-E NO.02 NO.03
\\ \\\\\\\\
bit
1 0 7 6 5 4 3 2 1 0 NO.03
NO.02
Analog / Digital conversion
0 - 500A / 1.2 - 4.0V
Voltage [Battery] Use 10 bits by binary system. "1 and 0 bits of NO.05 and 7 to 0 bits of NO.04" RS1-E NO.04 NO.05
\\ \\\\\\\\
bit
1 0 7 6 5 4 3 2 1 0 NO.05
NO.04
Analog / Digital conversion
0 - 55V / 0 - 5V
Voltage [Battery capacity] Use 10 bits by binary system. "1 and 0 bits of NO.07 and 7 to 0 bits of NO.06" RS1-E NO.06 NO.07
\\ \\\\\\\\
bit
1 0 7 6 5 4 3 2 1 0 NO.07
NO.06
Analog / Digital conversion – 29 –
44.6 - 55V / 1.2 - 4.0V
I/O TABLE (3) Accelerator voltage 1 Use 10 bits by binary system. "1 and 0 bits of NO.09 and 7 to 0 bits of NO.08" RS1-E NO.08 NO.09
\\ \\\\\\\\
bit
1 0 7 6 5 4 3 2 1 0 NO.09
NO.08
Analog / Digital conversion
0 - 0.5V
Accelerator voltage 2 Use 10 bits by binary system. "1 and 0 bits of NO.0B and 7 to 0 bits of NO.0A" RS1-E NO.0A NO.0B
\\ \\\\\\\\
bit
1 0 7 6 5 4 3 2 1 0 NO.0B
NO.0A
Analog / Digital conversion
PORT NO.
RS1-E NO.18
0 - 0.5V
BIT
IN/OUT
0
OUT
Contactor select
[Forward]
1 : ON
1
OUT
Contactor select
[Reverse]
1 : ON
2
OUT
Contactor select
[By-pass]
1 : ON
3
OUT
Contactor select
[Overdrive]
1 : ON
4
OUT
Contactor select
[Regenerative]
1 : ON
5
OUT
Contactor select
[Hydraulic]
1 : ON
6
OUT
Contactor select
[Hydraulic by-pass]
1 : ON
7
CONTENTS
Not used
– 30 –
REMARKS
6. Practical trouble shooting (How to find the cause of problem) 6-1 Before starting Basically the same procedure can be used as the previous SICOS-50 for the troubleshooting. However, the display unit, MPU board, accelerator etc. are changed in design and some new functions are added. I/O checking also has the different procedure to recall on the display unit. The details of the procedure are explained in the following sections. In this section, the following matters should be understood.
qLocation of negative circuit Fit the negative(–) probe of circuit tester to; Minus (–) terminal in the control unit or the ribbon wire of M4 contactor when checking the voltage. Battery : 48V(FB10-25P) 72V (FB30P) (The auxiliary 48 volts output is equipped in the case of the 72 volts battery.
VA
F1
N
2200µF X 1 (FB10/15/18P) X 2 (FB20/25P) X 3 (FB30P)
NA
V
Capacitor : 100V
D1
275A VC
D2 M4
M1 A
IF
IA
FC1 M2
WH
Pre-energizing resistor : 30W 2.2Ω X 4 (10-25) 40W 2.2Ω X 2 (30)
RD
M3
D3
PB83-62 Pre-energizing
BU
(–) terminal or ribbon wire of M4 contactor
Capacitor : 100V 2200µF X 1 (FB10/15/18P) X 2 (FB20/25P) X 3 (FB30P)
D4 F2 PA
M7 FC2
(–) probe (–) probe
Battery (–) terminal
M4 contactor ribbon Wire (Bypass contactor)
– 31 –
wLayout of the connectors on MPU board and others 1) MIC connector MPU board
PB84-XX
CN1
CN3
CN2
CN4
CN5
CN6
A 6 5 4 3 14 13 12 11 10 9
CN1
2 8
1 7
4 3 10 9
10 9 8 7 6 5 4 3 2 1 20 19 18 17 16 15 14 13 12 11
8 7 6 5 4 3 2 1 16 15 14 13 12 11 10 9
CN2
CN5
CN6
10 9 8 7 6 5 4 3 2 1 20 19 18 17 16 15 14 13 12 11
8 7 6 5 4 3 2 1 16 15 14 13 12 11 10 9
CN3
CN4
8
7
2 6
1 5
View from A (receptacle/harness side) Each No. in the connector indicates pin No. For example, CN3-6 Pin No. (see picture in above) Connector No. (CN1-CN6)
NOTE
Pin location for connectors are shown from insertion side of pins.
– 32 –
2) Waterproof type connector Each No. in the connector indicates pin No. . 12 pin type
10 pin type
8 pin type
6 pin type
3 pin type
2 pin type
Rece side
6 5 4 3 2 1 12 11 10 9 8 7
5 4 3 2 1 10 9 8 7 6
4 3 2 1 8 7 6 5
3 2 1 6 5 4
3 2 1
2 1
Tab side
1 2 3 4 5 6 7 8 9 10 11 12
1 2 3 4 5 6 7 8 9 10
1 2 3 4 5 6 7 8
1 2 3 4 5 6
1 2 3
1 2
3) Other connector Each No. in the connector indicates pin No. . 6 pin type
Rece side
1 4
2 5
3 6
Tab side
3 6
2 5
1 4
4 pin type (1)
1
2
3
4
4 pin type (2)
1 3
2 4
2 4
1 3
6-2 Attention for the troubleshooting NOTE
Initially correctly understand content and phenomena of problems. After understanding customer’s operator sayings and actual forklift truck status as correctly as possible ( including problems that often occur).
qVisual checking The visual checking may help to find the main cause, check the each parts carefully. Example) Is there any parts or wire which is burned out ? How about the looseness of connector ?
– 33 –
2 pin type
1 2
wFault finding When the cause is unknown even after visual check, safety guard
1) Place the rigid blocks under the outer mast to stable the truck. 2) Tilt the mast forward by pushing the tilt lever to rise the front wheels. NOTE
Place the safety guards for safety ! Do not rotate the drive wheels off the floor at high speed, because the drive motor and internal parts of the gear box could be damaged. Measurement of voltage should be done in a short time. Be sure to disconnect the battery plug when connecting the volt-ohm meter, repairing and replacing parts.
– 34 –
Rigid block
eError message and Possible defective part Error No. and error message is displayed. Symbol Error (Flash for defect) No.
Message
Possible defective part
3
* FAIL TRAVEL. *
FET, D2, MPU board ... etc.
4
* FAIL HYD. *
FET, MPU board ... etc.
* TURN OFF KEY SWITCH *
linked with other message
5
A1 : FUSE-TRAVEL.
Travel fuse
6
A2 : FET6-REGEN.
Regen. contactor coil, MPU board
7
A3 : CONTACTOR-REGEN.
Regen. contactor, MPU board
8
A4 : FET10-FORWARD
Forward contactor coil(Left), MPU board
9
A5 : CONTACTOR-FORWARD
Forward contactor
10
A6 : FET9-REVERSE
Reverse contactor coil (Left), MPU board
11
A7 : CONTACTOR-REVERSE
Reverse contactor
12
A8 : FET8-BYPASS
Bypass contactor coil, MPU board
13
A9 : CONTACTOR-BYPASS
Bypass contactor, MPU board
14
A10 : FET7-OVER DRIVE
15
A11 : TR-TRAVEL. MAIN
FET, Bypass contactor, MPU board
16
A12 : TR-REGEN. MAIN
Pre-energizing board, Resistor
17
A13 : ACCEL-ACCELERATOR
Accel., Directional sw.
18
A14 : SENSOR-CURRENT (ARMATURE)
Current sensor (Ia)
19
A15 : SENSOR-CURRENT (FIELD)
Current sensor (If)
20
A16 : SENSOR-SPEED
Speed sensor
21
B17 : FUSE-HYD.
Hydraulic fuse
22
B18 : FET5-HYD.
Hydraulic contactor coil, MPU board
23
B19 : CONTACTOR-HYD.
Hydraulic contactor, MPU board
24
B20 : FET4-HYD. BYPASS
25
B21 : TR-HYD. MAIN
Hydraulic FET, MPU board
26
B22 : SWITCH-LIFT
Lift micro switch (1), (2)
27
B23 : SENSOR-CURRENT (HYD.)
TRAVEL
HYD
Remarks
Half speed
Half speed
Half speed
Half speed
Half speed
D24 : PC. BOARD-AOS * FAIL AOS * D25 : TR-AOS D26 : RELAY-AOS D27 : POTENTIO-HYD. LEVER D28 : POTENTIO-MAST STEER
34
C29 : SENSOR-EPS TORQUE
35
C30 : TR-EPS MAIN
36
C31 : FUSE-EPS
37
C32 : FET3-EPS
38
C33 : CONTACTOR-EPS
* The following parts cannot be diagnosed and displayed. 1) Diodes : D1, D2, D3 and D4 5) Motors 2) Capacitors for surge absorbing 6) A part of MPU board 3) A part of current sensor 7) A part of microswitches 4) A part of pre-energizing board 8) Wire harness
9) Connectors 10) Back contacts of forward / reverse contactror 11) LCD display
* The error messages for the current sensor and the pre-energizing board are depend on the defect conditions to display. – 35 –
Symbol Error (Flash for defect) No.
Message
Possible defective part
Remarks
39
* REFILL HYDRAULIC OIL *
Shortage of hydraulic oil
40
* REDUCE THE LOAD *
Overloaded
Opt.
41
* REFILL BRAKE OIL *
Shortage of brake oil
Opt.
42
* REPLENISH REFINED WATER FOR BATTERY *
Shortage of battery electrolyte
* CHARGE THE BATTERY *
Need to charge battery
* RELEASE ACCEL. TO NEUTRAL *
Accelerator is operated before power on
* OFF HYD. LEVER TO NEUTRAL *
Hyd. lever is operated before power on
6-3 Troubleshooting Procedure Correct understanding of the content and phenomena of the problems is a great prerequisite. However, after understanding them, the indications on the display (safety monitor, error message, I/O checking ) become effective means. An indication is not made on the LCD display. No indications or abnormal. Indication of the LCD display is normal. No error message appears. Indication of the LCD display is normal. Error messages appears. These cases are assumed. Considering them and referring to the error messages and circuit diagram (system wiring), trace the malfunctions. Approximate guess is required. Thoughtless tracing greatly wastes time. The basic considerations are the same as the SICOS50/60. However, glance over this manual and roughly take note of the key matters.
6-4 Analysis of malfunction causes It was previously stated that initial understanding of the content and phenomena of the problems is an important point in finding the malfunctions. With prerequisite that a malfunction results in any error, the following checkings lead to a start for the procedure. – 36 –
GS batt.
Check for truck status LCD display status 1) Check to ensure that the display is normal. (Ordinary display or non-display) 2) Check to ensure that the display indicates error messages. Next, the malfunctions can be classified mainly into following three: No indications are made on the LCD display. Indication of the LCD display is normal, but the truck abnormally travels. On the LCD display, error messages appear. The following are the counter measures.
qNo indications are made on the LCD display. In this case, only the display does not make an indication. Whether the forklift truck normally travels or not is a judgement diverge. 1) If only indication problems exist; LCD display MPU board that is controlling LCD. Cables including connector between MPU and LCD shall be checked. 2) Without LCD indications, the forklift truck abnormally travels. (In many cases, the truck does not travel quite). The power circuits seem to have problems. At the LCD lighting on the MPU board, the MPU board, wirings or fuses are judged to have problems. PROCEDURE:Example, No LCD
Can truck travel and operate hydraulics normally?
Are all lit? LED0:12V LED1: 5V LED2:CPU run
No
Yes
Yes
Replace LCD dispraly. Yes
Checking for power line. F4 fuse, Mctt replay, CN2-6 pin, CN5-20 pin, CN5-10 pin.
Is LCD indication made? Yes
Check for MPU board or wirings.
– 37 –
No Replace MPU board.
wIndication of the LCD display is normal, but the truck abnormally travels. In this case, especially checking for malfunctions of the truck must be done. They are largely classified into two(2): Traveling and Hydraulic malfunctions. 1) Truck traveling status The truck does not travel. The truck rushes out. The electric braking (plugging) force is weak. If the LCD display indication is normal and the traveling system has an error, the following checkings must be initially done. Check to ensure that all adjustments have been done. (See 1-3 Adjustment of starting current and current limitation) Check to ensure that the option setting is correct. Check to ensure that the hour meter display is normal. Check for the parts which are not self-diagnosed regarding travel, (See 6-2 eError message and Possible defective part) 2) Hydraulic malfunctions A hydraulic motion is not made. The hydraulic speed control is impossible. If the hydraulic systems have errors, perform checking in the same way as the traveling systems. Check to ensure that all adjustments have been done. (See 1-3 Adjustment of starting current and current limitation) Check for malfunctions of the option and hour meter display.
eOn the LCD display, error messages appear. In this case, with reference to Section 6 Practical trouble shooting. Please try checking. The detailed procedure will be notified to you soon later. Main signal lines for error message will be attached to the system wiring base. Please refer to it.
– 38 –
6-5 Flowchart for troubleshooting q Check point 1) Is model select correct? 2) Check the specification. With option. Special truck? After checking the above, start to troubleshoot.
CAUTION
CAUTION
When replacing MPU board and/or Current sensor, and/or FET comp. be sure to check the following. 1. MPU board (1) Check the setting of Rotary switch (RS0, RS1-7). (See Adjustment Specification Table.) (2) Adjust Start current and Current limitation. Repeat the plugging operation a few times and recheck the setting. (3) Check the plugging brake distance. (See Adjustment Specification Table.) 2. Current sensor (1) Adjust Start current and Current limitation. Repeat the plugging operation a few times and re-check the setting. 3. FET Comp. (1) Adjust Start current and Current limitation. Repeat the plugging operation a few times and re-check the setting.
1. Be sure to turn off the key switch when setting Rotary switches. 2. Be sure to disconnect the battery plug when replacing the inner parts of Control unit.
w Contents of flowchart ERROR NO.1 ERROR NO.2 ERROR NO.3 ERROR NO.4 ERROR NO.5 ERROR NO.7 ERROR NO.9 ERROR NO.11 ERROR NO.13 ERROR NO.16 ERROR NO.18 ERROR NO.20 ERROR NO.22 ERROR NO.24 ERROR NO.26 ERROR NO.35
*RELEASE ACCEL TO NEUTRAL* *OFF HYD. LEVER TO NEUTRAL* *FAIL TRAVEL* *TURN OFF KEY SWITCH* *FAIL HYD.* *TURN OFF KEY SWITCH* A1:FUSE-TRAVEL ERROR NO.6 A3:CONTACTOR-REGEN. ERROR NO.8 A5:CONTACTOR-FORWARD ERROR NO.10 A7:CONTACTOR-REVERSE ERROR NO.12 A9:CONTACTOR-BYPASS ERROR NO.15 A12:TR-REGEN. MAIN ERROR NO.17 A14:SENSOR-CURRENT(ARMATURE) ERROR NO.19 A16:SENSOR-SPEED ERROR NO.21 A18:FET5-HYD. ERROR NO.23 B20:FET4-HYD. BYPASS ERROR NO.25 B22:SWITCH-LIFT ERROR NO.34 C30:TR-EPS MAIN ERROR NO.36
– 39 –
A2:FET6-REGEN. A4:FET10-FORWARD A6:FET9-REVERSE A8:FET8-BYPASS A11:TR-TRAVEL MAIN A13:ACCEL-ACCELERATOR A15:SENSOR-CURRENT(FIELD) A17:FUSE-HYD. B19:CONTACTOR-HYD. B21:TR-HYD. MAIN C29:SENSOR-EPS TORQUE C31:FUSE-EPS
Error No.1
* RELEASE ACCEL TO NEUTRAL *
LCD Display
*RELEASE ACCEL TO NEUTRAL* Operate Accelerator before turning on Key switch?
No
No Slit plate normal? Yes
Yes
Return the accelerator to the neutral position. Then operate it again.
Adjust.
Replace the accelerator printed board.
Operation become normal?
No
Yes
This situation is occurred by the neutral safety function. This is not problem. This function warns to the operator to take the correct procedure to operate.
END
No
Repair.
The following each wiring between Accelerator and MPU board is normal? Accelerator PB-CN3-4 (Red4) Accelerator PB-CN3-5 (Brown/Yellow1) Accelerator PB-CN3-14 (Black/Yellow) Accelerator PB-CN4-1 (Red/Green3) Accelerator PB-CN4-2 (Green/Black1) Accelerator PB-CN4-9 (Black1) Yes Replace MPU board.
CAUTION
CAUTION
When replacing MPU board and/or Current sensor, and/or FET comp. be sure to check the following. 1. MPU board (1) Check the setting of Rotary switch (RS0, RS1-7). (See Adjustment Specification Table.) (2) Adjust Start current and Current limitation. Repeat the plugging operation a few times and recheck the setting. (3) Check the plugging brake distance. (See Adjustment Specification Table.) 2. Current sensor (1) Adjust Start current and Current limitation. Repeat the plugging operation a few times and re-check the setting. 3. FET Comp. (1) Adjust Start current and Current limitation. Repeat the plugging operation a few times and re-check the setting.
1. Be sure to turn off the key switch when setting Rotary switches. 2. Be sure to disconnect the battery plug when replacing the inner parts of Control unit. – 40 –
Error No.2
* OFF HYD. LEVER TO NEUTRAL *
LCD Display
*OFF HYD. LEVER TO NEUTRAL* No
Operate the hydraulic lever before turning the key switch?
Turn off key switch.
Yes Set RS1 at [E]. Return the hydraulic lever to the neutral position. Then operate it again. Turn on key switch.
This situation is occurred by the neutral safety function. This is not problem. This function warns to the operator to take the correct procedure to operate.
Select [IOM 0E].
No
Release the hydraulic lever. Any bit shows [1]?
Replace MPU board.
Yes No Hyd. micro switch normal?
Repair.
Yes The following wiring between Hyd. Micro SW and MPU board are normal? Lift1 micro SW-CN6-6 (Brown/Red1) Lift2 micro SW-CN6-14(Blue/Yellow2) Tilt micro SW-CN6-7 (Red3) Reach micro SW-CN6-15 (Yellow/Black) Attachment micro SW-CN6-8 (Green/White3) Attachment micro SW-CN6-16 (Blue/Yelloew3)
No
Yes
7 6 5 4 3 2 1 0 Replace Micro SW of the bit that shows [1].
LIFT1 SW
LIFT2 SW
TILT SW
No REACH SW
ATTACHMEMT SW
ATTACHMEMT SW
IOM 0E/
Operation become normal? Yes END
– 41 –
Replace MPU board.
Repair.
Error No.3
* FAIL TRAVEL* *TURN OFF KEY SWITCH*
LCD Display
*
FAIL TRAVEL * * TURN OFF KEY SWITCH
The other error messages appear at the same time?
* No
The contact of M4 Bypass contactor is welded?
Yes See the flowchart in which the error message appears and check it.
No
Yes
The “Green/Blue” wire between drain of Travel FET and CN3-19 pin is normal?
Replace the contact of Bypass contactor.
No
Yes Repair. No
q Turn off key switch. w Disconnect
Operation become normal?
the connector of Travel FET “4P Green”.
Yes Turn on key switch. END No
The error messages “*FAIL TRAVEL*” appears? Yes
Replace MPU board. Replace Travel FET.
CAUTION
CAUTION
When replacing MPU board and/or Current sensor, and/or FET comp. be sure to check the following. 1. MPU board (1) Check the setting of Rotary switch (RS0, RS1-7). (See Adjustment Specification Table.) (2) Adjust Start current and Current limitation. Repeat the plugging operation a few times and recheck the setting. (3) Check the plugging brake distance. (See Adjustment Specification Table.) 2. Current sensor (1) Adjust Start current and Current limitation. Repeat the plugging operation a few times and re-check the setting. 3. FET Comp. (1) Adjust Start current and Current limitation. Repeat the plugging operation a few times and re-check the setting.
1. Be sure to turn off the key switch when setting Rotary switches. 2. Be sure to disconnect the battery plug when replacing the inner parts of Control unit. – 42 –
Error No.4
* FAIL HYD.* *TURN OFF KEY SWITCH*
LCD Display FAIL HYD. * * *TURN OFF KEY SWITCH*
The other error messages appear at the same time?
No
No Hyd. Bypass installed? Yes
Yes
See the flowchart in which the error message appears and check it.
No The contact of M7 contractor welded? Yes
The “Green/White” wire between drain of Hyd. FET and CN3-10 pin is normal?
No
Yes Repair. Replace M7 contractor.
q Turn off the key switch. w Disconnect the connector. (2P Black)
Turn on key switch.
No
The error message “*FAIL HYD.* TURN OFF KEY SWITCH*” * appears? Yes
Replace MU board. Replace Hyd. FET.
– 43 –
Error No.5
A1:FUSE TRAVEL
LCD Display A1:FUSE TRAVEL
Turn off key switch.
Fuse F1 for travel is normal?
No
Yes q Turn off the key switch. w Set RS1 at [E]. e Turn on key switch and
Replace Fuse for travel.
select I/O port [IOM 0F].
This bit 5 shows [1] on LCD display? LCD display
7 6 5 4
3 2 1 0
No
IOM 0F 1:normal
0:abnormal
The “Brown/White” wire between F1 (fuse) and CN2-1 pin is normal?
Yes
No
Yes
Replace MPU board.
Repair. Replace MPU board.
CAUTION
CAUTION
When replacing MPU board and/or Current sensor, and/or FET comp. be sure to check the following. 1. MPU board (1) Check the setting of Rotary switch (RS0, RS1-7). (See Adjustment Specification Table.) (2) Adjust Start current and Current limitation. Repeat the plugging operation a few times and recheck the setting. (3) Check the plugging brake distance. (See Adjustment Specification Table.) 2. Current sensor (1) Adjust Start current and Current limitation. Repeat the plugging operation a few times and re-check the setting. 3. FET Comp. (1) Adjust Start current and Current limitation. Repeat the plugging operation a few times and re-check the setting.
1. Be sure to turn off the key switch when setting Rotary switches. 2. Be sure to disconnect the battery plug when replacing the inner parts of Control unit. – 44 –
Error No.6
A2:FET6-REGEN.
LCD Display A2:FET6-REGEN. OPTION SET Adjust. RS1 Regenerative function installed?
[7]
7 6 5 4
Check OPTION SET.
3 2 1 0
No
OPTION
Yes Bit 4 shows [0]? The error message appears after turning on key switch Yes without traveling?
Yes
No Replace MPU board.
q Set the bit 4 at [0].
Then reset RS1 at [0]. w Turn off and on key switch. q Turn off key switch. w Disconnect CN1 from MPU
board. Replace MPU board.
The “Red/Green1” wire between coil of M3 contactor and CN1-3 pin is normal?
Yes
The coil resistance of M3 contactor is normal? 32.5-35.5Ω Yes
No
Repair.
No
Replace MPU board.
– 45 –
Replace M3 contactor and MPU board at the same time.
Error No.7
A3:CONTACTOR-REGEN.
LCD Display A3:CONTACTOR-REGEN. OPTION SET Adjust. RS1
No Regenerative function is installed?
[7]
7 6 5 4
Check OPTION SET.
3 2 1 0
OPTION Yes Bit 4 shows [0]? Yes
Turn off key switch.
q Set the bit 4 at [0].
Then reset RS1 at [0]. The contact of Regen. contactor (M3) is welded?
w Turn off and on key switch.
No
Yes
Replace M3 Contactor.
Replace MPU board.
The error message appears at the moment when key switch, Foot switch and Accelerator are turned on?
No Replace M3 Contactor.
Yes
Operation become normal?
The “Blue2” wire between contact of M3 contactor and CN4-15 pin is damaged?
No
Yes
No
END
Yes Replace MPU board. Repair. The connection of M3 contactor is bad ?
No
Yes Replace MPU board.
Replace M3 Contactor.
– 46 –
No
Error No.8
A4:FET10-FORWARD
LCD Display A4:FET10-FORWARD
The error message appears after turning on key switch without traveling.
No Replace MPU board.
Yes
q Turn off key switch. w Disconnect CN2 from MPU
board.
The “Red1” wire between coil of M1 contactor and CN2-3 pin is normal?
No Repair.
Yes
The coil resistance of M1 contactor is normal? 32.5-35.5Ω
No
Replace M1 contactor and MPU board at the same time.
Yes
Replace MPU board.
CAUTION
CAUTION
When replacing MPU board and/or Current sensor, and/or FET comp. be sure to check the following. 1. MPU board (1) Check the setting of Rotary switch (RS0, RS1-7). (See Adjustment Specification Table.) (2) Adjust Start current and Current limitation. Repeat the plugging operation a few times and recheck the setting. (3) Check the plugging brake distance. (See Adjustment Specification Table.) 2. Current sensor (1) Adjust Start current and Current limitation. Repeat the plugging operation a few times and re-check the setting. 3. FET Comp. (1) Adjust Start current and Current limitation. Repeat the plugging operation a few times and re-check the setting.
1. Be sure to turn off the key switch when setting Rotary switches. 2. Be sure to disconnect the battery plug when replacing the inner parts of Control unit. – 47 –
Error No.9
A5:CONTACTOR-FORWARD
LCD Display A5:CONTACTOR-FORWARD
Turn on key switch. Yes
The truck can travel when operating the accelerator after pushing the lever forward?
No Replace M1 contactor.
Yes
The “Yellow/White2” wire between contact of M1 contactor and CN3-18 pin is normal? And also the “Green/Blue2” wire between contact of M2 contactor and CN3-9 pin is normal?
No Repair.
Yes
Replace MPU board.
CAUTION
CAUTION
When replacing MPU board and/or Current sensor, and/or FET comp. be sure to check the following. 1. MPU board (1) Check the setting of Rotary switch (RS0, RS1-7). (See Adjustment Specification Table.) (2) Adjust Start current and Current limitation. Repeat the plugging operation a few times and recheck the setting. (3) Check the plugging brake distance. (See Adjustment Specification Table.) 2. Current sensor (1) Adjust Start current and Current limitation. Repeat the plugging operation a few times and re-check the setting. 3. FET Comp. (1) Adjust Start current and Current limitation. Repeat the plugging operation a few times and re-check the setting.
1. Be sure to turn off the key switch when setting Rotary switches. 2. Be sure to disconnect the battery plug when replacing the inner parts of Control unit. – 48 –
Error No.10
A6:FET9-REVERSE
LCD Display A6:FET9-REVERSE
The error message appears after turning on key switch without traveling.
No Replace MPU board.
Yes
q Turn off key switch. w Disconnect CN2 from MPU
board.
The “Red/White1” wire between coil of M2 contactor and CN2-4 pin is short-circuited with the other wire?
No Repair.
Yes
The coil resistance of M2 contactor is normal? 32.5-35.5Ω
No
Replace M2 contactor and MPU board at the same time.
Yes
Replace MPU board.
– 49 –
Error No.11
A7:CONTACTOR-REVERSE
LCD Display A7:CONTACTOR-REVERSE
Turn on key switch. Yes
The truck can travel when operating the accelerator after pushing the lever forward?
No Replace M1 contactor.
Yes
The “Yellow/White2” wire between contact of M1 contactor and CN3-18 pin is normal? And also the “Green/Blue2” wire between contact of M2 contactor and CN3-9 pin is normal?
No Repair.
Yes
Replace MPU board.
CAUTION
CAUTION
When replacing MPU board and/or Current sensor, and/or FET comp. be sure to check the following. 1. MPU board (1) Check the setting of Rotary switch (RS0, RS1-7). (See Adjustment Specification Table.) (2) Adjust Start current and Current limitation. Repeat the plugging operation a few times and recheck the setting. (3) Check the plugging brake distance. (See Adjustment Specification Table.) 2. Current sensor (1) Adjust Start current and Current limitation. Repeat the plugging operation a few times and re-check the setting. 3. FET Comp. (1) Adjust Start current and Current limitation. Repeat the plugging operation a few times and re-check the setting.
1. Be sure to turn off the key switch when setting Rotary switches. 2. Be sure to disconnect the battery plug when replacing the inner parts of Control unit. – 50 –
Error No.12
A8:FET8-BYPASS
LCD Display A8:FET8-BYPASS
The error message appears after turning on key switch without traveling.
No Replace MPU board.
Yes
q Turn off key switch. w Disconnect CN1 from MPU
board.
The “Red/Black1” wire between coil of M4 contactor and CN1-1 pin is short-circuited with the other wire?
No Repair.
Yes
The coil resistance of M4 contactor is normal? 32.5-35.5Ω
No
Replace M4 contactor and MPU board at the same time.
Yes
Replace MPU board.
– 51 –
Error No.13
A9:CONTACTOR-BYPASS
LCD Display A9:CONTACTOR-BYPASS
The error message of “*FAIL TRAVEL*” appear at the same time?
No Replace M4 contactor.
Yes The contact of M4 contactor welded?
No
Yes
The “Green/Blue” wire between drain of Travel FET and CN3-19 pin is normal?
Replace the contact of M4 contactor.
No Repair.
Yes No
q Turn off key switch w Disconnect the connector of
Operation become normal?
Travel FET (4P Green).
Yes
END Turn on key switch.
The error message of “*FAIL TRAVEL*” appear?
No
Yes Replace MPU board. Replace Travel FET.
CAUTION
CAUTION
When replacing MPU board and/or Current sensor, and/or FET comp. be sure to check the following. 1. MPU board (1) Check the setting of Rotary switch (RS0, RS1-7). (See Adjustment Specification Table.) (2) Adjust Start current and Current limitation. Repeat the plugging operation a few times and recheck the setting. (3) Check the plugging brake distance. (See Adjustment Specification Table.) 2. Current sensor (1) Adjust Start current and Current limitation. Repeat the plugging operation a few times and re-check the setting. 3. FET Comp. (1) Adjust Start current and Current limitation. Repeat the plugging operation a few times and re-check the setting.
1. Be sure to turn off the key switch when setting Rotary switches. 2. Be sure to disconnect the battery plug when replacing the inner parts of Control unit. – 52 –
Error No.15
A11:TR-TRAVEL MAIN
LCD Display A11:TR-TRAVEL MAIN
The error message of “*FAIL TRAVEL*” appears at the same time?
No
The “Green/Blue” wire between contactor of Travel FET and CN3-19 pin is normal?
Yes
No Repair.
Yes Replace Travel FET.
The contact of M4 contactor welded?
No
Yes
Replace the contact of M4 contactor.
The “Green/Blue” wire between contactor of Travel FET and CN3-19 pin is normal?
No Operation become normal? Yes
No Repair.
Yes
END
q Turn off key switch w Disconnect the connector of
Travel FET (4P Green).
Turn on key switch.
The error message of “*FAIL TRAVEL*” appears?
No
Yes Replace MPU board. Replace Travel FET.
– 53 –
Error No.16
A12:TR-REGEN. MAIN
LCD Display A12:TR-REGEN. MAIN No Regen. contactor (M4) is installed?
Replace MPU board.
Yes Resistors for pre-energizing are normal? 48V : 2.2Ω, 30W (4 pcs.) 24V : 1.0Ω, 30W (2 pcs.)
No Replace.
Yes The following 2mm2 wires are normal? (short-circuited or broken?) q “Red” wire between contact of M3 contactor and the resistors for pre-energizing. w “Blue” wire between the resistors and pre-energizing PB. e “White” wire between pre-energizing PB and D2 [A].
No Repair.
Yes The following wires are normal? (short-circuited or broken?) q “Blue/Red” wire between pre-energizing PB and MPU board (CN4-8 pin). w “White/Red1” wire between pre-energizing PB and MPU board (CN4-16 pin). e “Brown/White” wire between D2 [K] and MPU board (CN2-1 pin).
No Repair.
Yes Replace pre-energizing PB.
No Operation become normal?
Replace MPU board.
Yes END
CAUTION
CAUTION
When replacing MPU board and/or Current sensor, and/or FET comp. be sure to check the following. 1. MPU board (1) Check the setting of Rotary switch (RS0, RS1-7). (See Adjustment Specification Table.) (2) Adjust Start current and Current limitation. Repeat the plugging operation a few times and recheck the setting. (3) Check the plugging brake distance. (See Adjustment Specification Table.) 2. Current sensor (1) Adjust Start current and Current limitation. Repeat the plugging operation a few times and re-check the setting. 3. FET Comp. (1) Adjust Start current and Current limitation. Repeat the plugging operation a few times and re-check the setting.
1. Be sure to turn off the key switch when setting Rotary switches. 2. Be sure to disconnect the battery plug when replacing the inner parts of Control unit. – 54 –
Error No.17
A13:ACCEL-ACCELERATOR 7 6 5 4 3 2 1 0
LCD Display
Bit1-Bit4 change like the right table when pulling and/or pushing Accelerator? No 6 1 0 0
(Gray code)
5 0 Forward 1 Neutral 0 Backward Yes
0 0 0 0 0 0 0 0 1 1 1 1 1 1 1 1
0 0 0 0 1 1 1 1 1 1 1 1 0 0 0 0
0 0 1 1 1 1 0 0 0 0 1 1 1 1 0 0
0 1 1 0 0 1 1 0 0 1 1 0 0 1 1 0
Turn off key switch. Connector 6P MPU board of Accelerator 1 pin – CN3-14 (Black/Yellow) 2 pin – CN3-5 (Brown/Yellow1) 3 pin – CN3-4 (Red4) 4 pin – CN4-9 (Black1) 5 pin – CN4-2 (Green/Black1) 6 pin – CN4-1 (Red/Green3) Each wire of the above is broken or bad connector?
Micro switch of Directional switch is normal?
No
No
Yes Adjust or Replace.
Repair.
Yes Directional MPU board switch Forward – CN6-12 (Brown2) Backward – CN6-5 (White/Red2) Neutral – CN6-4 (Brown/Black1) Each wire of the above is broken or bad connector?
Replace Accelerator PB.
Operation become normal?
No
No
Yes Yes Replace MPU board. END
CAUTION
I/O check of Accelerator signal is displayed by Gray code. It is not Binary code. Pay attention. – 55 –
Replace MPU board.
Repair.
NO USED
FAD
BWD
0 1 2 3 4 5 6 7 8 9 10 11 12 13 14 15
select I/O port [IOM 10].
7 0 0 1
Accel, bit
DECIMAL
q Turn off key switch. w Set RS1 at [E]. e Turn on key switch, and
Bit Push Release Pull
NTRAL
IOM 10
A13:ACCEL-ACCELERATOR
0 0 0 0 0 0 0 0 0 0 0 0 0 0 0 0
Error No.18
A14:SENSOR-CURRENT (ARMATURE)
LCD Display A14:SENSOR CURRENT (ARMATURE)
Turn off key switch. [la] level can be adjust as 0[A]?
No
Yes
q Set RS1 at [1]. w Turn on key switch.
Adjust at 0[A].
[la] level of current sensor is 0[A]?
No The following wires are normal? q “Red/Black3” wire between Current sensor and CN3-1 pin. w “Blue” wire between Current sensor and CN3-2 pin. e “Black/Red1” wire between Current sensor and CN3-11 pin.
Yes Replace MPU board.
Operation become normal?
No
Yes
Yes END
No
Repair.
Replace Current sensor [la]. Replace Current sensor [la]. Operation become normal?
No
Yes END
CAUTION
CAUTION
Replace MPU board.
When replacing MPU board and/or Current sensor, and/or FET comp. be sure to check the following. 1. MPU board (1) Check the setting of Rotary switch (RS0, RS1-7). (See Adjustment Specification Table.) (2) Adjust Start current and Current limitation. Repeat the plugging operation a few times and recheck the setting. (3) Check the plugging brake distance. (See Adjustment Specification Table.) 2. Current sensor (1) Adjust Start current and Current limitation. Repeat the plugging operation a few times and re-check the setting. 3. FET Comp. (1) Adjust Start current and Current limitation. Repeat the plugging operation a few times and re-check the setting.
1. Be sure to turn off the key switch when setting Rotary switches. 2. Be sure to disconnect the battery plug when replacing the inner parts of Control unit. – 56 –
Error No.19
A15:SENSOR-CURRENT (FIELD)
LCD Display A15:SENSOR CURRENT (FIELD)
Turn off key switch. [lf] level can be adjust as 0[A]?
No
Yes
q Set RS1 at [1]. w Turn on key switch.
Adjust at 0[A].
[lf] level of current sensor is 0[A]?
No The following wires are normal? q “Red/Yellow3” wire between Current sensor and CN3-3 pin. w “Yellow/Red2” wire between Current sensor and CN3-12 pin. e “Black2” wire between Current sensor and CN3-13 pin.
Yes Replace MPU board.
Operation become normal?
No
Yes
Yes END
No
Repair.
Replace Current sensor [lf]. Replace Current sensor [lf]. Operation become normal?
No
Yes END
– 57 –
Replace MPU board.
Error No.20 A16:SENSOR-SPEED
LCD Display A16:SENSOR-SPEED
Speed sensor1 and Speed sensor2 are installed normally?
No Adjust.
Yes
The following wires are normal? q “White1” wire between Speed sensor1 and MPU board (CN5-3 pin). w “Black/White1” wire between Speed sensor1 and MPU board (CN5-13 pin). e “White2” wire between Speed sensor2 and MPU board (CN5-4 pin). r “Black/Yellow1” wire between Speed sensor2 and MPU board (CN5-14 pin).
No Repair.
Yes
Replace Speed sensor1 and Speed sensor2.
No Operation become normal?
Replace MPU board.
Yes
END
CAUTION
CAUTION
When replacing MPU board and/or Current sensor, and/or FET comp. be sure to check the following. 1. MPU board (1) Check the setting of Rotary switch (RS0, RS1-7). (See Adjustment Specification Table.) (2) Adjust Start current and Current limitation. Repeat the plugging operation a few times and recheck the setting. (3) Check the plugging brake distance. (See Adjustment Specification Table.) 2. Current sensor (1) Adjust Start current and Current limitation. Repeat the plugging operation a few times and re-check the setting. 3. FET Comp. (1) Adjust Start current and Current limitation. Repeat the plugging operation a few times and re-check the setting.
1. Be sure to turn off the key switch when setting Rotary switches. 2. Be sure to disconnect the battery plug when replacing the inner parts of Control unit.
– 58 –
Error No.21
B17:FUSE-HYD.
LCD Display B17:FUSE-HYD.
Turn off key switch.
Hyd. fuse F2 is normal?
No
Yes q Turn off the key switch. w Set RS1 at [E]. e Turn on key switch and
Replace.
select I/O port [IOM 0F].
This bit6 shows [1] on LCD display? LCD display
7 6 5 4
3 2 1 0
No
IOM 0F/ 1:normal
0:abnormal Yes
The “Green/Black” wire between F2 (fuse) and CN2-5 pin is normal?
No
Yes
Replace MPU board.
Replace MPU board.
– 59 –
Replace. (Damage or bad connection)
Error No.22
B18:FET5-HYD.
LCD Display A18:FET-HYD.
The error message appears when turning on key switch without traveling.
No Replace MPU board.
Yes
q Turn off key switch. w Disconnect CN1 from MPU
board.
The “Red2” wire between coil of M6 contactor and CN1-4 pin is normal?
No Repair.
Yes
The coil resistance of M6 contactor is normal? 32.5-35.5Ω
No Replace MPU board.
Yes
Replace M4 contactor and MPU board at the same time.
CAUTION
CAUTION
When replacing MPU board and/or Current sensor, and/or FET comp. be sure to check the following. 1. MPU board (1) Check the setting of Rotary switch (RS0, RS1-7). (See Adjustment Specification Table.) (2) Adjust Start current and Current limitation. Repeat the plugging operation a few times and recheck the setting. (3) Check the plugging brake distance. (See Adjustment Specification Table.) 2. Current sensor (1) Adjust Start current and Current limitation. Repeat the plugging operation a few times and re-check the setting. 3. FET Comp. (1) Adjust Start current and Current limitation. Repeat the plugging operation a few times and re-check the setting.
1. Be sure to turn off the key switch when setting Rotary switches. 2. Be sure to disconnect the battery plug when replacing the inner parts of Control unit. – 60 –
Error No.23
B19:CONTACTOR-HYD.
LCD Display A19:CONTACTOR-HYD.
No
No Hyd. operation is normal?
Hyd. contactor (M6) can work?
Replace M6 contactor.
Yes
Yes
The contact of M6 contactor is conductive?
No
Replace M6 contactor.
Yes
The “Brown/Red” wire between contact of M6 contactor and CN3-8 pin is normal?
No Repair.
Yes
Replace MPU board.
The contact of M6 contactor is welded?
No
The “Brown/Red” wire between contact of M6 contactor and CN3-8 pin is normal?
Yes
Replace M6 contactor.
Yes
Replace MPU board.
– 61 –
No Repair.
Error No.24 B20:FET4-HYD. BYPASS
LCD Display B20:FET4-HYD. BYPASS
OPTION SET Adjust. RS1
No Hyd. bypass system is installed?
[7]
7 6 5 4
Check OPTION SET.
3 2 1 0
No
OPTION Yes Bit 5 shows [0]? Turn off key switch. Yes The error message appears after turning on key switch without traveling?
Replace MPU board. No Replace MPU board. q Set the bit 5 at [0].
Yes
Then reset RS1 at [0]. w Turn off and on key switch.
q Turn off key switch. w Disconnect CN1 from
MPU board.
The “Red/White2” wire between coil of M7 contactor and CN1-5 pin is normal?
No Repair.
Yes The coil resistance of M7 contactor is normal? 32.5-35.5Ω
No Replace MPU board.
Yes Replace M7 contactor and MPU board at the same time.
CAUTION
CAUTION
When replacing MPU board and/or Current sensor, and/or FET comp. be sure to check the following. 1. MPU board (1) Check the setting of Rotary switch (RS0, RS1-7). (See Adjustment Specification Table.) (2) Adjust Start current and Current limitation. Repeat the plugging operation a few times and recheck the setting. (3) Check the plugging brake distance. (See Adjustment Specification Table.) 2. Current sensor (1) Adjust Start current and Current limitation. Repeat the plugging operation a few times and re-check the setting. 3. FET Comp. (1) Adjust Start current and Current limitation. Repeat the plugging operation a few times and re-check the setting.
1. Be sure to turn off the key switch when setting Rotary switches. 2. Be sure to disconnect the battery plug when replacing the inner parts of Control unit. – 62 –
Error No.25
B21:TR-HYD. MAIN
LCD Display B21:TR-HYD. MAIN
The error message of “*FAIL HYD.*” appears at the same time?
No
The “Green/White” wire between drain of Hyd. FET and CN3-10 pin is normal?
No Repair.
Yes
Yes
Replace Hyd. FET. Hyd. bypass system is installed.
No
Yes
Hyd. bypass contactor is welded?
The “Green/White” wire between drain of Hyd. FET and CN3-10 pin is normal?
No
Yes
No Repair.
Yes q Turn off key switch. w Disconnect Gate “4P Red” of
Replace M7 contactor.
Hyd. FET.
No
Turn on key switch.
Operation become normal? Yes The error message of “*FAIL HYD.*” appears on LCD?
No
Yes
END
Replace MPU board. Replace Hyd. FET.
– 63 –
Error No.26
B22:SWITCH-LIFT
LCD Display B22:SWITCH-LIFT
Lift(2) Micro switch is installed normally?
q Turn off key switch. w Set RS1 at [E].
No Adjust.
Yes The “Green/Yellow” wire between Lift(2) and CN6-14 pin is normal?
Turn on key switch. Yes
No
Repair.
Yes
Bit2 shows [0] when not operating Hyd. levers? LCD display
7 6 5 4
No
Replace Lift (2) Micro switch.
3 2 1 0
IOM 0E/
No Operation become normal? Yes
Yes Replace MPU board.
Bit2 changes to [1] after Bit1 changes to [1] when operating Hyd. levers? LCD display
7 6 5 4
END
3 2 1 0 No
Micro switch which does not change to [1] is installed normally?
IOM 0E/
7 6 5 4
3 2 1 0
IOM 0E/ Yes
No Adjust.
Yes The wire of which Micro switch is abnormal? q Between Lift(1) and CN6-6 “Brown/Red1”. w Between Lift(2) and CN6-14 “Blue/Yellow2”.
No
Yes Replace MPU board. Replace the Micro switch which is abnormal.
Repair.
No Operation become normal? Yes Replace MPU board. END
– 64 –
Error No.34
C29:SENSOR-EPS TORQUE
LCD Display C29:SENSOR-EPS TORQUE
Turn off key switch.
The “Yellow/White1” wire between 4 pin of 10 P water-resistant connector of EPS controller and CN5-15 pin is normal?
No Repair.
Yes The “Blue3”, “Green/Blue1”, “White” wires between EPS controller and EPS sensor is damaged or broken?
No Repair.
Yes Check the resistance at sensor side (tab side) between,
• q pin (Orange) and e pin (Black/Red) = Approx. 5kΩ ................... A • q pin (Orange) and w pin (Green/Red) = Approx. 2.5kΩ .............. B • w pin (Green/Red) and e pin (Black/Red) = Approx. 2.5kΩ .............. C
No
Adjust EPS sensor by removing or insterting a shim to be even value between B and C.
Yes NOTE
Replace EPS controller.
Refer to page 20.
No Operation become normal?
Replace MPU board.
Yes END
CAUTION
CAUTION
When replacing MPU board and/or Current sensor, and/or FET comp. be sure to check the following. 1. MPU board (1) Check the setting of Rotary switch (RS0, RS1-7). (See Adjustment Specification Table.) (2) Adjust Start current and Current limitation. Repeat the plugging operation a few times and recheck the setting. (3) Check the plugging brake distance. (See Adjustment Specification Table.) 2. Current sensor (1) Adjust Start current and Current limitation. Repeat the plugging operation a few times and re-check the setting. 3. FET Comp. (1) Adjust Start current and Current limitation. Repeat the plugging operation a few times and re-check the setting.
1. Be sure to turn off the key switch when setting Rotary switches. 2. Be sure to disconnect the battery plug when replacing the inner parts of Control unit. – 65 –
Error No.35
C30:TR-EPS MAIN
LCD Display C30:TR-EPS MAIN
The “Blue/Black” wire between 2 pin of 10 P water-resistant connector and CN5-5 pin is shortcircuited with other wires?
No Replace EPS controller.
Yes
No Operation become normal?
Replace MPU board.
Yes
Repair.
END
CAUTION
CAUTION
When replacing MPU board and/or Current sensor, and/or FET comp. be sure to check the following. 1. MPU board (1) Check the setting of Rotary switch (RS0, RS1-7). (See Adjustment Specification Table.) (2) Adjust Start current and Current limitation. Repeat the plugging operation a few times and recheck the setting. (3) Check the plugging brake distance. (See Adjustment Specification Table.) 2. Current sensor (1) Adjust Start current and Current limitation. Repeat the plugging operation a few times and re-check the setting. 3. FET Comp. (1) Adjust Start current and Current limitation. Repeat the plugging operation a few times and re-check the setting.
1. Be sure to turn off the key switch when setting Rotary switches. 2. Be sure to disconnect the battery plug when replacing the inner parts of Control unit. – 66 –
Error No.36
C31:FUSE-EPS
LCD Display C31:FUSE-EPS
Turn off key switch.
EPS fuse F3 is normal?
No
Yes q Turn off the key switch w Set RS1 at [E]. e Turn on key switch and
Replace EPS fuse.
select I/O port [IOM 0F].
Bit 7 shows [1] on LCD display? LCD display
7 6 5 4
3 2 1 0
No
IOM 0F/ 1:normal
0:abnormal
The “Brown/Yellow” wire between F3 (fuse) and CN2-2 pin is normal?
Yes
No
Yes
Replace MPU board.
Repair. Replace MPU board.
– 67 –
7. Wiring and layout of control unit
– 68 –
Battery:48V(FB10-25P) 72V (FB30P)
BNRD1
RD3 NB
Pre-energizing resistor : 30W 2.2Ω X 4 (10-25) 40W 2.2Ω X 2 (30)
BK BU GNBU
19
M2
WH
YEWH2 GNBU2
E1 B1 C5 C3 C4
3 3 3 3 3
16 6 19 18 9
D3 BU2
C1
4
15
Travel FET Comp. source Travel FET Comp. gate Travel FET Comp. drain voltage Contact of For. contactor
GNWH3 BUYE3
5
BU
BURD BNWH BK
Capacitor : 100V 2200µF X 1 (FB10/15/18P) X 2 (FB20/25P) X 3 (FB30P)
BNWH5
4
16
Pre-energizing FET source
B3
4
8
Pre-energizing FET gate
VC
2
1
Trave lfuse
NA
2
8
GND of contactor coil
F2 M6
For trucks with 48V Battery (FB10-25P)
X4
BUBK YEWH1 BN1 BNBK
YE
GN
Controller
key switch
X1
6
15
Attachment switch 1 (OPT.)
48
6
8
Attachment switch 2 (OPT.)
49
6
16
Attachment switch 3 (OPT.)
E2 B2 C6 C2 VD VE C7
3 3 3 3 2 2 3
17 7 10 8 5 2 20
EPS Sensor
BU3 GNBU1 WH
70 71 72 73
5 5 5 5
5 15 6 16
OPT.
43
6
13
Brake switch
90
4
13
Parking brake switch
VB
2
7
Power supply for contactor coil
VH
2
6
Power supply for contorol
RDYE
15 ST
5 5
20 10
BUYE1
RDGN4
DS3 DS1 DS2
Drectional switch
BNBK1
Tum on when neutral position
BN2 WHRD2
P57
6
1
40
6
4
Abnomal of EPS chopper Abnomal of EPS sensor Speed sensitive for EPS(SP1) Speed sensitive for EPS(SP2)
Charger panel
RDWH1
M2
BNWH1 RDBK1
M4
WHGN
RDGN1
M3
WHBU RD2
M6
WHRD RDWH2
M7
BUYE
RDBK2
X1
BKWH✻
2
3
BK
RDWH
GNRD1
4
20
2
3
30
2
9
21
2
4
31
2
10
22
1
1
32
1
7
23
1
2
33
1
8
24
1
3
34
1
9
25
1
4
35
1
12
26
1
5
TSL
GNWH2 M
YEWH4 YERD
Forward contactor
25W TSL BUWH2
left
41
6
12
Forward
42
6
5
Reverse
NB7
6
9
X2
58
5
12
Low speed
56
5
11
Mode select
55
5
1
Up
1
13
1
6
EPS contactor
37
1
14
28
1
10
38
1
11
57
5
2
Down
5
60 NB5
5 5
3 13
Signal for speed sensor 1 GND for speed sensor 1
WH1 BKYE1
61 NB6
5 5
4 14
Signal for speed sensor 2 GND for speed sensor 2
P50 10 NB0
3 3 3
1 2 11
Power supply for current sensor (Ia) Signal for current sensor (Ia) GND for current sensor (Ia)
IA
IF
RDYE3 YERD1 BK2
Travel current sensor
RD4 BNYE1 BKYE
Accelerator
RDGN3 GNBK1 BK1
Brained wire
Display unit
8
Hydraulic oil level(OPT.)
5
18
Brake oill level
83
4
3
Over load(OPT.)
85
4
4
Travel inhibit(OPT.)
86
4
12
Input for spare
87
4
5
Reducing speed when tuming(OPT.)
84
4
11
Seat switch(OPT.)
39
4
10
Tum signal lamp
P12 97
5 4
9 7
P12V Waring buzzer
95
4
6
Forward signal Load 200mA max.
96
4
14
Reverse signl Load 200mA max.
Tail & stop lamp 25W
TL
10W
Back lamp 25W
BL
Turn signal lamp 25W
TSL
Rear combination lamp(left) 25W
TL
10W
Back lamp 25W
20P Relay for power supply
5
82
Rear combination lamp(right) BU4
WH1 BKWH1
RDBK1 BU1 BKRD1
Regenerative contactor
27
81
BZ
P51 11 NB1
3 3 3
3 12 13
Power supply for current sensor (If) Signal for current sensor (Ia) GND for current sensor (Ia)
P52 12 NB2
3 3 3
4 5 14
Power supply for accelerator Signal for accelerator GND for accelerator
BL
Turn signal lamp 25W
TSL
Brained wire
36
Hour meter(OPT.)
Back buzzer
Tail & stop lamp
Reverse contactor
Hyd.bypass contactor Opt. (FB10-25P) Std. (FB30P)
Hour meter counting
17
X5
BNRD2
Brained wire
Hyd. contactor
7
5
X2
Start for key switch
Over drive contactor
5
76
right
(GNWH2)
Battery voltage
Travel bypass contactor
75
Neutral
Low speed
Flat cable 20p
3
YEWH BK
RD1
25W
Turn signal switch RD5
Speed Sensor WHBK
GNRD2
RDWH3 BUWH1
Contact of Hyd. contactor Hyd fuse
Charger, Controller M1
BNWH2
Only for EEC
Tilt level sensor
YEBK1
RDGN2
WHBK1
OPT.
RDGN5
Mode select switch
X4
GNWH1
Hyd. FET Comp .source Hyd. FET Comp gate Hyd. FET Comp drain voltage
EPS fuse Contact of Rev. contactor
BK
YEWH3
BNWH6
TS
Accessory
BUWH3
X5
VG
VF
47
OPT.
BNBK4 BURD5
EPSMotor
EPS
RD The truck with built in charger
Tilt switch
BU
RD
40A
7
(YEBK2)
Connector CN Pin No. No.
RDYE1
BKWH✻
RDGN
F3
RDWH
WH
RDYE4
For trucks with 72V Battery (FB30P)
BNYE
F4 10A
F5 10A RDBK
BKRD BUWH GNWH BNRD BUBK4
PA
6
Line NO. BURD1
1
To connect :To start counting
BNBK4 BURD5
FC2
Opt.(FB15-25P) Std.(FB30P)
46
1
DC/DC Converter
YERD4
Leveiing lamp
bypass contactor (M7) :
Lifut 2 switch
Laser pointer switch
Laser
M7
PA
Lifut 1 switch
14
Only for trucks with laser pointer
D4
1
BU4
Contact of regenerative contactor
3
6
6
OPT.
Turn on depressing
RDWH WHRD1
6
45
BU4
RDWH
PB83-62 Pre-energizing
44
OPT.
Control GND
Contact of Rev. contactor
Connector CN Pin No. No.
4
RDYE5
IF
IA
5
YEBK
FC1
3
GNRD3
VC
BUYE2
M4
A
M3
275A
Line NO.
D2 M1
RD
Connector CN Pin No. No.
1
4
BKWH✻
D1
275A
BKWH
Line NO.
RDWH
F1
3
RDBK
2
N
NA
VA
V
Capacitor : 100V 2200µF X 1 (FB10/15/18P) X 2 (FB20/25P) X 3 (FB30P)
BK
(The auxiliary 48 volts output is equipped in the case of the 72 volts battery.
4
Body earth
P53 13 NB3
4 4 4
1 2 9
AC0 AC1 AC2 AC3
6 6 6 6
2 10 3 11
} 80
Ramp switch right HL
Power supply for accelerator Signal for accelerator GND for accelerator
Head lamp
WH3
40Wx2
Harness mark/color Red Black Green Yellow White Brown Blue Gray Pink
RD BK GN YE WH BN BU GY PK
Ex) BKWH (=Black/White) Black colored harness with White line.
HL
left 100V 22µF X3
WHBK2
White line Black color
H
Horn 7
YEBU1 3
15
Battery electrolyte level
X3
(Post)
(lever) Horn switch
FB10-30P-DC70 SYSTEM WIRING
– 69 –
Head guard (right)
Laser pointer (Laser &Level sensor)
Main controller
✻Only for trucks with laser pointers
RD BK
Hanging on mast "M"
Water resistant
Water resistant
Harness,mast(1)
Harness,head guard
24801-10111
Level sensor
Hanging on mast
1E-06145
Water resistant
2P
"M"
Water resistant
2P
2P
Laser
Water resistant
1
1
1
1
HL TSL
M3
RDBK YEBU1
✻Only for when using opthional eduipment. 2P BK
Att.3
2
2
2
2
M2
M1
M4
Controller Ass’y,EPS
M6
1 1 1 1
Control valve
2E-15273
1
RDBK RDWH BKWH GNBK2
Water resistant
Harness,mast(2)
WH GN
1
1
Accessory (front) AA
Horn switch (valve lever)
PA
Hydraulic motor Traction FET Comp.
Water resistant
Tilt
Lift 2
Harness,"M"(1)
10-25 : 2E-15405 30 : 2E-15406
2E-15407
DC/DC Converter
White line
FF
F
Battery plug
2P WH
AA
A
Brake oil level sensor
2
2
2
YEWH3 BK
Accessory (rear)
2P-X
10P
EPS sensor
,,,,,,,
Water resistant
Water resistant
Rear combination lamp (left)
Water resistant
Foot brake switch
8P
Mode serect switch
4P RD
1
1
1
1
GNWH BK
6P RD
Back buzzer Horn
Parking brake switch
3P
Charger panel
4P 2
2
2
Magnetic controller
– 70 –
BKWH
4P WH 6P BK
Harness, head guard 24801-10111
Backward output relay
4P BK
Horn relay
4P YE
Turn signal relay
1
1
1
1
WH GN
1
1
1
1
HL TSL
STD : 24801-32180 STD : 24801-32200 EEC : 24801-32220 EEC : 24801-32240
TSL Seat switch
,,
,, Harness,charger(1) 2E-15424
TL Water resistant
BL
Water resistant
Terminal
RD BK
10-25 30 10-25 30
2P
Harness,charger(2) 2E-15425
Harness, head guard(left)
RDBK YEBU1
✻Only when a chargers is not mounted.
BODY WIRING
7
Transformer secondary Rectifier side
Charger, controller
Conector comp. 24300-21472
FB10-30P-DC70
7
WHBK2
4P WH
EPS motor
3P
"W"
2
YE
+ –
4P BK
Water resistant
GN
BKWH
Transformer primary side
Water resistant
Water resistant
RDYE5
2
✻Only for trucks with built-in chargers.
✻Only for trucks with built-in chargers.
Directional switch
2
2
Transformer
"K"
Key switch
2
✻Only for EEC or when using optional equipment
Control power supply relay
6P
Warning buzzer
Hurn switch (handle post)
TL BL
Harness,body
Tun signal lamp switch
TSL
2E-15680
Display
Low speed mode switch
Rear combination lamp (right)
6P
2
6P WH
Battery
3P
Lamp switch
Harness Comp.,panel 24300-32030
2P WH
4P WH
Water resistant
Harness,"M"(3) 4P WH
✻30 4P WH
72V (30)
48V
Battery
(10-25)
Indicator panel
✻10-25
–
Battery plug
Black color
Laser pointer switch
+ (48V)
RDWH BKWH GNBK
–
+ (72V)
1
✻Only for trucks with laser pointers
1
+
10A
10A
Traction motor
4P WH
CN5 CN6
CN4 Harness,"M"(2)
Laser pointer (switch & Converter)
Ex) BKWH (=Black/White) Black colored harness with White line.
Board comp.,MPU
Water resistant
(Connect wires after removal of the cup holder)
2E-15680
RDGN RDBK RDYE4 BKWH✻ BK
Connect , and bigin the hour meter countdown.
Speed sensor (left)
BURD1 BK
Harness,"M"(4) "L"
10A
1
Speed sensor (right)
10A
1
1
6P BK
2P
RD BK GN YE WH BN BU GY PK
2P
Red Black Green Yellow White Brown Blue Gray Pink
M7
Water resistant
Lift 1
Harness mark/color
PA PF
Hydraulic FET Comp.
275A
Acceleration sensor
Att.1
RDGN RDBK RDYE4 BKWH✻ BK
Water resistant
6P
2P
Att.2 Indicator lamp for forkleveling LED
40A
"L"
275A
M mast
"M"
1
2P
Laser
4P WH
2P
2P
1E-06145
1
Harness,mast(1)
1
P mast
+ –
NOTE: 1. indicates the lead wire numbers. 2. Terminal symbols 2
:Plug
1 2
:Plug :Receptacle
1 7
:Receptacle :Receptacle
AMP 170020-3 AMP 170002-5 AMP 170020-2 AMP 170021-3 AMP 170003-5 AMP 170021-1 AMP 41729
3. When installing the charger panel on the truck body,use only bolts and spring washers. The reason why only spring washers should be used is that they break the coating on the charger panel ,enduring conductance between the frame and the charger panel. 4. "M" , "S" , "L" , "K" , and "W" indicate the printed marks on the connector.
(✻Refer to note 6 )
RDBK WH3 GNRD3
3 3 3
1 V,Q 59G 2 3 E1,E2 55B 4
3 3
1 X 2
AMP 172134-1 M1,M2 43B
Plug 4P
W Lamp switch
1 2 3 4
WH
AMP 172130-2
Q
BK YEBK1 YEWH4 YERD BK GNWH2 RDWH3 BUWH1
4 4 4
4 4 4 4 4 4 4 4
RD RDYE RDGN2
4 4 4 4
RDBK RD5 RDGN5 1 2 3
1 2 3 4
1 2 3
1 2 3 4 5 6 7 8
Q M2 59I 46A
V
59H 41C
A A 28B 26B
M1 44A
Horn switch (steering)
b
water resistant Plug 3P
water resistant Plug 3P
A
N Brake oil
water resistant Plug 8P
AMP 174982-2
AMP 174357-2
W
K 2 1 4 3
3 2 1
Horn switch (Hydraulic)
V
A A A A 13B 11B 14B 7B
25C
AMP 174257-2
AMP 174357-2
a5 Laser pointer switch
1 2
WH
a1 100A
59F P2,W
2
41B F1,Q
2
22B
A
2
58E
O,U
2
RDBK YEBU1
YERD4 BKWH✻ BNWH6 BURD5
3 3 3 3
1 a5 100B 2 M1,P2 61K 3 a4 101B a2,a3 102B 4
BNRD1 BUYE2 RD3 YEBK GNWH3 RDWH
3 3 3 3 3 3
1 2 3 4 5 6
Plug 4P
WH
a1 DC/DC Converter
1 2 3 4
58C 12B 58F 23B
F2
water resistant Plug 4P
N
Point c A
A
54C 24B
A A 29B 27B
Plug 2P
60I
AMP 172134-1
4 4 4
YEBU1 2
RDBK 2 W,R
BN2 WHRD2 RDGN4 BNBK1
RDWH YERD4
3 2 1
4 3 2 1 8 7 6 5
21B A
1
58D C,N
1
YEWH3 BK
AMP 171898-2
A 31B A 32B Plug 6P
A 33B A 34B
BK
A 35B
X Valve microswitch
1 2 3 4 5 6
P2,a5 60H
AMP 172134-1
WH3 RDGN5 BKWH✻ BUWH2
BURD1 BK
3 3 3 3
1 W 43C 2 R,Point a 46B 3 P2 61M 4 M1,E2 47D
1 2 3 4
Plug 4P
WH
Put the sleeve for sure receptacle.
T Key switch U Indicator panel
O Hour meter
M2 Head guard (right)
AMP 174352-2
BNBK4 BURD5
a2 Laser
M
4 4
1 Point b 103A a1 102A 2
water resistant Plug 2P
4 4
1 Point b 103B 2 a1 102C
water resistant Plug 2P
2 1
44B
D
47C
WH
1 2 3 4 BK
F4 Turn signal reiay ✻ Connect the relay "Cala-48V-N". Do not bind with the body harness.
47B E1,M1 Plug 4P
1 2 3 4
YE
✻ Connect the relay "Cala-48V-N". Do not bind with the body harness.
Plug 4P
1 2 3 4
WH
6B
1 45A Point a 2
Plug 6P
RD
A
3 3
✻ Connect the relay "Cala-48V-N". Do not bind with the body harness.
1 2 3 4
RD
te no Re fe (✻
RDWH 3
1P
9
4 4
S
water resistant Plug 2P
1 a1 101A 2 Point b 103C
2 1
a4 Level sensor
GN▲
3 3
RDBK RDBK
4 48B E1,H 3
3 3
BNRD2 RDYE5
1 39B D 2 3 60D P1,K 40B D 4
3 3 3 3
48C F3,E2
2
61G F4,G
2
42B F1
7
61H H,b
7
BKWH1 WH1
4 4
1 A 16B 2 A 15B
water resistant Plug 2P
BKYE1 WH2
4 4
1 A 18B 2 A 17B
water resistant Plug 2P
RDYE5
P1
60G
57B
P2 Accessory(front)
RDYE RDBK2 RDWH GNRD1
55A W
1 61A D 2 3 44D Point a 30C Point c 4 48A F3 5 47A F4 6
:Receptacle(with plating) :Receptacle(without plating) Sleeve(for single wire) Sleeve(for double wire)
AMP AMP AMP AMP
BKWH✻
2
:Plug(with plating) :Receptacle(without plating) Sleeve(for double wire)
AMP 170020-2 AMP 170002-5 or 170020-3 AMP 170888-1
2
Condenser 100v 22µ
GNRD3 BKWH✻ RD5 BU4 RDYE5 BUWH2
4 4 4 4 4 4
NOTE: 1,Terminal symbols
2 1
1
+
Point "c"
water resistant Plug 6P
B Speed sensor
WHBK2
Point "a"
3 2 1 6 5 4
L 2 1
AMP 174352-2
BKWH✻
GNRD2 BKWH✻
1 59D F3,P2 2
AMP 172134-9
F2 Control power supply relay
8
50B C
G Horn
BUWH2 RDYE1
3 3
25B A,T
49B C
H Back buzzer
1 2 3 4 5 6
AMP 174262-2
Plug 4P
1P
BNWH6 BNBK4
YE▲
61L
K,X
AMP 174352-2
K Brake switch
4 61F F1,G 3
A
59C F1,F3
AMP 172134-1
F3 Backward output relay
4B
I EPS motor
A
AMP 171898-9
b Charger panel AMP 172134-7
F3,V a1,M2 59E
39B 60F
1 2 3 4
Plug 4P
a3 Level lamp
L 2 1
AMP 174352-2
A, Point c K,P2
61I
AMP 172134-2
M1 Head guard(left)
BNBK4 BURD5
60E 5B
D G,M1 111B
Plug 4P
F2,K
1 4 52B C 2 4 51B C 3 4
Point "b"
1 2 3 4 5 6
C,T
110B 54B
AMP 172134-1
BNWH5 BU4
RDWH
1 2 3 4 R, Point a F4,M2
3 3
61J
3 3 3 3
43A
3
RDYE4 RDGN RD BKWH✻
3 3 3 3 b,a1
water resistant Plug 3P
3 2 1
BU3 GNBU1 WH
53B C
r to
WH3 RD5 BKWH✻ BUWH2
J EPS sensor
1 2 3 4 W
4)
AMP 174352-2 AMP 174357-2
RDBK RDWH BKWH✻ GNBK2
S
Directional switch
1 1 1 1
R
Turn signal switch
BKYE BNYE1 RD4 BK1 GNBK1 RDGN3
4 4 4 4 4 4
1 D 38B 2 D 37B 3 D 36B A 2B 4 5 A 3B A 1B 6
RDWH BKWH✻ GNBK2
1 1 1
D,F2 60C
GNRD3 BKWH✻ RDGN5 BU4 RDYE5 BUWH2
4 4 4 4 4 4
1 Point c 55C Point c 61C 2 3 M2 46D Point c 39D 4 5 H 48D M2 47E 6
AMP 174262-2 water resistant Plug6P
E2,Pointc 61D
P2 57A
L Accelerator sensor
3 2 1 6 5 4
P1 Accessory
1
3
:Receptacle
AMP 170032-5 or 179461-5
3
:Tab
AMP 170340-3 or 179462-3
4
:Receptacle
AMP 171662-1 or 173707-1 AMP 172888-2(rubber plug) AMP 172748-2(seal plug)
5
:Receptacle
AMP 316041-2 or 179956-2
6
:Receptacle
AMP 173716-2 or 175061-2
7
:Receptacle(with sleeve) Sleeve(for single wire) Sleeve(for double wire) :Receptacle :Tab :Pressed sleeve :Terminal(F) :Terminal(M)
AMP 174262-2
E2 Stop & tail lamp (right)
3 2 1 6 5 4
water resistant Plug6P
E1 Stop & tail lamp (left)
8 9 12
A
61B
8B
A 9B A C,P1
Point c
L
L
F2
AMP 174655-2
Cap 2P
Plug 4P
WH
WH
BK
5 4 3 2 1 10 9 8 7 6
AMP 172133-1
AMP 172134-1
AMP 171898-2
2 1 4 3
1 2 3 4
U
D
7A
9A
L
F4
2A
4A
K
F3
5A
6A
37A 39A
8 7 6 5 4 3 2 1 16 15 14 13 12 11 10 9
Point "a"
Point "b"
BNBK1 BN2 WHRD2 BU4 BNRD1 BUYE2 RD3 YEBK GNWH3
RDGN4
RDGN2 RDYE
YEWH3 RDWH3
BURD1
BUBK YEWH1 B
O
U
U
B
B
U
N
F2
22A
25A
C
12A 14A 16A 18A 20A
4
10 9 8 7 6 5 4 3 2 1 20 19 18 17 16 15 14 13 12 11 AMP.040 series multi-lock connector 175967-2
6 6 6 6 6 6 6 6 6
1 9 2 10 3 11 4 12 5 13 6 14 7 15 8 16 S
T
23A 24A
21A
6
6 6
6 6
6
C
26A
S
S
X
X
2, 3, 4, 5, 6,
:Braid wire under 25mm pitch. The location of the connector pin is as viewed from the inserting side. The ends of the insulating tube should be tied together with wire ties. Fuses should be placed in a circle, as shown in Figure 1. The ends of the spiral tube should be tied together with wire ties, and then theube should be coiled with a gap of 2 ± 1mm.(Refer to Figure 2.)
X
27A 29A 31A 33A 35A S
K
X
X
28A 30A 32A 34A
Fuse
CN6 5
8 7 6 5 4 3 2 1 16 15 14 13 12 11 10 9
10A 10A
6
AMP.040 series multi-lock connector 175966-2
12
Clamp Figure 1
Wire tie Figure 2
Point "c"
To K
BU4
FB10-25P-DC70
BU4
12 BU4
BK
To O
12
To E1
BNBK4 To a4
To E2
12 12
To D
RDYE1 To F4
BNBK4 To a2 BNBK4 To a3
BK
RDGN5 To M2 RDGN5 To E2
To U
46C M2,E2
B
15
AMP 41729 AMP 178023-2 AMP 1-170823-5 Yszaki 7116-3251 Yszaki 7114-3251 JST FNE-2 Yszaki 1500-0110 Yszaki 1600-0105
A MPU board
BK
White line
U
CN5
AMP.040 series multi-lock connector 175966-2
1 2 3 4 5 6
U
8A 10A
Plug 6P
1 11 2 12 3 13 4 14 5 15 6 16 7 17 8 18 9 19 10 20 11A 13A 15A 17A 19A
D
CN4
BKWH✻
RD5 To M1 RD5 To E1
D
6 6 6 6 6 6 6 6 6 6
WH1 BKWH1 WH2 BKYE1
L 3A
D Controller 44C M1,E1
YERD YEWH4 YEBK1 GNWH2
BNWH5
L 1A
F2
10B 60B
RDYE1 To F4
6 6 6 6 6
6
RDGN3 BK1 GNBK1
L
36A 38A 40A
110A 58A
Ex) BKWH (=Black/White) Black colored harness with White line.
BNRD2 BUWH1 BU2 BURD WHRD1
GNRD2
RDBK2 GNRD1
6 6 6 6 E1,Point c
b
Receptacle
C EPS unit
Black color
RD4 BNYE1 BKYE 1 2 3 4 5 6
2P-X water resistant Plug10P
BU2 WHRD1 BURD RDWH
RDBK RDYE4 BKWH✻ BK 12
GN▲
RDGN 12
BK
BK
10A
10A
1 2 3 4
To F1
19B 20B 54A 51A 53A
RD BK GN YE WH BN BU GY PK
1 2 3 4 AMP 1-179958-2
To D
J
To P1
J
BKWH✻
b
1 9 2 10 3 11 4 12 5 13 6 14 7 15 8 16 3 3 3 3 3
A
I
BKWH✻
Red Black Green Yellow White Brown Blue Gray Pink
A
2
I
49A 50A
60A 52A
Harness mark/color
1
3 3 3 3
J
F1
59A
111A
3 3 3
D
b
(✻Refer to note 5)
1 2 3 4 5 6 7 8 9 10
5
BKWH✻ WHBK2
YE▲
4 3 42A G 3 3
5
61E Point c,F4
RD RDWH
BK
15
YEWH1
Plug 4P
RDBK YEBU1
BUBK
1 2 3 4
1 3 41A V 2 3
Seal plug 4 Seal plug 4 Seal plug 4 4 WH 4 GNBU1 4 BU3 4
F1 Horn relay ✻ Connect the relay "Cala-48V-N". Do not bind with the body harness.
59B D,F3
AMP 172134-2
170021-2 170003-5 or 170021-3 170089-1 170890-1
BODY HARNESS
– 71 –
(✻Refer to note 6)
RDBK WH3 GNRD3
3 3 3
1 V,Q 2 3 E1,E2 4
RDWH YERD4
3 3
1 X 60I 2
AMP 172134-1
59G M1,M2
Plug 4P
43B
W Lamp switch
1 2 3 4
WH
55B
W,R
Q
BK YEBK1 YEWH4 YERD BK GNWH2 RDWH3 BUWH1
4 4 4
4 4 4 4 4 4 4 4
RD RDYE RDGN2
BN2 WHRD2 RDGN4 BNBK1 4 4 4 4
RDBK RD5 RDGN5
V
1 2 3
1 2 3 4
1 2 3
1 2 3 4 5 6 7 8
Q 59I
59H 41C
M2 46A
A 28B
M1 44A
Horn switch (steering)
A 26B
A 29B
water resistant Plug 3P
water resistant Plug 4P
AMP 174357-2
b A 54C 24B
Piont c A 58C 12B
F2 25C
A 13B
A 27B
water resistant Plug 3P
AMP 174257-2
N 58F
A 11B
Horn switch
V (Hydraulic)
2 1 4 3
N Brake oil
AMP 174982-2 21B
Turn signal switch
Directional switch
4 3 2 1 8 7 6 5
3 2 1
2
41B F1,Q
2
22B
A
2
58E
O,U
2
YEBU1
A 7B
K
3 2 1
59F P2,W
RDBK
YERD4 BKWH✻ BNWH6 BURD5
3 3 3 3
1 a5 100B M1,P2 2 3 a4 101B a2,a3 4
BNRD1 BUYE2 RD3 YEBK GNWH3 RDWH
3 3 3 3 3 3
1 2 3 4 5 6
61K
Plug 4P
WH
a1 DC/DC Converter
1 2 3 4
102B
A 23B
A 14B
water resistant Plug 8P
AMP 174357-2
W
a5 Laser pointer switch
1 2
WH
AMP 172134-1
4 4 4
2
2
RDBK
YEBU1
AMP 172130-2 Plug 2P
a1 100A
A
BK
AMP 171898-2
A 31B A 32B A 33B
Plug 6P
A 34B
BK
A 35B P2,a5
X Valve microswitch
1 2 3 4 5 6
60H
AMP 172134-1
WH3 RDGN5 BKWH✻ BUWH2
BURD1
1
58D C,N
YEWH3
BK
1
3 3 3 3
1 W 43C R,Point a 46B 2 3 P2 61M 4 M1,E2 47D
1 2 3 4
Plug 4P
WH
Put the sleeve for sure receptacle.
T Key switch
U Indicator panel
M2 Head guard (right)
AMP 174352-2
BNBK4 BURD5
4 4
1 Point b 103A a1 102A 2
water resistant Plug 2P
4 4
1 Point b 103B 2 a1 102C
water resistant Plug 2P
M 2 1
AMP 174352-2
1 2 3 4 R, Point a F4,M2
44B
D
47C
110B
Plug 4P
WH
F2,K
A
54B
60E
5B
G,M1
111B
61I
1 2 3 4
A, Point c 39B
AMP 172134-2
M1 Head guard(left)
BK
Plug 6P
RD
b Charger panel F4 Turn signal reiay
1 2 3 4
✻ Connect the relay "Cala-48V-N". Do not bind with the body harness.
Plug 4P
YE
8
1P
50B C
9
H Back buzzer
1 2 3 4 5 6
48C F3,E2
2
61G F4,G
2
G Horn
42B
7
F1
3 3
Lengs 50
RDBK RDBK
Cap 2P
F2 Control power supply relay ✻ Connect the relay "Cala-48V-N". Do not bind with the body harness.
1 2 3 4
Plug 4P
RD
25B A,T 39B D 60D P1,K 40B D
1 2 3 4
3 3 3 3
BKYE1 WH2
4 4
1 2
A 18B
A 15B
water resistant Plug 2P
A 17B
water resistant Plug 2P
a4 Level sensor
P1
60G
57B
P2 Accessory(front)
RDYE RDBK2 RDWH GNRD1
:Receptacle(with plating) :Receptacle(without plating) Sleeve(for single wire) Sleeve(for double wire)
AMP AMP AMP AMP
7
2
:Plug(with plating) :Receptacle(without plating) Sleeve(for double wire)
AMP 170020-2 AMP 170002-5 or 170020-3 AMP 170888-1
2
+
BKYE BNYE1 RD4 BK1 GNBK1 RDGN3
4 4 4 4 4 4
1 D 38B 2 3 D 36B 4 5 A 3B 6
RDWH BKWH✻ GNBK2
1 1 1
D,F2 60C
GNRD3 BKWH✻ RDGN5 BU4 RDYE5 BUWH2
4 4 4 4 4 4
1 Point c 55C Point c 61C 2 3 M2 46D Point c 39D 4 5 H 48D M2 47E 6
AMP 174262-2 D 37B A 2B
L Accelerator sensor
3 2 1 6 5 4
water resistant Plug6P
A 1B
1
BK BUYE1
58B Point c1 15 2 15
120B A
1 2
55A W 1 61A D 2 44D Point a 3 30C Point c 4 48A F3 5 47A F4 6
water resistant Plug 6P
1,Terminal symbols 1
BKWH✻
c Seat switch 3 2 1 6 5 4
NOTE:
2 1
Point "c"
P1 Accessory
E2,Pointc 61D
P2 57A
4 4 4 4 4 4
GNRD3 BKWH✻ RD5 BU4 RDYE5 BUWH2
3
:Receptacle
AMP 170032-5 or 179461-5
:Tab
AMP 170340-3 or 179462-3
4
:Receptacle
AMP 171662-1 or 173707-1 AMP 172888-2(rubber plug) AMP 172748-2(seal plug)
5
:Receptacle
AMP 316041-2 or 179956-2
6
:Receptacle
AMP 173716-2 or 175061-2
7
:Receptacle(with sleeve) Sleeve(for single wire) Sleeve(for double wire) :Receptacle :Tab :Pressed sleeve :Terminal(F) :Terminal(M)
AMP 174262-2
E2 Stop & tail lamp (right)
3 2 1 6 5 4
water resistant Plug6P
E1 Stop & tail lamp (left)
8 9
L
F2
36A
38A
40A
Receptacle
b 110A
AMP 174655-2
Cap 2P
AMP 172133-1
2 1 4 3
C EPS unit
C,P1
L
F2
60B
37A
39A
Plug 4P
Point "a"
BNBK1 BN2 WHRD2 BU4 BNRD1 BUYE2 RD3 YEBK GNWH3
RDGN4
6 6 6 6 6 6 6 6 6 S
X
X
X
29A
31A
33A
35A
L
F4
c
K
F3
D
D
U
U
B
B
C
N
F2
S
K
X
X
2A
4A
120A
5A
6A
8A
10A
12A
14A
16A
18A
20A
22A
25A
28A
30A
32A
34A
8 7 6 5 4 3 2 1 16 15 14 13 12 11 10 9
CN5 4
AMP.040 series multi-lock connector
175966-2
10 9 8 7 6 5 4 3 2 1 20 19 18 17 16 15 14 13 12 11 AMP.040 series multi-lock connector
175967-2
A MPU board To K
BU4
Point "c"
BU4
12 To E2
12 BU4
12
Point "b"
6
S 27A
1 2 3 4 5 6
BNBK4 To a4
RDGN2 RDYE
S 26A
BK
12
6 6 T 24A
To E1
BNBK4 To a2 BNBK4 To a3
YEWH3 RDWH3 U 23A
BK
RDGN5 To M2 RDGN5 To E2
6 6
O 21A
To O
46C M2,E2
BURD1
C 19A
BK
RD5 To M1 RD5 To E1
6
B 17A
BK
44C M1,E1 RDYE1 To F4
BUBK YEWH1 WH1 BKWH1 WH2 BKYE1 B 15A
CN4
AMP 171898-2
1 2 3 4
YERD YEWH4 YEBK1 GNWH2
BNWH5
U 13A
Plug 6P
WH AMP 172134-1
6 6 6 6 6 6 6 6 6 6
6 6 6 6 6
6
U 11A
D Controller
RDYE1 To F4
BNRD2 BUWH1 BU2 BURD WHRD1
GNRD2
BUYE1 6
D 9A
To D
BODY HARNESS (EEC)
5 4 3 2 1 10 9 8 7 6
A 10B
Point c 58A
U 7A
To U
Black color
RDGN3 BK1 GNBK1 6 6 6 6
L
9B
WH
White line
RDBK2 GNRD1
A
8B
1 9 2 10 3 11 4 12 5 13 6 14 7 15 8 16
L 3A
BK
water resistant Plug10P
RD4 BNYE1 BKYE A
61B
1 11 2 12 3 13 4 14 5 15 6 16 7 17 8 18 9 19 10 20
L 1A
To C
Ex) BKWH (=Black/White) Black colored harness with White line.
BU2 WHRD1 BURD RDWH
RDBK RDYE4 BKWH✻ BK 12
BK 10A
BK 10A
AMP 1-179958-2
To F1
J 53A
1 2 3 4 5 6
BKWH✻
J 51A
1 2 3 4
To D
b 54A
1 2 3 4 E1,Point c
To P1
A 20B
1 9 2 10 3 11 4 12 5 13 6 14 7 15 8 16
BKWH✻
A 19B
RDGN 12
I 50A
2P-X
FB10-25P-DC70
– 72 –
I 49A
BKWH✻
RD BK GN YE WH BN BU GY PK
2
J 52A
3 3 3 3 3
Red Black Green Yellow White Brown Blue Gray Pink
1
D 60A
3 3 3 3
Harness mark/color
F1 59A
3 3 3
1 2 3 4 5 6 7 8 9 10
b 111A
(✻Refer to note 5)
BKWH✻ WHBK2
GN▲
3 3
YE▲
4 42A G 3
5
61E Point c,F4
5
BK
RD RDWH
Plug 4P
YEWH1
1 2 3 4
RDBK YEBU1
Seal plug 4 Seal plug 4 Seal plug 4 4 WH 4 GNBU1 4 BU3 4
F1 Horn relay ✻ Connect the relay "Cala-48V-N". Do not bind with the body harness.
3 3
41A V
BUBK
12
1 2
59B D,F3
AMP 172134-2
15 15
2, 3, 4, 5, 6,
8 7 6 5 4 3 2 1 16 15 14 13 12 11 10 9
AMP 41729 AMP 178023-2 AMP 1-170823-5 Yszaki 7116-3251 Yszaki 7114-3251 JST FNE-2 Yszaki 1500-0110 Yszaki 1600-0105
:Braid wire under 25mm pitch. The location of the connector pin is as viewed from the inserting side. The ends of the insulating tube should be tied together with wire ties. Fuses should be placed in a circle, as shown in Figure 1. The ends of the spiral tube should be tied together with wire ties, and then theube should be coiled with a gap of 2 ± 1mm.(Refer to Figure 2.)
Fuse
CN6 5
170021-2 170003-5 or 170021-3 170089-1 170890-1
3
water resistant
2 1
BNRD2 RDYE5
L 2 1
WHBK2
Condenser 100v 22µ
Plug 2P
water resistant
AMP 174262-2
AMP 172134-9
2 1
4)
48B E1,H
4 3
S
water resistant Plug 2P
AMP 174352-2
te
A
c 121B
A 16B
BKWH✻
no
6B
c 121A
BK 15
1 2
RDYE5
Point "a"
BK 15
4 4
to
WH
3 3
1 a1 101A 2 Point b 103C
AMP 174352-2
BKWH1 WH1
fer
1 2 3 4
59D F3,P2
Plug 4P
1 2
3 3
GNRD2 BKWH✻
4 4
61L
K,X
GN▲
Re
59C F1,F3
4 3
BUWH2 RDYE1
4) efe
49B C
BNWH6 BNBK4
60F
K Brake switch
3 3
F3,V a1,M2
Point "b"
YE▲
(✻
✻ Connect the relay "Cala-48V-N". Do not bind with the body harness.
A 61F F1,G
AMP 172134-1
F3 Backward output relay
4B
1 45A Point a 2
a3 Level lamp
59E
(✻ R
3
1P
61H H,b 47B E1,M1
AMP 172134-7
L 2 1
AMP 174352-2
K,P2
AMP 171898-9
1 2 3 4
Plug 4P
I EPS motor
1 2 3 4 5 6
C,T
D
AMP 172134-1
3 3
61J
3
3 3 3 3
b,a1
43A
BNBK4 BURD5
te
water resistant Plug 3P
3 2 1
BU3 GNBU1 WH
4 4 4
no
1 52B C 2 51B C 3
RDWH
BNWH5 BU4
1 2 3 4 W
RDWH
3 3 3 3
RDYE4 RDGN RD BKWH✻
J EPS sensor
53B C
r to
WH3 RD5 BKWH✻ BUWH2
AMP 174357-2
a2 Laser RDBK RDWH BKWH✻ GNBK2
S
1 1 1 1
R
O Hour meter
10A 10A
6
12
Clamp
Wire tie
AMP.040 series multi-lock connector
175966-2
Figure 1
Figure 2
RDBK WH3 GNRD3
(✻Refer to note 6)
3 3 3
1 V,Q 2 3 E1,E2 4
3 3
1 X 2
AMP 172134-1
59G M1,M2
Plug 4P
43B
W Lamp switch
1 2 3 4
WH
55B
AMP 172130-2
Q
BK YEBK1 YEWH4 YERD BK GNWH2 RDWH3 BUWH1
4 4 4
4 4 4 4 4 4 4 4
RD RDYE RDGN2
4 4 4 4
RDBK RD5 RDGN5 1 2 3
1 2 3 4
1 2 3
1 2 3 4 5 6 7 8
Q
V
59I
59H 41C
M2 46A
A 28B
M1 44A
Horn switch (steering)
A 26B
A 29B
AMP 174357-2
Point c A 58C 12B
F2 25C
A 13B
water resistant Plug 3P
water resistant Plug 4P
water resistant Plug 3P
b A 54C 24B
A 27B
AMP 174257-2
N 58F
A 11B
A 7B
N Brake oil
AMP 174982-2 21B
3 2 1
2 1 4 3
a5 Laser pointer switch
1 2
WH
a1 100A
59F P2,W
2
41B F1,Q
2
22B
A
2
58E
O,U
2
RDBK YEBU1
YERD4 BKWH✻ BNWH6 BURD5
3 3 3 3
1 a5 100B M1,P2 2 3 a4 101B a2,a3 4
BNRD1 BUYE2 RD3 YEBK GNWH3 RDWH
3 3 3 3 3 3
1 2 3 4 5 6
61K
Plug 4P
WH
a1 DC/DC Converter
1 2 3 4
102B
A 23B
A 14B
K
3 2 1
Horn switch (Hydraulic)
V
water resistant Plug 8P
AMP 174357-2
W
Plug 2P
60I
AMP 172134-1
4 4 4
YEBU1
RDBK
2
2 W,R
BN2 WHRD2 RDGN4 BNBK1
RDWH YERD4
4 3 2 1 8 7 6 5
58D C,N
BK
AMP 171898-2
A 31B A 32B Plug 6P
A 33B A 34B
BK
A 35B P2,a5
X Valve microswitch
1 2 3 4 5 6
60H
AMP 172134-1
WH3 RDGN5 BKWH✻ BUWH2
BURD1
1
A
YEWH3
BK
1
3 3 3 3
1 W 43C R,Point a 46B 2 3 P2 61M 4 M1,E2 47D
Plug 4P
WH
1 2 3 4
Put the sleeve for sure receptacle.
O Hour meter
T Key switch U Indicator panel
M2 Head guard (right)
AMP 174352-2
BNBK4 BURD5
4 4
1 Point b 103A 2 a1 102A
water resistant Plug 2P
BNBK4 BURD5
4 4
1 Point b 103B 2 a1 102C
water resistant Plug 2P
M
a2 Laser
L
a3 Level lamp
2 1
1 2 3 4 F4,M2
44B
47C
D 110B
WH
54B
60E
111B
61I
1 2 3 4
Plug 4P
F2,K
G,M1
M1 Head guard(left)
47B E1,M1
F4 Turn signal reiay ✻ Connect the relay "Cala-48V-N". Do not bind with the body harness.
1 2 3 4
Plug 4P
YE
Plug 6P
RD
✻ Connect the relay "Cala-48V-N". Do not bind with the body harness.
1 2 3 4
1 45A Point a 2
A 61F F1,G
59C F1,F3
AMP 172134-1
F3 Backward output relay
4B
59D F3,P2
Plug 4P
WH
6B
A 48B E1,H
4 3
1 2
4 3
3 3
3 3
3 3
3 3
AMP 172134-9
✻ Connect the relay "Cala-48V-N". Do not bind with the body harness.
1 2 3 4
RD
25B A,T 39B D 60D P1,K 40B D
(✻ Re fe
3
50B C
9
H Back buzzer
1 2 3 4 5 6
K Brake switch
1 2 3 4
3 3 3 3
4 4
1 a1 101A 2 Point b 103C
a4 Level sensor
S
water resistant Plug 2P
2 1
GN▲
48C F3,E2
2
61G F4,G
2
G Horn
F1
7
61H H,b
7
42B
GNRD2 BKWH✻
BKWH1 WH1
4 4
1 2
A 16B
BKYE1 WH2
4 4
1 2
A 18B
RDYE5
A 15B
water resistant Plug 2P
A 17B
water resistant Plug 2P
P1
60G
57B
P2 Accessory(front)
L 2 1
B Speed sensor
AMP 174352-2
BKWH✻
NOTE: 1,Terminal symbols
2 1
:Receptacle(with plating) :Receptacle(without plating) Sleeve(for single wire) Sleeve(for double wire)
AMP AMP AMP AMP
2
:Plug(with plating) :Receptacle(without plating) Sleeve(for double wire)
AMP 170020-2 AMP 170002-5 or 170020-3 AMP 170888-1
1 2
WHBK2 BKWH✻
+
BKYE BNYE1 RD4 BK1 GNBK1 RDGN3
Condenser 100v 22µ
BUWH2 RDYE1
Point "a"
RDBK RDBK
Point "c"
4 4 4 4 4 4
1 D 38B 2 3 D 36B 4 5 A 3B 6
AMP 174262-2 D 37B A 2B
L Accelerator sensor
3 2 1 6 5 4
water resistant Plug6P
1
A 1B
RDWH BKWH✻ GNBK2
1 1 1
D,F2 60C
GNRD3 BKWH✻ RDGN5 BU4 RDYE5 BUWH2
4 4 4 4 4 4
1 Point c 55C Point c 61C 2 3 M2 46D Point c 39D 4 5 H 48D M2 47E 6
E2,Pointc 61D
P2 57A
55A W
1 2 3 44D Point a 30C Point c 4 48A F3 5 47A F4 6
3 2 1 6 5 4
RDYE RDBK2 RDWH GNRD1
water resistant Plug 6P
GNRD3 BKWH✻ RD5 BU4 RDYE5 BUWH2
4 4 4 4 4 4
3
:Receptacle
AMP 170032-5 or 179461-5
:Tab
AMP 170340-3 or 179462-3
4
:Receptacle
AMP 171662-1 or 173707-1 AMP 172888-2(rubber plug) AMP 172748-2(seal plug)
P1 Accessory
5
:Receptacle
AMP 316041-2 or 179956-2
6
:Receptacle
AMP 173716-2 or 175061-2
7
:Receptacle(with sleeve) Sleeve(for single wire) Sleeve(for double wire) :Receptacle :Tab :Pressed sleeve :Terminal(F) :Terminal(M)
AMP 174262-2 water resistant Plug6P
E2 Stop & tail lamp (right)
3 2 1 6 5 4
E1 Stop & tail lamp (left)
8 9 12
62B
Receptacle
5 4 3 2 1 10 9 8 7 6
A
L
L
F2
8B
9B
36A
38A
40A
A
C,P1
L
F2
10B
60B
37A
39A
Point c 58A Cap 2P
Plug 4P
Plug 6P
WH
WH
BK
AMP 172129-1
AMP 172134-1
1 2
C EPS unit
Point "a"
Point "b"
BNBK1 BN2 WHRD2 BU4 BNRD1 BUYE2 RD3 YEBK GNWH3
RDGN4
6 6 6 6 6 6 6 6 6
T
S
S
S
X
X
X
24A
26A
27A
29A
31A
33A
35A
L
F4
K
F3
D
D
U
U
B
B
C
N
F2
S
K
X
X
2A
4A
5A
6A
8A
10A
12A
14A
16A
18A
20A
22A
25A
28A
30A
32A
34A
4
10 9 8 7 6 5 4 3 2 1 20 19 18 17 16 15 14 13 12 11 AMP.040 series multi-lock connector 175967-2
:Braid wire under 25mm pitch. The location of the connector pin is as viewed from the inserting side. The ends of the insulating tube should be tied together with wire ties. Fuses should be placed in a circle, as shown in Figure 1. The ends of the spiral tube should be tied together with wire ties, and then theube should be coiled with a gap of 2 ± 1mm.(Refer to Figure 2.)
Fuse 10A 10A
CN6 5
8 7 6 5 4 3 2 1 16 15 14 13 12 11 10 9
6
AMP.040 series multi-lock connector 175966-2
12
Clamp Figure 1
Wire tie Figure 2
Point "c"
BU4
To K
FB30P-DC70
BU4
12 BU4
BK
To O
12
To E2
BNBK4 To a4
6
U 23A
To E1
RDYE1 To F4
12
RDGN2 RDYE
O 21A
CN5
2, 3, 4, 5, 6,
A MPU board
12 BNBK4 To a2 BNBK4 To a3
6 6
C 19A
BK
RDGN5 To M2 RDGN5 To E2
6 6
B 17A
To U
46C M2,E2
BURD1
B 15A
AMP.040 series multi-lock connector 175966-2
To F1
RD5 To M1 RD5 To E1
YEWH3 RDWH3
U 13A
8 7 6 5 4 3 2 1 16 15 14 13 12 11 10 9
BKWH✻
44C M1,E1
6
U 11A
D Controller RDYE1 To F4
BUBK YEWH1 WH1 BKWH1 WH2 BKYE1
D 9A
CN4
1 2 3 4 5 6
6 6 6 6 6 6 6 6 6 6
U 7A
AMP 171898-2
1 2 3 4
YERD YEWH4 YEBK1 GNWH2
BNRD2 BUWH1 BU2 BURD WHRD1 6 6 6 6 6
6 6 6 6
6
RDGN3 BK1 GNBK1
BNWH5
GNRD2
RDBK2 GNRD1
A
61B
15
AMP 41729 AMP 178023-2 AMP 1-170823-5 Yszaki 7116-3251 Yszaki 7114-3251 JST FNE-2 Yszaki 1500-0110 Yszaki 1600-0105
1 9 2 10 3 11 4 12 5 13 6 14 7 15 8 16
L 3A
To D
Black color
E1,Point c
1 11 2 12 3 13 4 14 5 15 6 16 7 17 8 18 9 19 10 20
L 1A
BK
White line
RD4 BNYE1 BKYE
10A b 110A
AMP 174655-2
Ex) BKWH (=Black/White) Black colored harness with White line.
BU2 WHRD1 BURD RDWH
12
12
BK
BK D
2P-X water resistant Plug10P
10A
AMP 1-179958-2
To D
J 53A
1 2 3 4 5 6
To P1
J 51A
1 2 3 4
BKWH✻
b 54A
1 2
BKWH✻
A 20B
3 3 3 3 3
A 19B
1 9 2 10 3 11 4 12 5 13 6 14 7 15 8 16 D 62A
3 3 3 3
I 50A
3 3
I 49A
12
2
J 52A
BK✻
1
D 60A
RDBK RDYE4 BKWH✻ BK
RDGN
F1 59A
1
1 2 3 4 5 6 7 8 9 10
RD BK GN YE WH BN BU GY PK
b 111A
Harness mark/color Red Black Green Yellow White Brown Blue Gray Pink
GN▲
BKWH✻ WHBK2
YE▲
3 3
RD RDWH
4 42A G 3
(✻Refer to note 5)
61E Point c,F4
5
BK
5
✻ Connect the relay "Cala-48V-N". Do not bind with the body harness.
41A V
Plug 4P
YEWH1
1 2 3 4
RDBK YEBU1
Seal plug 4 Seal plug 4 Seal plug 4 4 WH 4 GNBU1 4 BU3 4
F1 Horn relay
3 3
BUBK
15
1 2
59B D,F3
AMP 172134-2
170021-2 170003-5 or 170021-3 170089-1 170890-1
3
BNRD2 RDYE5 61A D
Plug 4P
1P
BNWH6 BNBK4
61L
K,X
AMP 174352-2
AMP 174262-2
F2 Control power supply relay
59E AMP 174352-2
YE▲
60F
AMP 171898-9
b Charger panel AMP 172134-7
1P
8
F3,V a1,M2
5B
39B
1 2 3 4
BK
A
49B C
2 1
Point "b"
A, Point c K,P2
AMP 172134-2 Plug 4P
I EPS motor
1 2 3 4 5 6
C,T
D
AMP 172134-1
3 3
61J
3
43A
3 3 3 3
b,a1
R, Point a
no
water resistant Plug 3P
3 2 1
BU3 GNBU1 WH
4 4 4
RDWH
RDWH
BNWH5 BU4
RDYE4 RDGN RD BKWH✻
3 3 3 3 1 2 3 4 W
1 52B C 2 51B C 3
r to
WH3 RD5 BKWH✻ BUWH2
J EPS sensor
53B C
te 4
)
AMP 174352-2 AMP 174357-2
RDBK RDWH BKWH✻ GNBK2
S
Directional switch
1 1 1 1
R
Turn signal switch
BODY HARNESS
– 73 –
RDBK WH3 GNRD3
(✻Refer to note 6)
3 3 3
1 V,Q 2 3 E1,E2 4
3 3
1 X 2
AMP 172134-1
59G M1,M2
Plug 4P
43B
W Lamp switch
1 2 3 4
WH
55B
AMP 172130-2
BK YEBK1 YEWH4 YERD BK GNWH2 RDWH3 BUWH1
4 4 4
4 4 4 4 4 4 4 4
RD RDYE RDGN2
4 4 4 4
RDBK RD5 RDGN5
1 2 3 4
1 2 3
1 2 3 4 5 6 7 8
Q 59I
59H 41C
Q
1 2 3 V
M2 46A
A 28B
M1 44A
Horn switch (steering)
A 26B
A 29B
water resistant Plug 3P
Point c A 58C 12B
F2 25C
A 13B
A 27B
water resistant Plug 4P
AMP 174357-2
b A 54C 24B
water resistant Plug 3P
AMP 174257-2
N 58F
A 11B
V
A 23B
N Brake oil
water resistant Plug 8P
AMP 174357-2
AMP 174982-2
W
21B
K
3 2 1
3 2 1
2 1 4 3
Horn switch (Hydraulic)
59F P2,W
2
a5 Laser pointer switch
1 2
WH
a1 100A
41B F1,Q
2
22B
A
2
58E
O,U
2
4 3 2 1 8 7 6 5
A
YEBU1
BNRD1 BUYE2 RD3 YEBK GNWH3 RDWH
YEWH3 BK
3 3 3 3
1 a5 100B M1,P2 2 3 a4 101B a2,a3 4
3 3 3 3 3 3
1 2 3 4 5 6
61K
Plug 4P
WH
a1 DC/DC Converter
1 2 3 4
102B
AMP 171898-2
A 31B A 32B Plug 6P
A 33B A 34B
BK
A 35B P2,a5
X Valve microswitch
1 2 3 4 5 6
60H
AMP 172134-1
WH3 RDGN5 BKWH✻ BUWH2
BURD1
1
58D C,N
YERD4 BKWH✻ BNWH6 BURD5
RDBK
A 7B
A 14B
Plug 2P
60I
AMP 172134-1
4 4 4
RDBK
YEBU1 2
2 W,R
BN2 WHRD2 RDGN4 BNBK1
RDWH YERD4
BK
1
3 3 3 3
1 W 43C R,Point a 46B 2 3 P2 61M 4 M1,E2 47D
Put the sleeve for sure receptacle.
T Key switch
O Hour meter
U Indicator panel
M2 Head guard (right)
AMP 174352-2
BNBK4 BURD5
4 4
1 Point b 103A 2 a1 102A
water resistant Plug 2P
4 4
1 Point b 103B 2 a1 102C
water resistant Plug 2P
M
a2 Laser
L
a3 Level lamp
2 1
BK
15
c 121A
15
c 121B
J 53A
50A
AMP 1-179958-2
water resistant Plug10P
D
Receptacle
62B
– 74 –
1 2 E1,Point c 61B
b 110A
5 4 3 2 1 10 9 8 7 6
1 2 3 4
1 2 3 4 5 6
A
L
A
8B
9B
L
D,F2 60C
GNRD3 BKWH✻ RDGN5 BU4 RDYE5 BUWH2
4 4 4 4 4 4
1 Point c 55C Point c 61C 2 3 M2 46D Point c 39D 4 5 H 48D M2 47E 6
L Accelerator sensor
A 1B
P1 Accessory
E2,Pointc 61D
P2 57A
AMP 174262-2
36A
38A
AMP AMP AMP AMP
2
:Plug(with plating) :Receptacle(without plating) Sleeve(for double wire)
AMP 170020-2 AMP 170002-5 or 170020-3 AMP 170888-1
2
3
:Receptacle
AMP 170032-5 or 179461-5
:Tab
AMP 170340-3 or 179462-3
4
:Receptacle
AMP 171662-1 or 173707-1 AMP 172888-2(rubber plug) AMP 172748-2(seal plug)
5
:Receptacle
AMP 316041-2 or 179956-2
6
:Receptacle
AMP 173716-2 or 175061-2
7
:Receptacle(with sleeve) Sleeve(for single wire) Sleeve(for double wire) :Receptacle :Tab :Pressed sleeve :Terminal(F) :Terminal(M)
8 9 12 15
C,P1
L
F2
60B
37A
39A
Cap 2P
Plug 4P
Plug 6P
WH
WH
BK
AMP 172134-1
44C M1,E1
RD5 To M1 RD5 To E1
46C M2,E2
RDGN5 To M2 RDGN5 To E2
Point "a"
BNBK4 To a2 BNBK4 To a3
BNBK4 To a4
Point "b"
11A
13A
B
15A
C
17A
O
19A
21A
U
T
23A
24A
X
29A
X
31A
X
33A
35A
c
K
F3
D
D
U
U
B
B
C
N
F2
S
K
X
X
4A
120A
5A
6A
8A
10A
12A
14A
16A
18A
20A
22A
25A
28A
30A
32A
34A
8 7 6 5 4 3 2 1 16 15 14 13 12 11 10 9
CN5 4
AMP.040 series multi-lock connector 175966-2
10 9 8 7 6 5 4 3 2 1 20 19 18 17 16 15 14 13 12 11 AMP.040 series multi-lock connector 175967-2
A MPU board 12
12
Point "c"
AMP 41729 AMP 178023-2 AMP 1-170823-5 Yszaki 7116-3251 Yszaki 7114-3251 JST FNE-2 Yszaki 1500-0110 Yszaki 1600-0105
6 6 6 6 6 6 6 6 6 S
F4
12 12
6
27A
9A
7A
B
L
CN4
1 2 3 4 5 6
6 6 6 6 6 6 6 6 6 6
26A
3A
U
2A
D Controller RDYE1 To F4
6 6 6 6 6
S
AMP 171898-2
1 2 3 4
6
S
D
170021-2 170003-5 or 170021-3 170089-1 170890-1
3
BNBK1 BN2 WHRD2 BU4 BNRD1 BUYE2 RD3 YEBK GNWH3
RDGN4
BURD1
BUBK YEWH1 WH1 BKWH1 WH2 BKYE1
YERD YEWH4 YEBK1 GNWH2
BNRD2 BUWH1 BU2 BURD WHRD1
BNWH5
BUYE1
GNRD2
40A
A
1 2
RDYE1 To F4
:Receptacle(with plating) :Receptacle(without plating) Sleeve(for single wire) Sleeve(for double wire)
1
E2 Stop & tail lamp (right)
3 2 1 6 5 4
water resistant Plug6P
1 9 2 10 3 11 4 12 5 13 6 14 7 15 8 16
1A
F2
10B
Point c 58A
AMP 172129-1
C EPS unit
BODY HARNESS (EEC)
1 1 1
1,Terminal symbols 3 2 1 6 5 4
water resistant Plug6P
A 2B
U
U
To K
J 51A
Black color
FB30P-DC70
RDWH BKWH✻ GNBK2
NOTE:
AMP 174262-2 D 37B
1 11 2 12 3 13 4 14 5 15 6 16 7 17 8 18 9 19 10 20
L
BU4
b 54A
AMP 174655-2
White line
1 D 38B 2 3 D 36B 4 5 A 3B 6
L
To E2
A 20B
2P-X
Ex) BKWH (=Black/White) Black colored harness with White line.
4 4 4 4 4 4
1 9 2 10 3 11 4 12 5 13 6 14 7 15 8 16
BU4
49A
A 19B
D 62A
6
I
BU4
52A
2
I
To E1
60A
1
BK
J
To O
RD BK GN YE WH BN BU GY PK
BKYE BNYE1 RD4 BK1 GNBK1 RDGN3
15
BK
Red Black Green Yellow White Brown Blue Gray Pink
D
F1 59A
To D
1 2 3 4 5 6 7 8 9 10
Harness mark/color
b 111A
RDGN3 BK1 GNBK1
BKWH✻ WHBK2
6 6 6 6
3 3
GNRD3 BKWH✻ RD5 BU4 RDYE5 BUWH2
BK
61E Point c,F4
4 4 4 4 4 4
To U
BK
Point "c"
BK
4 42A G 3
41A V
Plug 4P
GN▲
RDBK YEBU1
B Speed sensor
2 1
E1 Stop & tail lamp (left) YE▲
3 3
water resistant Plug 6P
5
✻ Connect the relay "Cala-48V-N". Do not bind with the body harness.
1 2
1 61A D 2 3 44D Point a 30C Point c 4 48A F3 5 47A F4 6
5
1 2 3 4
40B D
59B D,F3
AMP 172134-2
F1 Horn relay
39B D 60D P1,K
3 2 1 6 5 4
RDYE RDBK2 RDWH GNRD1
RD RDWH
RD
3 3 3 3
YEWH1
1 2 3 4
✻ Connect the relay "Cala-48V-N". Do not bind with the body harness.
1 2 3 4
BUBK
F2 Control power supply relay
25B A,T
55A W
Seal plug 4 Seal plug 4 Seal plug 4 4 WH 4 GNBU1 4 BU3 4
AMP 172134-9 Plug 4P
te
c Seat switch AMP 174262-2
L
1
To C
BNRD2 RDYE5
1 2
2 1
To F1
3 3
water resistant
Lengs 50
BKWH✻
4 3
P2 Accessory(front)
2 1
5)
48B E1,H
A
57B
te
6B
2 1
P1
60G
no
WH
120B A
to
RDBK RDBK
A 17B
water resistant Plug 2P
fer
3 3
A 18B
Re
1 2 3 4
✻ Connect the relay "Cala-48V-N". Do not bind with the body harness.
1 2
1 2
(✻
F3 Backward output relay
Plug 4P
water resistant Plug 2P
a4 Level sensor
BK BUYE1
58B Point c 1 15 2 15
Plug 2P
Cap 2P water resistant
59D F3,P2
59C F1,F3
AMP 172134-1
no Re fe (✻
RDWH
BK
4 4
+
To D
61F F1,G
BKYE1 WH2
A 15B
water resistant Plug 2P
Condenser 100v 22µ
Point "a"
GNRD2 BKWH✻
A 16B
BKWH✻
To P1
3 3
7
BKWH✻
4 3
A
61H H,b
BKWH✻
4B
S
WHBK2
RDBK2 GNRD1
✻ Connect the relay "Cala-48V-N". Do not bind with the body harness.
YE
3 3
7
1 2
AMP 174352-2
RD4 BNYE1 BKYE
1 2 3 4
1 45A Point a 2
G Horn
BUWH2 RDYE1
F1
42B
4 4
BKWH✻
3 3 3 3 3
F4 Turn signal reiay
Plug 4P
2
BU2 WHRD1 BURD RDWH
47B E1,M1
AMP 172134-7
K Brake switch
2
61G F4,G
3 3 3 3
b Charger panel
48C F3,E2
RDBK RDYE4 BKWH✻ BK
RD
H Back buzzer
1 2 3 4 5 6
BKWH1 WH1 RDYE5
12
Plug 6P
1 a1 101A 2 Point b 103C
61L
K,X
AMP 174352-2
BK
BK
9
60F
AMP 171898-9
1 2 3 4
Plug 4P
4 4
GN▲
10A
AMP 172134-2
M1 Head guard(left)
YE▲
8
3 3
39B
RDGN
1 2 3 4
BNWH6 BNBK4
A, Point c K,P2
12
WH
50B C
1P
BK
61I
49B C
10A
G,M1
1P
I EPS motor
12
D 111B
59E
6
5B
F3,V a1,M2
AMP 174352-2
RDGN2 RDYE
A
60E
2 1
Point "b"
6 6
F2,K
54B
BNBK4 BURD5
YEWH3 RDWH3
C,T
BU3 GNBU1 WH
4 4 4
6 6
D 110B
AMP 172134-1
Plug 4P
BNWH5 BU4
1 2 3 4 5 6
BK✻
47C
1 2 3 4
1
44B
RDWH
RDYE4 RDGN RD BKWH✻
F4,M2
3 2 1
(✻Refer to note 7)
61J
water resistant Plug 3P
3
43A R, Point a
3 3
b,a1 3
W
3 3 3 3
3 3 3 3 1 2 3 4
1 52B C 2 51B C 3
r to
WH3 RD5 BKWH✻ BUWH2
J EPS sensor
53B C
4)
AMP 174352-2 AMP 174357-2
RDBK RDWH BKWH✻ GNBK2
S
Directional switch
WH
1 1 1 1
R
Turn signal switch
1 2 3 4
Plug 4P
2, 3, 4, 5, 6,
:Braid wire under 25mm pitch. The location of the connector pin is as viewed from the inserting side. The ends of the insulating tube should be tied together with wire ties. Fuses should be placed in a circle, as shown in Figure 1. The ends of the spiral tube should be tied together with wire ties, and then theube should be coiled with a gap of 2 ± 1mm.(Refer to Figure 2.)
CN6 5
8 7 6 5 4 3 2 1 16 15 14 13 12 11 10 9
Fuse
6
AMP.040 series multi-lock connector 175966-2
10A 10A
12
Clamp Figure 1
Wire tie Figure 2
FB10-25P
2P
2P
WH
WH
2P
2P
WH
WH BNRD
2P WH
170020-2 170021-2
2.The terminal is fixed in place by the fitting for the connector. 3. Connect only if a GS battery is installed.
M6
WH
YEWH2
2P
GNBU2
2P
M4
M2
M1
M3
WH
FB30P
Note: 1.Terminal symbols :Terminal :Lead bar :Plug :Receptacle
CF
4PWH
F
FB20/25/30P
F
WH*
A
Only FB30P
S+
PF
40A
275A
275A
Controller Ass’y.,EPS
H+
BUBK4
D1
4PWH
A
PA WHRD1
RD
FB10P
FET Comp.
M7
RD*
Only FB10-25P (FB30P has no this line)
WH
A
RD 4P
GN 4P
YEWH
BKWH✻ 4P GN
T+ BNWH
Refer to note 2
Pre-energizing
2 BU
2P
BNYE
FB15/18
FET Comp.
D+
RDYE
Board Comp.,MPU
BU
1
Refer to note 3
1
1
3
Harness,Controller
Harness mark/color Red Black Green Yellow White Brown Blue Gray Pink
2
RD BK GN YE WH BN BU GY PK
FB10-25P : 24200-68871 FB30P : 24200-68941
Wire, Lead ( - ) 4P
2P
4P
6P
WH
WH
WH
WH
FB10-25P
FB30P
Ex) BKWH (=Black/White) Black colored harness with White line.
FB10P
For Std. 24200-68792
24200-68832
FB15/18P
24200-68802
24200-68842
FB20/25P
24200-68812
24200-68852
FB30P
24200-68822
24200-68862
10P Water resistant
2P TipeX
For EEC
White line Black color
To Harness,Body
FB10-30P-DC70 CONTROL UNIT WIRING
– 75 –
B Contactor
Harness mark/color
32B 35B
GNBU2
A
A
A
A
2
1
2
RDBK1
RDWH1
WHBK
2
2
*
8
1 3
A
2 3
A
1 3
3
28B 37B
8
24B 27B
2
15B A
BNWH1
3
RDGN1
Ex) BKWH (=Black/White) Black colored harness with White line.
YEWH2
A
2
8
3
A
1 RD1
A
2
3
A
1
Plug 2P WH
A
Plug 2P WH
BNRD
23B 25B
Plug 2P WH
17B
A
NOTE: 1. Lead wire # :AVS 0.3mm ✻ :AVS 0.85mm :KIV 2.0mm Others :AV S0.5mm
2
2. The location of the pin is as viewed from the inserting side. : Braid wire under 25mm pitch. 3. 4. Do not use sure-plugs and receptacles.
3
30B 29B
16B
1 2
3
Plug 2P WH
1 2
RD2
Plug 2P WH
1 2
WHRD
1 2
3
1 2
WHGN
RD BK GN YE WH BN BU GY PK
WHBU
Red Black Green Yellow White Brown Blue Gray Pink
White line Black color
10P
20P
8
Resistor
B
C
C
N
6A
H
4A
E
BUBK4
8A
2A
E
E
19A
17A
15A
13A
11A
9A
7A
5A
3A
1A
M
B
B
M
K
H
H
E
E
E
6
6
6
6
6
6
6
6
6
6
6
6
6
8
BKWH✻
YEWH 1
3
3
3
BKRD GNWH BUWH
3
BU
GNBU
3
BK
3
3
3
3
RD4 BNYE1 BKYE RDBK2 GNRD1 3
3
3
3
3
BU2 WHRD1 BURD RDWH 3
3
3
8
3
BU2
RDYE4 RDYE4 BKWH✻ BK
3 F
40A
A
Current sensor
3
G
38A
8
20 10 19 9 18 8 17 7 16 6 15 5 14 4 13 3 12 2 11 1
BU* BURD WH* 3
3
1 2 3 4
8
20B
10A
K
H,H
BNWH
B
M
44B
A
RDYE4
C
10 5 9 4 8 3 7 2 6 1
B
12A
22B
BNYE
20A
6
14
14
14
14
14
RDBK1
G
14
1 2
F 1 2 3 4
K
22A
14A
6
B
H
23A
6
B
H
24A
6
B
H
26A
6
B
14 7 13 6 12 5 11 4 10 3 9 2 8 1
B
16A
A
GNWH GNBU GNBU2 YEWH2 BNRD BKRD BUWH BK BU YEWH BNYE1 BKYE RD4 BK2# RDYE3# YERD1# BU1# BKRD1# RDBK3#
28A
18A
14
30A
21A
6
B
32A
21C
14
B
37A
12D
14
H
25A
14
H
27A
29A
14
B
31A
14
33A
14
35A
14
F Terminal
4P
A
E
Plug 2P WH
14P
14
4P
40B
26B
WHRD
A
6B
14
A
2B
39B 38B
10 9 8 7 6 5 4 3 2 1 20 19 18 17 16 15 14 13 12 11
GNRD1 RD2 RDBK2 RDGN1 WHBU
4B
5 4 3 2 1 10 9 8 7 6
14
I,H
C Fuse
3
7 6 5 4 3 2 1 14 13 12 11 10 9 8
14
A
2
BNWH1 BUBK4 WHBK RDWH1 BK RD1 RDWH BNYE RDWH BNWH
I
5B
1 2 3 4
BU* 3
J
8
WHGN
3B
RD* 3
2
A
1B
WH* WHRD1
1
A
A
YERD1# BK2# 10
1 2 3 4
1 2 3 4
10
RDYE3# 10
BU1# BKRD1# 10
10
10
RDBK3#
A MPU board 1
A
8
10B
H
42B
8
Plug 4P GN
G
1 2 3 4
1 2 3 4 5 6
1 2 3 4
1 2 3 4
C
L
J
I
A
A
A
A,H
A
A
A
44A
41B
42A
43A
7B
8B
33B
12B
11B
14B
13B
C
K,A
F
A,A
A
A
A
A
44C
12C
40C
21B
9B
31B
18B
19B
1
1 2 3 4
39A
1 2 3 4
I Pre-energizing PB J Diode
CONTROL UNIT HARNESS
– 76 –
H
N
41A
L Battery(–)
6
Plug 4P WH
Cap 4P WH
Cap 4P RD
Cap 4p GN
Cap 6P BK
N
10D
1 2 3 4
2 1 4 3
3 2 1 6 5 4
H External terminal FB10-25P-DC70
10C
YEWH
43B
RD*
H
2 1 4 3
K
FET comp. (travel)
2 1 4 3
N Body earth Refer to note 4
M
FET comp. (hidraulic)
B Contactor
Harness mark/color
1 2
16B
Plug 2P WH
28B 37B
32B 35B
2
A
1
2
BNRD
A
RD2
2
2
2. The location of the pin is as viewed from the inserting side. : Braid wire under 25mm pitch. 3. 4. Do not use sure-plugs and receptacles.
3
A
2
3
A
RDBK1
*
8
1 3
GNBU2
A
2 3
A
1 RDWH1
Plug 2P WH
8
24B 27B
WHBK
RDGN1
White line
8
3
A
2
2
15B A
BNWH1
A
1
Plug 2P WH
3
A
2
RD1
A
1
1 2
A
YEWH2
23B 25B
3
30B 29B
3
Plug 2P WH
3
Ex) BKWH (=Black/White) Black colored harness with White line.
Plug 2P WH
1 2
17B
A
NOTE: 1. Lead wire # :AVS 0.3mm ✻ :AVS 0.85mm :KIV 2.0mm Others :AV S0.5mm
WHRD
1 2
3
1 2
WHGN
RD BK GN YE WH BN BU GY PK
WHBU
Red Black Green Yellow White Brown Blue Gray Pink
Black color
18A
16A
14A
12A
10A
8A
6A
4A
2A
D
B
H
H
B
B
B
H
H
H
K
B
M
K
N
H
E
E
E
37A
34A
32A
30A
28A
26A
24A
23A
22A
20A
19A
17A
15A
13A
11A
9A
7A
5A
3A
1A
B
D
B
B
B
C
B
B
C
C
M
B
B
M
K
H
H
E
E
E
34B 36B A
A
1
2
3
6
6
6
6
6
6
6
6
6
6
6
6
6
6
6
6
6
6
Plug 2P WH
8
RDWH2
GNWH GNBU GNBU2 YEWH2 BNRD BKRD BUWH BK BU YEWH BNYE1 BKYE RD4 BK2# RDYE3# YERD1# BU1# BKRD1# RDBK3#
6
14
14
14
14
14
14
14
14
14
14
14
14
14
20 10 19 9 18 8 17 7 16 6 15 5 14 4 13 3 12 2 11 1
A
43B
8
Plug 4P
GN
G
1 2 3 4
L
J
I
A
A
A
A,H
A
A
A
41B
42A
43A
7B
8B
33B
12B
11B
14B
13B
K,A
F
A,A
A
A
A
A
12C
40C
21B
9B
31B
18B
19B
39A
1 2 3 4
I Pre-energizing PB
J Diode
BKWH✻
YEWH 1
3
3
1 2 3 4
3
BKRD GNWH BUWH
3
3
1 2 3 4 5 6
3
BK GNBU BU
3
3
3
RD4 BNYE1 BKYE RDBK2 GNRD1 3
3
3
3
3
3
BU2 WHRD1 BURD RDWH 1 2 3 4
A
8
10B
1
H
42B
1 2
YEWH
H
3
8
3
F
40A
RD*
G
38A
BU2
1 2 3 4
BKWH✻ BK
3
3
3
BU* BURD WH*
Resistor
RDBK1
G
E Current sensor
8
3
21A
BUYE
21C
BNWH
12D
BNYE
25A
BUBK4
27A
10 5 9 4 8 3 7 2 6 1
1 2
A
20B
29A
14
1 2
8
31A
14 7 13 6 12 5 11 4 10 3 9 2 8 1
F
20P
BNWH1 BUBK4 WHBK RDWH1 BK RD1 RDWH BNYE RDWH BNWH
1 2 3 4
Plug 2P WH
10P
33A
14
4P
A
BU*
40B
F Terminal
A
35A
14
6B
D Contactor
26B
36A
14
2B
I
14
A
J
39B 38B
14
A
4P
RD*
I,H
14P
WHRD RDWH2 GNRD1 RD2 RDBK2 RDGN1 WHBU
A
4B
2
10 9 8 7 6 5 4 3 2 1 20 19 18 17 16 15 14 13 12 11
5 4 3 2 1 10 9 8 7 6
C Fuse
3
22B
14
A
5B
1
8
2
7 6 5 4 3 2 1 14 13 12 11 10 9 8
WHGN BUYE
A
3B
3
A
1 2 3 4
WH* WHRD1
YERD1# BK2# 10
1 2 3 4
1B
1 3
1 2 3 4
10
RDYE3# 10
10
10
10
BU1# BKRD1#
RDBK3#
A MPU board
10C
H
N
41A
L Battery(–)
6
Plug 2P WH
Cap4P
Cap 6P
WH
BK
Cap 4P GN
Cap 4P RD
1 2
2 1 4 3
3 2 1 6 5 4
2 1 4 3
2 1 4 3
N
10D
H External terminal
K
FET comp. (travel)
N Body earth Refer to note 4
M
FET comp. (hidraulic)
FB30P-DC70 CONTROL UNIT HARNESS
– 77 –
Reference Connector for MPU board Double lock plate pushing part
1. Pin layout of housing
Locking lever Rib for preventing inverse insertion
6 5 4
Double lock plate
3 2 1
14 13 12 11 10 9 8 7
CN1 (gray) [P/No.37010-21040] Ratchet part 4 3
Plug housing
2 1
CN3, 4, 5 6
10 9 8 7 6 5
CN2 (gray) [P/No.37010-21030]
(2) Crimping terminals 10 9 8 7 6 5 4 3 2 1 20 19 18 17 16 15 14 13 12 11
CN3 (black) CN5 (black) [P/No.37010-21020]
Housing lance fixing part
Contacting part (inside box)
Wire barrel 8 7 6 5 4 3 2 1
Insulation barrel
16 15 14 13 12 11 10 9
CN1&CN2 [P/No. 37010-21480]
CN4 (black) CN6 (black) [P/No.37010-21010]
2. Names of parts (1) housing
Housing lance fixing part
Contacting part (inside box) Wire barrel
Double lock plate pushing part
Insulation barrel
Locking lever
CN3, 4, 5, 6 [P/No. 37010-21490]
Double lock plate
Ratchet part
Plug housing
CN1&CN2
– 79 –
3. Insertion terminal into housing (1) With the locking lever of housing upward and the crimping part of terminal upward, insert the housing into corresponding port. (Fig.1) CAUTION
When it is impossible to insert the terminal easily, do not force to insert it. At first, check the corresponding port. When inserting forcedly, the housing will be damaged at the housing. Pay attention to insertion of terminal.
Locking lever Plug housing
(3) Press the crimping part of the double lock plate. The plate will go down and release from the ratchet part and will sound snapping. And after finishing the inserting the terminal, pull the wire lightly to make sure the locking. When the double lock plate would work correctly, the condition would be like as Fig.4. CAUTION
When there are some unlocked terminals, the double lock plate would not work correctly, the plate would be one side locking and the ratchet would be raised at one side Remove the terminal by using the ejection tool and do over again correctly.
Double lock plate pressed part Double lock part Double lock part
Pull the wire lightly
Crimping part
Insulation barrel Housing lance
Terminal
[Completed double locking]
Fig.1
(2) Verify the terminal is locked correctly into the housing. When inserting the terminal like as Fig.2, the terminal which the crimping part is placed in the middle of the retainer would come to lose, insert the terminal into the housing like as Fig.3. When the terminal is locked, it would sound snapping. And after inserting the terminal, pull the wire lightly to make sure the locking it.
Fig.4
There a gap on normal condition
The inserting groove for ejection tool
[Completed double locking]
[Incompleted detente locking] [One side locking of ratchet] Fig.5
4. Pulling terminal CAUTION
When remove the terminal for doing over again, use the specified pulling tool.
Pull the wire lightly
(1) Release the double locking (Fig.6) q Insert the jig into the groove . w Lay it to the direction of arrow and bend the wall of housing, and then rise the plate crimping part and remove the ratchet. Repeat the same way at the opposite side also. CAUTION
[Unlocked condition of terminal]
[Correct locked condition of terminal]
Fig.2
Fig.3
– 80 –
Do not vent the wall of housing strongly, it will come to be damaged.
[In case of CN1, 2]
Be careful not to insert the ejection tool into the housing side of crimping terminal.
CAUTION
Rib of plate crimping part Operation from q to w Inserting groove for ejection jig
e w
q
q
r
Fig.7
Cut face should be inside
w
• Insert the jig into the groove and bend the housing. • After the housing would be bended, rise the rib of plate crimping part to the arrow direction.
Rib of plate crimping part
5. Crimping tool (AMP made) (1) Crimping terminal for CN1&2 (P/No.37010-21480) applicable hand tool Model: 911788-2 Mark of crimping part Crimping die
Fig.6
[In case of CN3, 4, 5, 6]
m
Rib of plate crimping part
Pin and retaining ring Handle
Operation from q to w
Radio pliers (article on the market)
5m Bared length -4. of insulation 3.5
Inserting groove for ejection jig
Crimping pressure control device
press down part of insulation
Crimping part of wire
q
(2) Crimping terminal for CN3, 4, 5, 6 (P/No.37010-21490) applicable hand tool Model: 911738-1
Ejection jig (AMP) Model: 755430-1
w
Crimping die (Inside)
Clamp the housing and retainer by the radio pliers, then release the ratchet part (sounds clipping) and repeat the same outline at the opposite side.
Crimping part of wire press down part of insulation
Rib of plate crimping part When insert the jig into the housing, move the jig to the arrow direction and vent the housing.
Bared length of insulation 4mm (Reference)
Crimping pressure control device Handle
(2) Pulling out the crimping terminal qPush the crimping terminal to the arrow direction. wInsert the ejection jig tool to the groove. eRise the lance. rPull the crimping terminal. – 81 –